
Main Courses
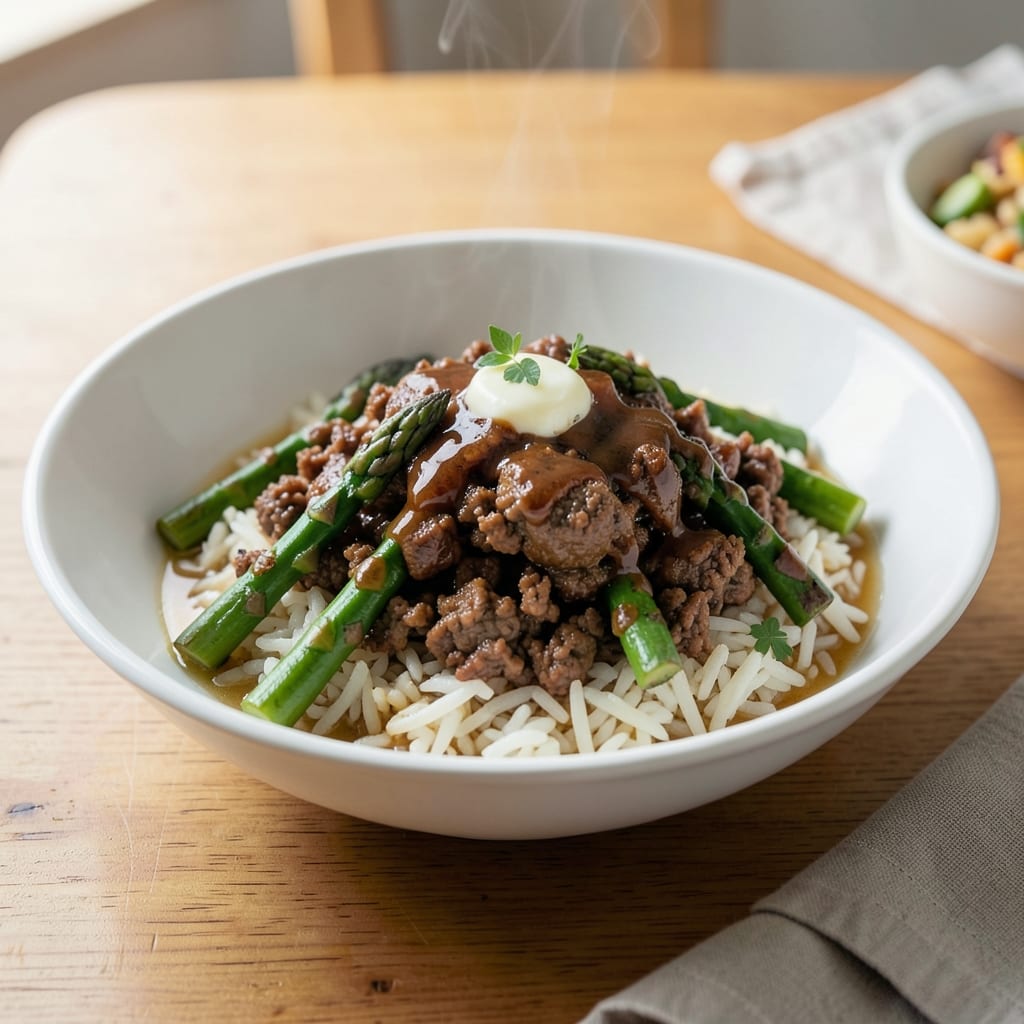
This asparagus ground beef rice recipe transforms a simple weeknight dinner into a hearty, restaurant-worthy meal with minimal effort. The secret lies in searing the ground beef until deeply browned—this creates a rich, savory foundation that infuses every bite of tender rice and crisp-tender asparagus. No fancy techniques required, just one pan and 30 minutes of hands-off cooking time that delivers bold flavors without the cleanup.
The magic happens when you deglaze the pan with beef broth after browning the beef, turning those flavorful browned bits into a velvety sauce that coats the rice and asparagus. This method ensures every component—juicy beef, bright asparagus, and fluffy rice—works together in perfect harmony. The asparagus gets just crisp enough to hold its shape while absorbing the savory sauce, creating a balance of textures that makes this dish feel special without the fuss.
What you'll end up with is a one-pan dinner that's packed with protein, fiber, and satisfying flavors—ideal for feeding a family or meal prepping for the week. The beef stays tender and flavorful, the asparagus retains its vibrant color and slight crunch, and the rice absorbs all the delicious juices for a cohesive, hearty bite. It's the kind of meal that turns a Tuesday night into something memorable, all while keeping prep simple and efficient.
Serve with a side of crusty bread to soak up any extra sauce or pair it with a simple arugula salad drizzled with lemon vinaigrette for a refreshing contrast. This recipe is designed to be adaptable—swap in different vegetables or adjust the seasoning to suit your taste, but the core combination of ground beef, asparagus, and rice remains a foolproof weeknight solution.
Ingredients for asparagus ground beef rice
Pantry staples plus fresh asparagus make this weeknight one-pan dinner shine effortlessly.
| Ingredient | Amount | Notes |
|---|---|---|
| Ground Beef 🥩 | 1 ½ lb | 85% lean for best texture |
| Asparagus 🌱 | 1 lb | Fresh, trimmed spears |
| Long-Grain White Rice 🍚 | 1 ½ cups | Uncooked, jasmine or basmati |
| Yellow Onion 🧅 | 1 whole | Medium size, diced |
| Garlic Cloves 🧄 | 4 cloves | Fresh, minced |
| Beef Broth 💧 | 2 cups | Low-sodium preferred |
| Dry Sherry 🍷 | ¼ cup | Or substitute with white wine |
| Tomato Paste 🍅 | 2 tbsp | Smooth, not chunky |
| Olive Oil 🫒 | 2 tbsp | Extra-virgin for richness |
| Dried Thyme 🌿 | 1 tsp | Or 1 tbsp fresh |
| Salt 🧂 | 1 ½ tsp | Kosher or sea salt |
| Black Pepper 🌶️ | ½ tsp | Freshly ground |
| Butter 🧈 | 1 tbsp | Unsalted, for finishing |
| Lemon Juice 🍋 | 1 tbsp | Freshly squeezed |
| Fresh Parsley 🌿 | ¼ cup | Chopped, for garnish |
The ground beef is where flavor starts. 85% lean gives you that perfect balance of juiciness and browning—90% lean or higher can turn dry. Look for packages labeled 'chuck blend' at Costco or Walmart for the best value, or grab the pre-portioned 1.5 lb packages at Trader Joe's if you're short on time. Fresh asparagus matters too—skip the pre-cut bundles; thick spears hold up better to cooking and taste more vibrant. Trim the woody ends by bending them until they snap naturally, then just pull off the broken piece. That's the pro trick.
No sherry? White wine or extra beef broth works in a pinch, but the alcohol helps tenderize the beef and deglaze the pan beautifully. The tomato paste can be a squeeze tube from Trader Joe's for convenience—just scrape out what you need. Fresh thyme is ideal, but dried at one-third the amount gets you close. Swapping asparagus? Green beans or broccoli florets work too, but cut them smaller since they cook faster. The rice? Jasmine or basmati stays separate better than long-grain white, but use what you've got—just don't skip rinsing it first to remove excess starch.
Prep ahead by dicing the onion and mincing the garlic—they'll keep in the fridge for 3 days in a sealed container. The asparagus can be trimmed and stored upright in a jar with water in the fridge for up to 5 days, just like flowers. This whole dish reheats beautifully—cover with foil and warm in the oven at 350°F for 15 minutes. I always double the recipe and freeze portions because it's perfect for 3 months of easy lunches. Just thaw overnight in the fridge before reheating.
Why You'll Love This Recipe
- One-Pan Magic: I swear by this recipe on nights when I’d rather not wash a million dishes. Brown the beef, toss in the onions and garlic, add the asparagus spears—boom—it all cooks together while the rice simmers nearby. Minimal chopping, zero fuss, and that satisfying sizzle of beef meeting the pan.
- Umami Crunch Combo: The asparagus adds this unexpected but perfect texture—crisp-tender stalks with that snap, while the beef stays juicy and the rice soaks up all the savory garlic-onion goodness. Honestly, the way the flavors meld? It’s like a hug for your taste buds.
- Lunchbox Hero: Between us, this is my go-to for meal prep. Cook a big batch, and I’m set for lunches all week—just reheat and pack. The asparagus holds up better than you’d think, and the rice stays fluffy. My kids actually eat their veggies this way. (Yes, even on a Tuesday.)
- Budget-Friendly Powerhouse: Ground beef and rice stretch forever, and asparagus is cheaper than you’d assume in season. I’ll be real: it’s not the fanciest dish, but it’s hearty, filling, and costs me less than half of what a takeout burrito would. Plus, leftovers taste just as good the next day.
Step-by-step instructions for asparagus ground beef rice
This one-pan wonder comes together faster than takeout but tastes like a restaurant special.
Sear the Ground Beef for Maximum Flavor
Heat a large, heavy-bottomed skillet over medium-high heat until hot. Add the 1.5 lb ground beef and break it apart with a wooden spoon, letting it brown in batches to avoid overcrowding. Cook for 5-6 minutes until the beef loses its raw color and develops a deep brown crust—this builds rich, caramelized flavor.
Once fully browned, drain most of the fat (leave about 1 tablespoon for cooking) and transfer the beef to a plate. Here's the thing—don't skip this draining step. Too much fat will steam your rice instead of crisping it. I like to press the beef lightly with a paper towel to remove any excess grease before returning it to the pan.
Sauté Onion and Garlic as the Base
In the same skillet, add the 2 tbsp olive oil and reduce heat to medium. Add the diced yellow onion and cook for 4-5 minutes until softened and translucent. Stir occasionally to prevent burning—you're looking for a gentle sizzle, not smoke.
Add the 4 minced garlic cloves and 2 tbsp tomato paste, stirring for 30 seconds until fragrant. This is where the aromatic foundation happens. If you smell the garlic burning, reduce heat immediately—it only takes seconds to turn bitter. The tomato paste will deepen the flavor and give the dish that subtle umami richness.
Build the Rice Mixture with Broth and Sherry
Return the browned beef to the skillet and stir to combine with the onion mixture. Add the 1.5 cups long-grain white rice, 2 cups beef broth, and 0.25 cup dry sherry, stirring gently to distribute everything evenly. The sherry adds a touch of acidity that brightens the dish—don't skip it, even if substituting with white wine.
Bring the mixture to a gentle boil, then immediately reduce heat to low. Cover the skillet with a tight-fitting lid and let it simmer for 15 minutes without stirring. This undisturbed cooking period allows the rice to absorb liquid evenly and develop a delicate texture. If you peek too early, you'll release steam and potentially dry out the rice.
Add Asparagus and Simmer to Perfection
After 15 minutes, carefully remove the lid and add the 1 lb asparagus (trimmed and cut into 2-inch pieces) and 1 tsp dried thyme. Stir gently to combine, then return the lid and continue simmering for another 10-12 minutes until the rice is tender and the asparagus is bright green with slightly tender tips.
You'll know the rice is done when the grains are fluffy and separate, with just a slight bite remaining. The asparagus should be tender-crisp—it should yield slightly when pressed with a fork but still have some resistance. If the mixture looks dry before the rice is fully cooked, add 2-3 tablespoons of water and let it steam for another 2 minutes.
Finish with Butter, Lemon, and Fresh Herbs
Remove the skillet from heat and stir in the 1 tbsp butter and 1 tbsp lemon juice. The butter adds richness while the lemon brightens all the flavors—this is the secret to making simple dishes taste restaurant-quality. Let the mixture sit for 1 minute to meld these final ingredients.
Finally, stir in the 0.25 cup chopped fresh parsley and season with the 1.5 tsp salt and 0.5 tsp black pepper. Taste and adjust seasoning if needed—this is your chance to balance the dish. The parsley adds freshness and color, making the dish visually appealing. Serve immediately while hot, straight from the pan for that one-pot convenience.
Pro Tips For Making Asparagus Ground Beef Rice
- CRISP THE ASPARAGUS FIRST: Cut asparagus into 2-inch pieces and blanch them in boiling salted water for 90 seconds—this softens them just enough to cook through later without turning mushy. (Yes, it’s an extra step, but raw asparagus in ground beef rice is a textural crime.)
- SAUTÉ THE ONIONS LOW AND SLOW: Cook the onions until they’re golden brown, not caramelized—about 8-10 minutes on medium-low heat. I used to rush this and end up with bitter, dark bits that overpower the dish. (Your nose will thank you.)
- BREAK THE GROUND BEEF BY HAND: Use your fingers to separate the beef into tiny, uneven pieces—no need for a knife. This ensures even cooking and a better texture than pre-crumbled beef, which often releases grease in clumps. (I know it feels weird, but it makes a real difference.)
- ADD RICE LAST, THEN BASTE: Stir the cooked rice into the beef mixture off the heat, then return the pan to low heat for 2 minutes to toast the grains slightly. This locks in flavor instead of drying out the rice. (Your future self will notice the difference.)
Pro cooking tips for perfect results
Pan Selection Matters
A heavy-bottomed skillet like a Lodge cast iron or All-Clad stainless steel is your best friend for even heat distribution and crispy asparagus. I avoid nonstick because it can't handle the high heat needed for proper searing—those browned bits are flavor gold. If you're using a lighter pan, reduce heat slightly to prevent scorching, especially when adding the asparagus. 🔥
Deglaze Like a Pro
After browning the beef, don't just toss in the broth—deglaze properly. Add the dry sherry first, scraping up those delicious browned bits with a wooden spoon. Let it bubble for 30 seconds before adding the beef broth. This step transforms your pan drippings into a rich, velvety sauce that coats every grain of rice. I promise, skipping this means missing out on layers of flavor.
Rice Cooking Hacks
For perfectly fluffy rice, rinse it first under cold water to remove excess starch—this prevents gummy texture. After adding the rice, broth, and sherry, bring to a gentle boil for exactly 1 minute, then reduce to the lowest heat setting. The lid should fit snugly—if steam escapes, your rice will dry out. I set a timer for 15 minutes and resist the urge to peek! 🕒
Asparagus Timing
Add the asparagus after the initial rice cooking phase to prevent it from turning mushy. Cut into 2-inch pieces for even cooking—thicker spears need 10-12 minutes to reach tender-crisp perfection. If your asparagus cooks faster, add it 5 minutes earlier and cover the pan to trap steam. The goal is bright green spears with just a slight bite, not limp stems.
Butter and Lemon Magic
Finish with 1 tbsp butter and 1 tbsp lemon juice while the pan is off the heat—this prevents the butter from burning. Let it sit for 1 minute to melt and emulsify with the sauce. The lemon brightens all the rich flavors while the butter adds luxurious mouthfeel. Trust me, this simple step elevates the dish from good to restaurant-worthy. ✨
One-Pan Cleanup
Here's my favorite part: one pan, one dish. After serving, let the pan cool slightly, then scrape up any remaining rice and sauce with a spatula. Add ½ cup water, bring to a boil, and let it simmer for 2 minutes to dissolve any stuck-on bits. The pan will come out sparkling clean with minimal scrubbing. This is why I love this recipe—effortless cleanup after a flavorful meal! 🧼
Nutrition facts
Frequently asked questions
Can I substitute another protein for the ground beef?
Swap the ground beef for ground turkey (use the same amount) or lean ground pork for similar results. For extra flavor, try Italian sausage (remove casing) or chicken thighs (diced), but reduce cooking time by 2-3 minutes since they cook faster. Avoid ground chicken breast—it tends to dry out during the long simmer.
How do I make this dish spicier?
Add ½ teaspoon cayenne pepper or 1 teaspoon smoked paprika when browning the beef. For heat lovers, stir in 1 chopped jalapeño with the asparagus or sprinkle ½ teaspoon red pepper flakes at the end. Serve with hot sauce on the side for customizable spice levels—everyone can adjust to their taste!
What if I don't have sherry? What can I substitute?
No problem! Use ½ cup white wine (dry varieties like Sauvignon Blanc work best) or ½ cup beef broth plus 1 teaspoon soy sauce for umami depth. Avoid sweet wines—they'll make the dish taste off-balance. The key is the acidity, so even ½ cup apple cider vinegar (reduced with broth) works in a pinch.
Can I make this recipe in an Instant Pot?
Yes! Sauté the beef, onion, and garlic in the Instant Pot first. Then add rice, broth, sherry, and thyme. Cook on high pressure for 3 minutes, then quick-release. Stir in asparagus and cook on sauté mode for 5 minutes. Finish with butter and lemon as directed. The Instant Pot version cooks 20 minutes faster but requires more attention to avoid overcooking the asparagus.
Why did my rice turn out mushy?
Mushy rice usually means one of three things: too much liquid (check your rice-to-broth ratio), peeking too early (releases steam), or not enough heat (keep it at a gentle simmer). For next time, use 1.5 cups broth for 1.5 cups rice and resist opening the lid until the timer goes off. If it's still too wet, spread it on a baking sheet and dry it in the oven at 300°F for 10 minutes.