
Main Courses
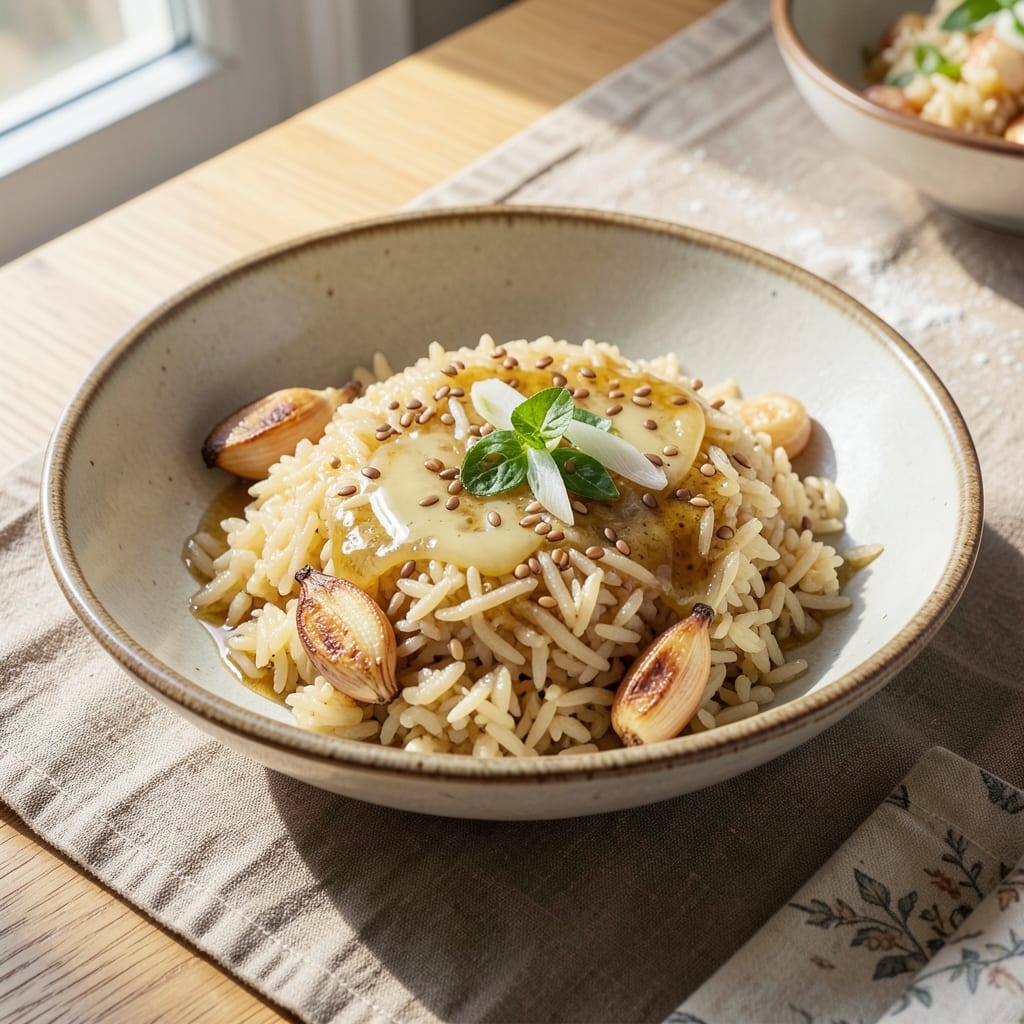
This apple cider vinegar rice recipe transforms ordinary grains into a bright, tangy side dish with toasted aromatics and complex flavor—perfect for balancing rich main courses. The secret lies in cooking the rice with apple cider vinegar and a touch of sugar, creating a subtle sweet-tart harmony that elevates every bite. I developed this method after realizing how much a simple acid infusion could change a basic rice dish into something restaurant-worthy.
The process is straightforward: rinse the rice thoroughly to remove excess starch, then cook it with apple cider vinegar, garlic, and a pinch of salt for flavor depth. The vinegar not only adds tang but also helps tenderize the grains, resulting in light, separate kernels with a delicate crunch. This technique works beautifully with jasmine or basmati rice, though any long-grain variety will do.
What makes this recipe stand out is its versatility—serve it as a cool side salad with fresh herbs and cucumbers, or use it as a base for bowls with grilled chicken, roasted vegetables, or crispy tofu. The bright acidity cuts through rich flavors, making it ideal for summer meals or as a refreshing accompaniment to hearty dishes. The texture is perfectly balanced: tender yet slightly chewy, with a subtle tang that lingers.
For best results, let the rice cool slightly before serving to allow the flavors to meld. Store leftovers in the fridge for up to 4 days, and reheat gently with a splash of water to restore moisture. Whether you're meal prepping or cooking for a crowd, this recipe delivers restaurant-quality results with minimal effort. Let’s get started!
Ingredients for apple cider vinegar rice
Nine simple ingredients transform plain rice into a vibrant, restaurant-worthy side dish.
| Ingredient | Amount | Notes |
|---|---|---|
| Long-Grain Jasmine Rice 🍚 | 1 ½ cups | Uncooked, rinsed thoroughly |
| Apple Cider Vinegar 🍏 | ¼ cup | Raw, unfiltered preferred |
| Granulated Sugar 🍚 | 1 tbsp | White or brown sugar |
| Garlic Cloves 🧄 | 3 cloves | Minced for aromatic depth |
| Unsalted Butter 🧈 | 1 tbsp | Full-fat for richness |
| Vegetable Oil 🫒 | 1 tbsp | Light olive or neutral oil |
| Kosher Salt 🧂 | ½ tsp | Diamond Crystal preferred |
| Fresh Parsley 🌿 | ¼ cup | Chopped, for garnish |
| Fresh Cilantro 🌿 | ¼ cup | Chopped, optional garnish |
| Water 💧 | 2 ¼ cups | Room temperature preferred |
| Lemon Zest 🍋 | 1 tsp | Brightens final flavor |
The rice is the foundation, and jasmine delivers the best balance of floral aroma and tender texture. Whole Foods or Trader Joe's carry excellent bulk bins if you want to experiment with different varieties. For the vinegar, Bragg is my go-to—its raw, unfiltered version adds complexity that pasteurized can't match. The garlic should be fresh, not powdered; Costco sells great whole bulbs that stay crisp for weeks. Toast the grains lightly in butter and oil before adding liquid—this step builds the nutty depth that makes this rice special.
No jasmine rice? Basmati or long-grain white works just as well. Swap the apple cider vinegar for rice vinegar plus a pinch of sugar>, though the flavor won't be identical. Fresh herbs optional? Dried parsley at one-third the amount suffices, but fresh adds that bright pop. The sugar is key—it balances the vinegar's acidity, so don't skip it. For a smoky twist, add ½ tsp smoked paprika> to the butter toasting step. And if you're short on time, pre-rinsed rice> from the store works (just give it an extra rinse to remove excess starch).
This rice keeps beautifully in the fridge for 4-5 days, though it's best within 2 days> for peak texture. Reheat gently with a splash of water—microwaving dries it out. For meal prep, portion into containers with a thin layer of olive oil> on top to prevent drying. The flavors actually improve overnight as the vinegar and sugar meld. Freezes well for 3 months> if you're planning ahead, but texture may soften slightly after thawing.
Why You'll Love This Recipe
- One-Pot Magic: I swear by this recipe when I’m too tired to wash pots—just rice, vinegar, butter, and garlic simmer together until the aroma hits your kitchen like a warm hug. No strainers, no extra bowls, just clean-up simplicity.
- Sweet-Tangy Surprise: That apple cider vinegar isn’t just for dressings—it adds this unexpected brightness that cuts through the richness of the butter and garlic, leaving you with a dish that’s both comforting and refreshing. Honestly, the sugar balances it so well, it’s like dessert in every bite.
- Weeknight Workhorse: This rice is my go-to for lazy dinners, potlucks, or even packed lunches—it reheats beautifully and pairs with everything from fried chicken to grilled fish. Between us, I’ve served it at book club meetings, and no one batted an eye.
- Budget-Friendly Staple: Jasmine rice and vinegar won’t break the bank, and a single batch stretches across three meals for my family of four. Plus, the garlic and butter make it feel fancy without the grocery-store sticker shock. My secret weapon for feeding crowds without stress.
Step-by-step instructions for apple cider vinegar rice
This bright, aromatic rice combines tangy vinegar with toasted garlic for a dish that elevates any meal.
Toast Garlic and Prepare the Pot
Heat a medium saucepan over medium heat and add the 1 tablespoon vegetable oil. Once shimmering, add the 3 cloves minced garlic and toast for 30-45 seconds until fragrant and just beginning to turn golden. Be careful not to let it burn—it should smell sweet and nutty, not bitter.
Remove the pan from heat and immediately stir in the 1 tablespoon unsalted butter until melted. Return the pan to medium heat and add the 1.5 cups long-grain jasmine rice, stirring to coat each grain with the garlic butter mixture. This step ensures every bite carries that toasted garlic aroma and prevents the rice from sticking later.
Cook the Rice with Vinegar and Sugar
Pour in the 2.25 cups water and 0.25 cup apple cider vinegar, then bring to a boil. Once boiling vigorously, reduce heat to low and stir in the 1 tablespoon granulated sugar and 0.5 teaspoon kosher salt. The sugar balances the vinegar's acidity while the salt enhances all flavors.
Cover the pan tightly with a lid and simmer for 15 minutes without lifting it. You'll notice the rice absorbs the liquid gradually—this is normal. The vinegar will infuse the grains with a subtle tang, and the sugar prevents any harshness from overpowering the dish. After 15 minutes, check for doneness by lifting a grain—it should be tender but still slightly firm in the center.
Finish and Garnish for Brightness
Once the rice is tender, remove the pan from heat and let it sit covered for 5 minutes. This resting period allows the steam to redistribute, ensuring each grain is perfectly cooked. After resting, fluff the rice gently with a fork, then stir in the 1 teaspoon lemon zest and half of the 0.25 cup chopped parsley.
For serving, divide the rice among plates and garnish with the remaining 0.25 cup chopped parsley and 0.25 cup chopped cilantro. The herbs add freshness that contrasts beautifully with the vinegar's tang, while the lemon zest brightens the final flavor. Serve immediately while the rice is still warm and the aromas are at their peak.
Pro Tips For Making Apple Cider Vinegar Rice
- Rinse the Rice Twice: Jasmine rice absorbs vinegar like a sponge—rinse it cold until the water runs almost clear (not bone-dry, just translucent). I learned this the hard way when my rice turned gummy after soaking in the tangy liquid. Two quick rinses save you from a mushy texture later.
- Toast the Garlic Low: Sauté those garlic cloves in butter over medium-low heat until they’re golden, not browned—this keeps the flavor bright without bitterness. I used to crank the heat and ended up with burnt garlic that overpowered the dish. Patience here makes all the difference.
- Simmer the Vinegar Slow: After adding the apple cider vinegar, reduce heat to a gentle simmer and let it cook uncovered for 3–4 minutes. Skipping this step leaves the rice sharp and acidic instead of mellow and fragrant. (Yes, it smells weird at first—trust the process.)
- Stir Once, Then Stop: After the initial toast, stir the rice once to coat it evenly, then leave it alone until the liquid’s absorbed. I used to obsessively check it, which breaks the grains and turns them sticky. Set a timer and walk away—your rice will thank you.
Storing and reheating your leftovers
Fridge Storage
Store your apple cider vinegar rice in an airtight container with a tight-fitting lid to preserve its bright tang and prevent drying. I recommend using glass Pyrex containers because they maintain flavor better than plastic and are microwave-safe. Let the rice cool completely before transferring—hot rice creates steam that can make it soggy. The vinegar-infused rice keeps well in the fridge for 4-5 days, though the texture is best within 2 days for that perfect al dente bite. 💫
Freezer Prep
For longer storage, portion the rice into freezer-safe containers or quart-sized Ziploc bags, leaving ½-inch headspace for expansion. Spread a thin layer of olive oil (about 1 teaspoon per serving) on top before sealing to lock in moisture and prevent freezer burn. Label with the date—this rice stays delicious for 3 months in the freezer. When ready to eat, thaw overnight in the fridge for even texture. 🧊
Reheating Methods
For the best texture, reheat in a lightly oiled skillet over medium-low heat with 1-2 tablespoons water per cup of rice. Cover and heat for 3-5 minutes, stirring occasionally, until warmed through. Microwave reheating works in a pinch: cover with a damp paper towel and heat in 30-second intervals on 50% power, stirring between each interval. Never reheat dry—add liquid to restore moisture. 🔥
Meal Prep Tips
Double the recipe and store half for later—this rice reheats beautifully for lunches or picnics. I like to portion it into mason jars with a layer of cucumber slices or cherry tomatoes on top for easy grab-and-go meals. Keep the vinegar rice separate from other components until ready to eat to maintain its crisp texture. For extra flavor, add a pinch of salt or a squeeze of lemon juice when reheating. ✨
Reviving Texture
If your reheated rice feels dry, don't stress—just add 1-2 teaspoons of water or broth and cover for 1-2 minutes to steam. The vinegar's acidity makes it more prone to drying out, so always reheat gently. For a restaurant-style finish, drizzle with extra virgin olive oil and a sprinkle of fresh herbs right before serving. This trick instantly elevates the dish. 💡
Nutrition facts
Frequently asked questions
Can I use white vinegar instead of apple cider vinegar?
White vinegar will work in a pinch, but it lacks the depth of apple cider vinegar's sweet-tart complexity. For the best flavor, stick with apple cider—its mild sweetness balances the tang perfectly. If you must substitute, use ½ cup white vinegar plus 1 extra tablespoon sugar> to mimic the flavor profile.
Why does my vinegar rice turn out mushy?
Overcooking or lifting the lid too soon are the usual culprits. Always cook on low heat> after boiling, and resist peeking! The vinegar's acidity also breaks down starch faster, so reduce cooking time by 1-2 minutes> compared to regular rice. If it's still mushy, spread it on a baking sheet and dry it in the oven at 200°F for 10 minutes>.
Can I make this rice ahead of time for a potluck?
This rice actually tastes better the next day as flavors meld. Cook it fully, then refrigerate in an airtight container> for up to 4 days>. Reheat gently with 1 tablespoon water per cup> in a skillet over medium-low heat>, stirring occasionally. For potlucks, serve it cold as a tangy rice salad with sliced cucumbers and herbs.
What's the best way to adjust this for a larger crowd?
Double or triple the recipe using the same ratio: 1.5 cups rice to 2.25 cups liquid>. For extra-large batches, use a heavy-bottomed pot> to prevent scorching. Toast the garlic in batches if needed, and stir frequently to distribute heat evenly. The key is maintaining the 1:1.5 rice-to-liquid ratio>—never skimp on the vinegar or sugar for big groups!
How can I make this recipe vegetarian or vegan?
Skip the butter and use vegetable oil> instead. For extra richness, stir in 1 tablespoon nutritional yeast> when fluffing the rice. The dish stays fully plant-based while keeping all the bright tangy flavors. Garnish with extra herbs or toasted nuts for crunch. This version works perfectly as a base for veggie bowls or curries!