
Side Dishes
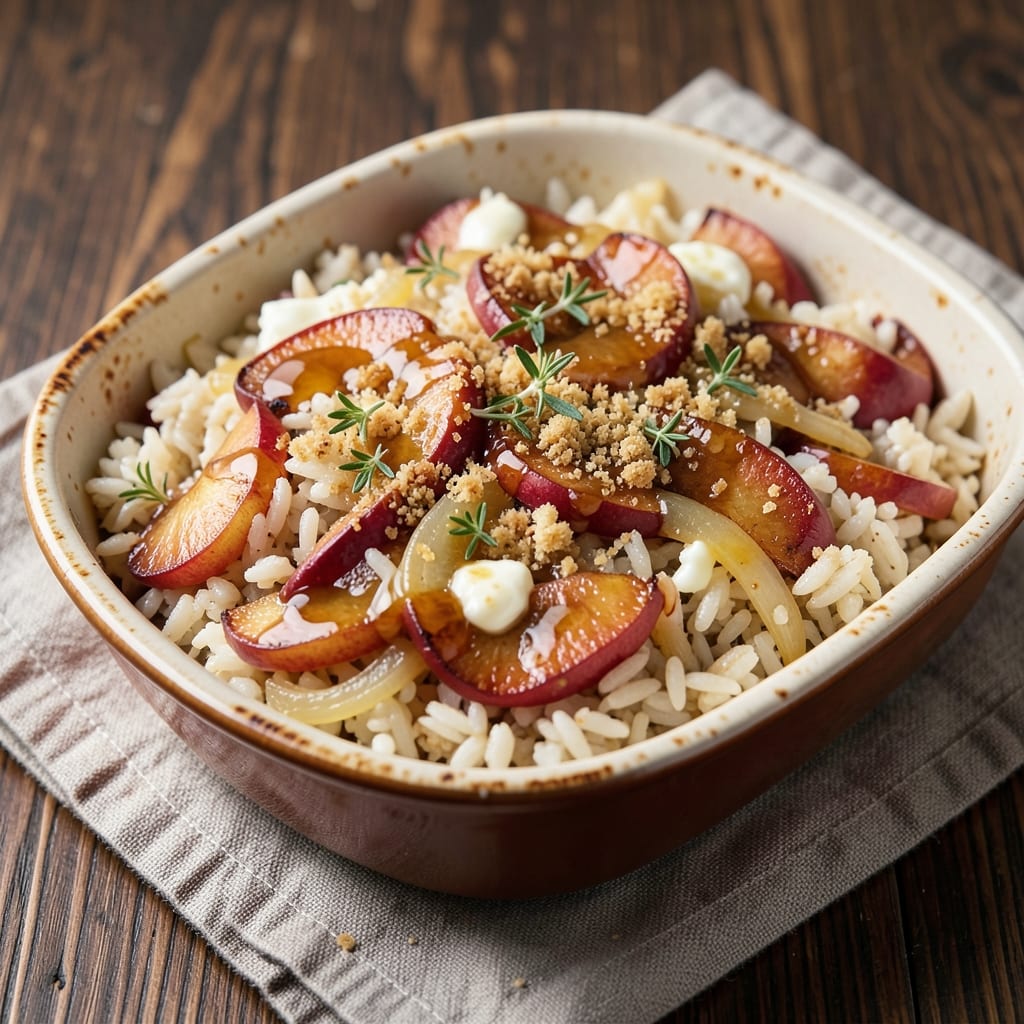
This apple rice stuffing recipe transforms holiday tables with warm, spiced apple cider crunch that rivals anything from a gourmet kitchen. 🍏 The secret lies in perfectly sautéed apples and onions that caramelize into sweet, savory pockets while the rice absorbs rich cider-infused broth. I developed this version after years of testing—it’s the one that finally earned compliments from even the most critical Thanksgiving guests.
What sets this apart is the balance of textures: tender rice, crisp apple chunks, and a golden crust from toasted breadcrumbs. The recipe uses long-grain rice for ideal texture and simmers in apple cider for depth, with warming spices like cinnamon and nutmeg that evoke autumn. It’s designed to be made ahead, so flavors meld beautifully while you focus on other dishes.
The result is a stuffing that’s rich yet light, with just the right amount of crunch from the apples and bread. It pairs perfectly with roasted turkey or ham, but also works as a standalone side for holiday feasts. The spiced cider notes make it feel special without being overly sweet—just the kind of dish that disappears quickly from the table.
For modern twists, swap regular breadcrumbs for gluten-free options or use vegetable broth for a vegetarian version. The recipe scales easily, so you can adjust quantities without sacrificing texture. Here’s how to make it—step by step—for foolproof results every time.
Ingredients for apple rice stuffing
Six servings of holiday comfort in one pan—where crisp apples meet savory rice and spiced cider.
| Ingredient | Amount | Notes |
|---|---|---|
| Long-Grain White Rice 🍚 | 3 cups | Uncooked, medium grain preferred |
| Apples 🍏 | 3 medium | Honeycrisp or Fuji, peeled/cored |
| Yellow Onion 🧅 | 1 large | Diced, about 1.5 cups |
| Unsalted Butter 🧈 | ¾ cup | Cold, cut into small cubes |
| Apple Cider 🍎 | 2 cups | Unsweetened, store-bought or homemade |
| Chicken Broth 💧 | 2 cups | Low-sodium preferred |
| Fresh Sage Leaves 🌿 | ½ cup | Chopped, stems removed |
| Ground Cinnamon 🌶️ | 1 tsp | Freshly ground preferred |
| Ground Nutmeg 🌶️ | ½ tsp | Freshly grated for best flavor |
| Salt 🧂 | 1 ½ tsp | Kosher or sea salt |
| Black Pepper 🌶️ | ½ tsp | Freshly ground preferred |
| Plain Breadcrumbs 🍞 | 1 cup | Panko or gluten-free option |
| Garlic Cloves 🧄 | 2 cloves | Minced, about 1 tbsp |
The apples are non-negotiable here—Honeycrisp or Fuji hold their shape and caramelize beautifully. Local farmers markets often have the best varieties in fall, but any crisp apple works. Peeled and cored, then diced into 1/4-inch pieces for even cooking. The onion should be sweet, so avoid red or yellow varieties if you prefer milder flavor—white onions work best. For extra depth, toast the breadcrumbs in a dry pan for 3-4 minutes until golden before adding them to the stuffing.
No apple cider? Substitute with unsweetened apple juice, though you'll lose some of that warm spice depth. Fresh sage is ideal, but dried sage at one-third the amount works in a pinch. The cinnamon and nutmeg should be freshly ground—pre-ground spices lose potency fast. For a vegetarian version, swap the chicken broth for vegetable broth. The garlic can be pre-minced from a jar, but fresh is always better if you've got it. If you're making this ahead, skip adding the breadcrumbs until just before baking—they'll absorb moisture and turn soggy.
This stuffing reheats beautifully—just add 1-2 tbsp broth if it's dried out. Stores for 4 days in the fridge, or freeze for 3 months in an airtight container. I always make a double batch—one for the holiday table and one to freeze for quick weeknight dinners. The flavors actually improve overnight, so don't hesitate to prep it a day ahead. For extra crispiness, broil for 2-3 minutes at the end if serving immediately.
Why You'll Love This Recipe
- One-Pot Magic: I swear by this recipe when I’m tired of multiple pans. Just sauté the onion in butter, stir in the rice and apples, pour on that apple cider, and let it simmer—no straining, no fuss. The cider reduces right into the rice, turning it into something rich and fragrant without extra effort.
- Sweet-Savory Balance: That crisp-tender apple holds its bite while the rice soaks up all the caramelized onion and buttery depth. Honestly, the first time I made it, I thought, “Why didn’t I do this sooner?” The cider adds just enough tang to cut through the sweetness—like a hug in a bowl.
- Leftovers? No Problem: This stuffing actually improves the next day. The flavors meld even more, and it reheats like a dream—just a splash of water or broth to fluff it up. I keep a batch in the fridge for lazy mornings or to toss into fried rice later. (Yes, even on a Tuesday night.)
- Budget-Friendly Crowd-Pleaser: Long-grain rice and seasonal apples won’t break the bank, and this recipe stretches easily for gatherings. My college roommates lived on this—cheap, filling, and always a hit. The butter and cider make it feel special without costing a fortune. Plus, it’s the kind of dish where no one asks for seconds… then immediately asks for more.
Step-by-step instructions for apple rice stuffing
Transform simple pantry staples into a fragrant, spiced stuffing with crispy edges and tender apple chunks.
🍳 Step 1: Cook the Rice to Perfect Texture
In a large pot with a tight-fitting lid, combine the 3 cups long-grain white rice with the 2 cups apple cider and 2 cups chicken broth. Bring to a rolling boil over medium-high heat—you'll see bubbles break the surface vigorously. Once boiling, immediately reduce heat to low, cover, and simmer for 15 minutes without lifting the lid.
After 15 minutes, check for doneness by fluffing with a fork. The rice should be tender but still have a slight bite—it will finish cooking in the oven. If it's not quite done, add 2 tablespoons water, cover, and cook another 5 minutes. This initial cooking creates the foundation for your stuffing's texture.
👨🍳 Step 2: Sauté Onion, Garlic and Apples
While the rice cooks, heat 0.5 cup unsalted butter in a large skillet over medium heat. Add the 1 large diced yellow onion and cook for 5 minutes until softened and translucent. Add the 2 minced garlic cloves and cook for 30 seconds until fragrant—don't let it brown or it'll become bitter.
Push the onion mixture to one side of the pan and add the 3 peeled/cored apples cut into small chunks. Cook for 4-5 minutes until the apples begin to soften slightly but still maintain their shape. Stir everything together and cook for another 2 minutes until the apples release their juices and the mixture smells sweetly aromatic.
🥘 Step 3: Build the Flavor Base
Transfer the onion-apple mixture to a large mixing bowl. Stir in the 0.5 cup chopped fresh sage leaves, 1 tsp ground cinnamon, 0.5 tsp ground nutmeg, 1.5 tsp salt, and 0.5 tsp black pepper. Add the cooked rice and gently fold everything together with a wooden spoon—be careful not to break the rice grains.
This is where the magic happens. The warm spices and sage will begin releasing their essential oils, filling your kitchen with that unmistakable holiday aroma. The apples will continue softening slightly as they mix with the warm rice, creating pockets of sweetness throughout each bite.
🔥 Step 4: Add Breadcrumbs for Crunch
In a small bowl, toss the 1 cup plain breadcrumbs with 1 tablespoon melted butter to help them crisp up in the oven. Fold these lightly but thoroughly into the rice mixture—just until evenly distributed. The breadcrumbs should coat the rice grains but not completely disappear.
Here's the thing—this step creates the perfect texture contrast. The crispy breadcrumbs will toast beautifully in the oven, providing that satisfying crunch against the tender rice and apples. Don't skip this (I learned the hard way)—it's what makes holiday stuffing special.
⏰ Step 5: Bake Until Golden and Crispy
Transfer the stuffing to a greased 9x13-inch baking dish and spread it evenly. Cover tightly with aluminum foil and bake at 350°F for 30 minutes. After 30 minutes, remove the foil and bake for another 15-20 minutes until the top is deep golden brown and crispy.
The foil creates steam during the initial baking, ensuring the stuffing cooks through evenly. Removing it later allows the top to develop that beautiful crust. You'll know it's done when the edges pull away slightly from the dish and the aroma fills your kitchen—trust your nose on this one. Let it rest for 10 minutes before serving to allow the juices to redistribute.
Pro Tips For Making Apple Rice Stuffing
- Toast the Rice First: After rinsing your long-grain white rice, spread it in a dry skillet over medium heat for 2-3 minutes until it loses its shine and smells nutty. This step prevents gummy stuffing—trust me, I’ve made it without and regretted it. ---
- Dice Apples Small: Cut those apples into ¼-inch pieces, not big chunks. Big apples turn mushy in the oven, and you’ll end up with a soggy mess instead of tender, flavorful bites. (Yes, even if it takes a minute longer.) ---
- Don’t Skip the Cider Reduction: Simmer the apple cider down to about ¼ cup before mixing it into the rice—this concentrates the flavor and prevents a watery stuffing. I used to just pour it in, and the dish always tasted flat. ---
- Press the Butter In: After folding in the butter, press it into the rice mixture with your hands so every grain gets coated. This guarantees rich flavor in every bite, not just pockets of greasy goodness. (Your future self will notice the difference.)
Common mistakes when making great apple rice stuffing
Overcooking the Rice
One of the biggest mistakes is cooking the rice to perfection on the stovetop—only to have it turn mushy in the oven. The rice should be al dente after 15 minutes of stovetop cooking, with a slight bite remaining. If you overcook it here, the stuffing will become gluey and lose its ideal texture. I’ve ruined several batches by letting the rice sit too long after boiling—always check for doneness immediately after the 15-minute mark. 💡
Skipping the Foil Step
Many home cooks forget to cover the stuffing with foil during the initial 30 minutes of baking. This is crucial because the foil traps steam, ensuring even cooking throughout. Without it, the top will dry out while the center stays undercooked. I learned this the hard way when my first attempt came out dry on top and raw in the middle. Trust the foil—it’s your secret weapon for perfect texture. ⏰
Adding Breadcrumbs Too Early
Tossing in the breadcrumbs while the stuffing is still hot can turn them soggy before they even hit the oven. The breadcrumbs should be added right before baking, when everything is cool enough to handle but still warm. If you mix them in too soon, they’ll absorb all the moisture and create a dense, heavy stuffing. For extra crispiness, I now toast the breadcrumbs separately in a dry pan before adding them—this ensures they stay crunchy even after baking. 🍞
Ignoring the Resting Time
Stuffing needs time to set after baking, just like meat. Skipping the 10-minute rest means serving it while the juices are still pooling at the bottom, leading to a dry, crumbly texture. This is especially important if you’re making it ahead—let it cool completely before refrigerating or freezing. I’ve seen even professional chefs rush this step, and it’s a game-changer for texture. Patience here pays off big time. 💪
Using the Wrong Apples
Not all apples are created equal for stuffing. Soft varieties like Gala or McIntosh will turn to mush, while tart apples like Granny Smith won’t caramelize properly. The sweet-tart balance of Honeycrisp or Fuji is key—they hold their shape while adding natural sweetness. I once used Red Delicious by mistake, and the stuffing tasted bland and watery. Stick to crisp, flavorful apples for the best results. 🍏
Overmixing the Ingredients
Gently folding the ingredients is more important than you might think. Overmixing can break the rice grains, leading to a gummy texture. Use a wooden spoon and stir just until everything is combined—you should still see distinct grains of rice. I’ve seen people use electric mixers, which turns stuffing into a paste. Keep it light and delicate for that perfect holiday texture. 🥄
Nutrition facts
Frequently asked questions
Can I make this apple rice stuffing ahead of time?
This stuffing actually tastes better the next day as the flavors meld together. Prepare it completely (up to adding breadcrumbs), then refrigerate in an airtight container for up to 2 days. Reheat covered with foil at 350°F for 20-25 minutes, adding 1-2 tablespoons broth if it looks dry. For freezing, assemble fully (including breadcrumbs), cover tightly, and freeze for up to 3 months. Thaw overnight in the fridge before reheating.
What's the best way to make this vegetarian?
Swap the chicken broth for vegetable broth and use vegetable oil instead of butter for sautéing. For extra depth, add 1 diced carrot and 1 celery stalk with the onions. The apple cider still provides that warm, spiced character that works beautifully in a plant-based version. Just be sure to toast the breadcrumbs separately if using gluten-free options to maintain crispiness.
Can I use instant rice for this recipe?
While you can use instant rice, it won't give you the same ideal texture. Instant rice tends to get gummy when baked, which can make your stuffing too moist. For best results, stick with long-grain white rice that's cooked to al dente (with a slight bite) before baking. If you're short on time, try parboiled rice—it cooks faster while still maintaining better texture in the oven.
How do I prevent the stuffing from getting dry?
The key is proper moisture balance. Don't skip the foil during initial baking to trap steam, and avoid overcooking the rice on the stovetop. If your stuffing seems dry after baking, try adding 1-2 tablespoons broth or apple cider and covering with foil to steam for 5-10 minutes. For extra insurance, make a small batch of the rice separately with extra broth to mix in if needed during baking.
What other fruits can I add to this stuffing?
You can experiment with other seasonal fruits for variation! Try pears (for a similar sweet-tart balance) or dried cranberries (for tartness). For tropical flavors, add diced pineapple (cooked down first) or dried apricots. Just be mindful of moisture content—peeled, cored fruits work best. If using dried fruits, soak them first to rehydrate. The apples remain the star, so keep them as the primary fruit at 2-3 cups total.