
Desserts
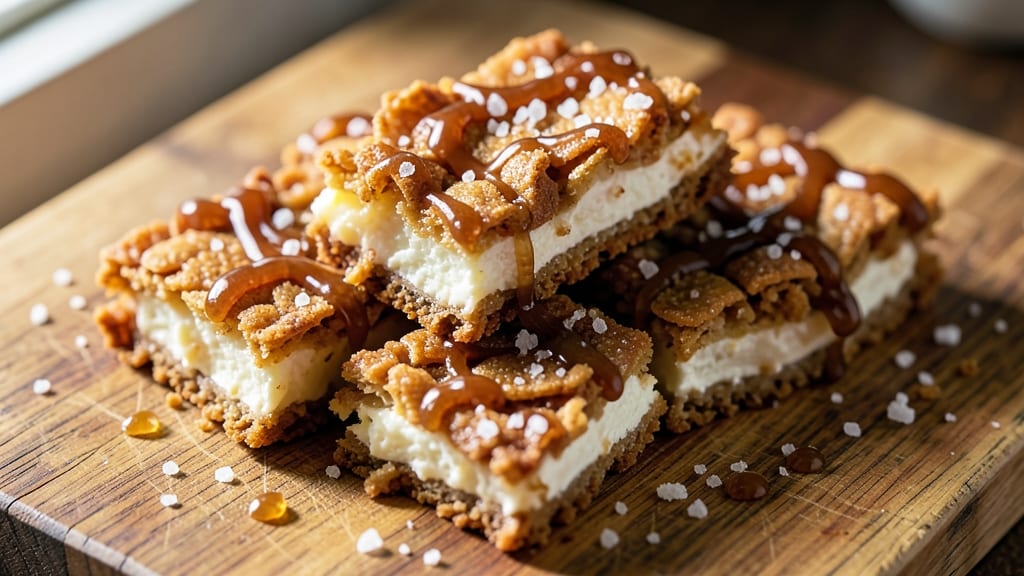
This brown sugar rice crispy treats recipe delivers caramelized sweetness with a crispy, chewy texture that’s impossible to resist. The secret lies in balancing buttery marshmallows, toasted cereal, and brown sugar for a rich, molasses-like depth that traditional recipes often miss.
No oven required—just a microwave and a sturdy pan, making this the perfect no-fuss dessert for gatherings or cravings.
The result is a golden, caramelized slab that cuts into perfectly crispy bars with a tender center, all without the sticky mess of classic recipes. The brown sugar adds a subtle warmth that pairs beautifully with the cereal’s crunch and marshmallow’s gooey heart.
Whether you’re feeding a crowd or satisfying a late-night sweet tooth, these treats are foolproof and always a hit.
Ingredients for brown sugar rice crispy treats
Eight essential ingredients transform into caramelized perfection with just a microwave and sturdy pan.
| Ingredient | Amount | Notes |
|---|---|---|
| Large Marshmallows 🍬 | 40 whole | Standard size, not mini |
| Brown Sugar 🍯 | 1 cup | Packed, light or dark |
| Unsalted Butter 🧈 | 1 cup | Cold, cubed for even melting |
| Rice Krispies Cereal 🥣 | 10 cups | Original, not honey-nut |
| Vanilla Extract 🌿 | 1 tsp | Pure, not imitation |
| Diamond Crystal Kosher Salt 🧂 | ½ tsp | For fine seasoning |
| Heavy Cream 🥛 | ¼ cup | For extra richness (optional) |
| Pure Vanilla Bean Paste 🌿 | ½ tsp | For deeper flavor (optional) |
The brown sugar is non-negotiable here—it’s what creates that signature molasses-like depth. Light or dark works, but dark adds more caramelized richness. For the marshmallows, Kraft Jet-Puffed is the gold standard (most stores stock them), but any large marshmallows will do. Butter matters too—unsalted ensures you control the saltiness, and cold cubes melt more evenly. If you’re feeling fancy, swap the vanilla extract for pure vanilla bean paste—the flecks of vanilla add an unexpected sophistication. For the cereal, Rice Krispies Original is a must; the honey-nut variety will throw off the balance of flavors.
No brown sugar? Substitute with 1/2 cup molasses plus 1/2 cup granulated sugar—it’s not identical, but it’ll get you close. Running low on marshmallows? Mini marshmallows at double the quantity work, though texture will differ slightly. Butter shortage? Coconut oil is a 1:1 swap, though it lacks the buttery richness. The heavy cream is truly optional, but if you’re making these for a crowd, it adds a luxurious creaminess that makes every bite feel special. For extra flavor depth without extra ingredients, toast the cereal in a dry pan for 2-3 minutes before mixing—it intensifies the nuttiness.
This recipe keeps beautifully—cut into bars and store in an airtight container for up to 5 days at room temperature. For longer storage, wrap tightly in parchment and freeze for up to 3 months. The texture stays perfect if you reheat slices in the microwave for 10-15 seconds. Pro tip: Line your pan with parchment paper sprayed with nonstick for effortless release. These treats also make fantastic gifts—just package in clear cellophane with a ribbon for a stunning presentation.
Why You'll Love This Recipe
- One-Pot Magic: I swear by this recipe—just butter, brown sugar, and marshmallows melting together in one pot, then tossing in the cereal. No extra bowls, no messier steps, and honestly? It’s the kind of treat that feels like a hug after a long day.
- Caramelized Comfort: That brown sugar swirls into the marshmallow goo, giving it a deep, buttery richness you won’t find in regular Rice Krispie treats. The vanilla extract ties it all together—warm, cozy, and just sweet enough to satisfy a craving without being cloying.
- Party in a Pan: I’ve used these for potlucks, kids’ birthday snacks, and even as a last-minute dessert for guests. Cut into squares or leave as a whole sheet—either way, they disappear fast. (Yes, even on a Tuesday night when you’re not expecting company.)
- Budget Bliss: Brown sugar and marshmallows stretch further than you’d think, and the ingredients cost next to nothing. Plus, the leftovers? They last in the fridge for days, and I’ve reheated slices in the microwave without losing a bit of that crispy-crunchy texture.
Step-by-step instructions for brown sugar rice crispy treats
Here's how to achieve perfectly crispy treats with caramelized brown sugar sweetness and no sticky mess.
🍳 Step 1: Melt Butter and Brown Sugar Together
In a large, heavy-bottomed saucepan, combine the 1 cup unsalted butter (cubed) and 1 cup packed brown sugar. Place over medium-low heat and let it melt slowly, stirring occasionally with a wooden spoon. You want the butter to melt completely before it starts to brown—this prevents grainy texture in your final treats.
Once fully melted, increase heat to medium and bring the mixture to a gentle boil. Watch carefully as it begins to bubble and thicken—this is where the caramelization happens. You're aiming for a deep amber color and a temperature of 235-240°F on a candy thermometer. If you don't have a thermometer, look for small bubbles forming at the edges and a slightly thickened consistency. Remove from heat immediately once it reaches this stage—overcooking will make the treats bitter.
👨🍳 Step 2: Incorporate Vanilla and Marshmallows
Return the pan to low heat and stir in the 1 tsp vanilla extract and 0.5 tsp pure vanilla bean paste. This adds depth of flavor that plain vanilla extract can't match. Let the mixture simmer gently for 1 minute to combine the flavors.
Working quickly, add the 40 whole large marshmallows all at once. Stir vigorously with a silicone spatula until they're completely melted and incorporated—this usually takes about 2-3 minutes. The mixture should look smooth and glossy, with no visible marshmallow pieces. If you see any unmelted marshmallow, return the pan to low heat for 30 seconds to finish melting them completely. This step is crucial for that classic Rice Krispy Treat texture.
🥘 Step 3: Mix in Cereal and Seasoning
Remove the caramel mixture from heat and transfer it to a large mixing bowl. Add the 10 cups Rice Krispies Cereal all at once and stir gently but thoroughly with a wooden spoon. The cereal will absorb the caramel quickly—work quickly but carefully to avoid breaking the cereal pieces.
Next, stir in the 0.5 tsp Diamond Crystal kosher salt and the 0.25 cup heavy cream (if using). The salt enhances all the sweet flavors, while the heavy cream adds luxurious richness. Mix until the cereal is evenly coated and the mixture looks uniformly moist but not soupy. At this point, you should be able to form the mixture into a ball when pressed together—if it's too sticky, let it sit for 2 minutes to thicken slightly.
🔪 Step 4: Press and Cut for Perfect Texture
Lightly grease a 9x13-inch baking dish with cooking spray or butter. Press the cereal mixture firmly and evenly into the pan using a greased spatula or your hands. I find using a damp rubber spatula helps prevent sticking. Press down until the mixture is about ½-inch thick—this ensures even cooking and crispy edges.
Let the treats cool in the pan for 15 minutes before cutting. This resting time allows the mixture to set slightly, making it easier to cut cleanly. Using a sharp, hot knife (dip in hot water between cuts), cut into squares or rectangles while the treats are still warm. The knife will glide through cleanly if it's hot, giving you those signature crisp edges. Let them cool completely before serving for maximum crispiness.
⏰ Step 5: Store Properly for Freshness
Once completely cooled, transfer the treats to an airtight container. For best results, store them at room temperature for up to 5 days. The treats will continue to crisp up as they sit, developing even more texture over time. If you notice any softness after storage, simply return them to a 200°F oven for 5-10 minutes to refresh the crispiness.
These treats are best enjoyed at room temperature, where their texture develops fully. The combination of caramelized brown sugar, toasted cereal, and vanilla creates a perfect balance of sweetness and crunch. Serve them as-is for classic Rice Krispy Treats, or drizzle with melted chocolate for an extra indulgent treat.
Pro Tips For Making Brown Sugar Rice Crispy Treats
- Use Medium Heat: I learned this the hard way—cranking the stove too high turns your marshmallows into burnt caramel before the butter melts. Keep it at a steady medium so the butter and sugar dissolve together without scorching. You want the mixture to bubble gently, not race toward disaster.
- Toast the Cereal: Dump the Rice Krispies into a dry skillet over low heat for 30 seconds before mixing. The extra warmth makes them crunchier when they hit the marshmallow butter—it’s a tiny step that makes a real difference in texture. (Yes, even if you’re impatient like me.)
- Skip the Pre-Measure: Weigh your marshmallows instead of eyeballing them. A standard recipe calls for about 4 cups of large marshmallows, but bagged ones vary wildly. Too few? Your treats will be dry. Too many? Gloppy. A kitchen scale solves this forever.
- Vanilla Last: Stir in the vanilla extract right before folding in the cereal. Adding it early lets the alcohol evaporate, which weakens the flavor. Wait until the last second—your treats will taste richer, and you won’t waste a drop. (Your future self will notice.)
Storing and reheating your brown sugar rice crispy treats
Room Temperature Storage
Store your brown sugar rice crispy treats in an airtight container at room temperature for up to 5 days. I use glass Pyrex containers with snap-on lids because they prevent moisture loss and keep the treats crispy.
The treats actually improve in texture as they sit—they become even more caramelized and crisp over time. Just be sure to keep them away from direct sunlight or humidity, which can cause softening. 🌡️
Freezer Preservation
For longer storage, wrap treats tightly in parchment paper or place them in a freezer-safe bag, squeezing out excess air. They’ll stay fresh for up to 3 months in the freezer. When ready to enjoy, let them thaw at room temperature for 30-60 minutes—no need for reheating.
The texture remains perfect, though they may lose a tiny bit of crispness compared to fresh treats. I like to portion them into individual servings before freezing for easy grab-and-go snacks. ❄️
Reviving Soft Treats
If your treats lose their crispness after storage, no worries! Pop them into a 200°F oven for 5-10 minutes to restore that perfect crunch. For a quicker fix, microwave a single piece for 10-15 seconds on high power.
This works especially well for treats stored in humid conditions. The key is to heat them just until they’re firm again—overheating can make them dry or rubbery. 🔥
Preventing Sticking
To avoid treats sticking to your container or each other, line the bottom with parchment paper before storing. For extra protection, sprinkle a light dusting of powdered sugar over the top layer before sealing.
This creates a barrier that keeps the treats from clumping together. I also recommend cutting treats into uniform squares before storing—they’ll stack neatly and reheat evenly. 📦
Gift-Worthy Packaging
For a special touch, package treats in clear cellophane bags tied with a ribbon for gifts. Store them in a cool, dry place until ready to give—this keeps them fresh for up to 3 days without refrigeration.
Add a handwritten note or a sprinkle of crushed peppermint on top for a festive presentation. These treats make thoughtful gifts for holidays, birthdays, or just because! 🎁
Nutrition facts
Frequently asked questions
Why does this recipe use brown sugar instead of white?
The brown sugar adds a deep, caramelized molasses-like flavor that traditional recipes miss. It creates a richer, more complex sweetness that pairs perfectly with the toasted cereal and marshmallows. The moisture content also helps bind the ingredients better than granulated sugar would.
Can I make these treats without a stove or microwave?
Yes! Use a double boiler method: place a heatproof bowl over a pot of simmering water. Melt the butter and brown sugar in the bowl, stirring constantly until it reaches 235-240°F. This works perfectly for apartment kitchens without stovetop access. Just be patient—it takes about 10-15 minutes to reach the right temperature.
How do I prevent my treats from being too sticky?
Let the cereal mixture sit for 2-3 minutes after mixing before pressing into the pan. This gives the excess moisture time to absorb. Also, press the mixture firmly and evenly into the pan—don't overpack it. If they're still too sticky, chill the pan in the fridge for 10 minutes before cutting. A lightly greased pan helps too!
What's the best way to make these treats extra crispy?
Press the mixture into a ½-inch thick layer and let it cool completely before cutting. For extra crispiness, bake the cut treats at 300°F for 5 minutes after cutting. Store them in an airtight container with a piece of bread or a paper towel to absorb moisture. The longer they sit, the crispier they become!
Can I substitute marshmallows with something else?
For a lighter texture, use 40 large marshmallows or 80 mini marshmallows. For a vegan option, try dairy-free marshmallows or melted coconut cream (though texture will differ). Never substitute with whipped cream—it won't melt properly and will create a gummy mess. The marshmallow's melt-in-your-mouth quality is essential for that signature texture!