
Desserts
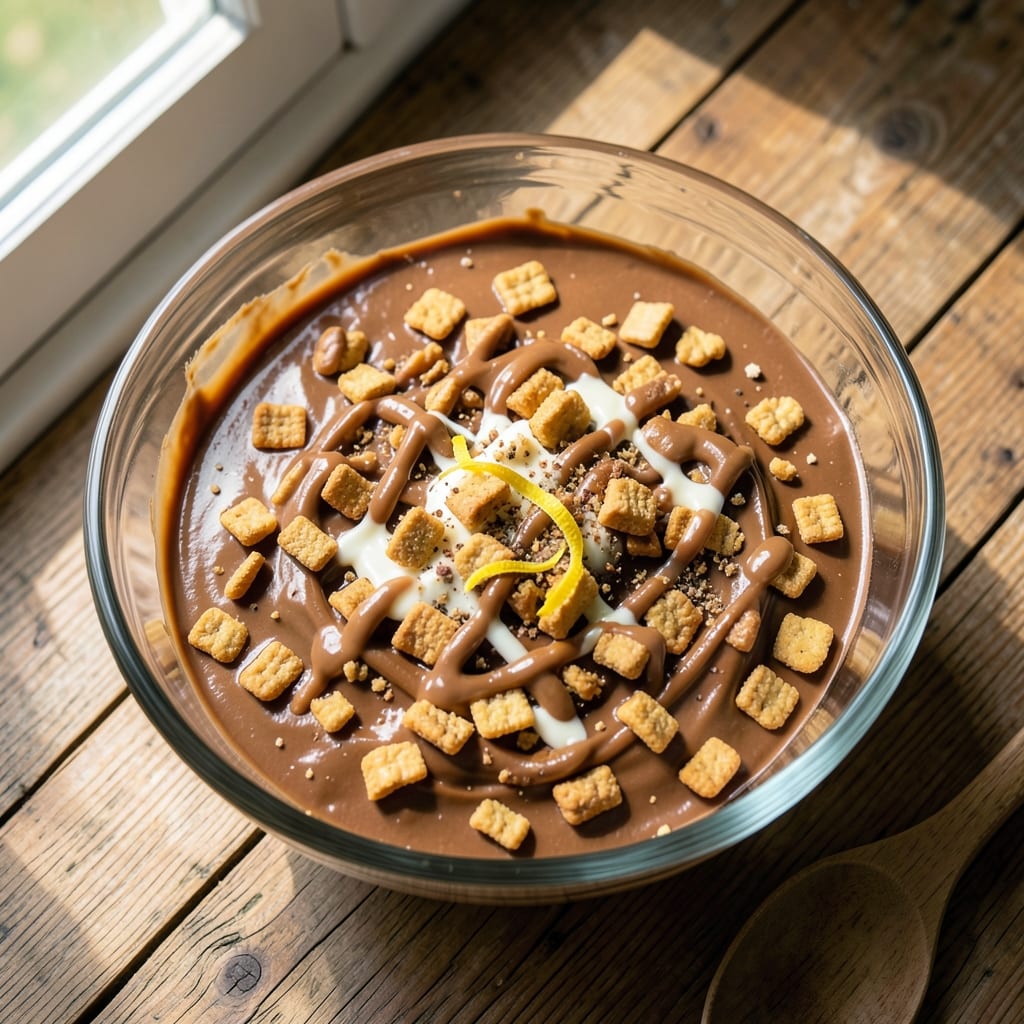
This 3-ingredient peanut butter Rice Krispie treats recipe proves dessert magic doesn't require complicated steps or a long ingredient list. The secret lies in the perfect balance of creamy peanut butter, crispy Rice Krispies, and just enough melted butter to bind everything together—no fancy techniques required. I developed this version after realizing most recipes call for extra ingredients that often get skipped, and the results still suffer. This one delivers that signature crunchy, gooey texture without compromise.
The beauty of this recipe is its simplicity: just three core ingredients, a single bowl, and about 10 minutes of active time. You'll mix everything together, press it into a pan, and let it set—no baking required. The peanut butter provides rich, nutty flavor, while the Rice Krispies add that satisfying crunch that makes these treats irresistible. What you end up with is a batch of golden-brown bars that are easy to cut into perfect squares, making them ideal for parties, lunches, or satisfying a late-night sweet tooth.
What makes this version special is how it maintains all the classic qualities of Rice Krispie treats—just with fewer ingredients. The peanut butter melts into the butter to create a smooth, creamy binder that coats each crispy cereal piece perfectly. Once cooled, the treats hold their shape beautifully, making them easy to transport or share. They're also customizable: add chocolate chips, crushed peanuts, or a drizzle of melted chocolate for extra flair without complicating the base recipe.
Perfect for kids to help make (with supervision), this recipe is also a grown-up favorite—simple enough for weeknight cravings but impressive enough for gatherings. The no-bake aspect means no oven heating required, making it a year-round treat that's always ready when the mood strikes. Let's get started on creating these effortless, crowd-pleasing bars!
Ingredients for 3 ingredient peanut butter rice krispie treats
Three ingredients, endless possibilities—this no-bake treat delivers classic Rice Krispie magic with zero fuss.
| Ingredient | Amount | Notes |
|---|---|---|
| Creamy Peanut Butter 🥜 | 1 ½ cups | Natural, no added sugar preferred |
| Rice Krispies Cereal 🍞 | 6 cups | Original flavor, not crunchy variety |
| Unsalted Butter 🧈 | ½ cup | Melted, full-fat for best flavor |
The peanut butter is your flavor foundation—natural, no-sugar-added is ideal, but any creamy variety works. Jif or Skippy are my go-tos, but store brands work fine. For the Rice Krispies, stick with the original flavor—the crunchy version lacks that signature snap. Butter matters here too: full-fat, unsalted melts smoother and gives the best texture. If you're using salted butter, cut back on any added salt in variations. Pro tip: measure your peanut butter and butter by weight if you're feeling fancy—1.5 cups peanut butter = ~12 oz, and 0.5 cup butter = ~4 oz—this keeps the ratio perfect every time.
No peanut butter? Almond butter or sunflower seed butter work in a pinch (though texture differs slightly). Short on Rice Krispies? Crushed graham crackers or cornflakes add crunch, but they won't hold the same structure. Butter too expensive? Coconut oil melts just as well—use the same amount. For the no-bake aspect, room-temperature ingredients are key. If your peanut butter is rock-hard from the fridge, microwave it 10 seconds to soften before mixing. And yes, you can use powdered peanut butter if that's what you've got—just add 1 tbsp milk to restore creaminess.
These treats set in 2-3 hours at room temperature, but 30 minutes in the fridge speeds things up if you're impatient. For cutting, a hot knife (dipped in hot water) gives clean squares every time. Store in an airtight container with parchment between layers—they'll keep for 5 days at room temperature or 2 weeks in the fridge. Freeze for up to 3 months if you're prepping for parties. The longer they sit, the more intense that peanut butter flavor gets—trust the process!
Why You'll Love This Recipe
- Pantry Magic: I swear by this recipe when I’ve got nothing but a jar of peanut butter and a box of cereal. No eggs, no flour, no fancy gadgets—just melt butter, stir in peanut butter, and let the Rice Krispies do their thing. Honestly, it’s the kind of recipe that makes me feel like a genius for remembering it exists.
- Rich, Nutty Bliss: That first bite? Crunchy, toasty Rice Krispies wrapped in a gooey, peanut-butter hug. I’ll be real: the smoothness of creamy peanut butter paired with the buttery crisp of the cereal is ridiculously satisfying—way better than store-bought bars that taste like sawdust. (Yes, even on a Tuesday night.)
- Party in a Box: These are my go-to for last-minute gatherings, potlucks, or when my kid’s soccer team needs snacks. They’re easy to shape into squares, cut into fun shapes, or even rolled into balls—no one will guess they’re made from three things you already own. Between us, they disappear faster than I can say “more?”
- Zero-Waste Winner: A single batch uses up leftover peanut butter, butter, and cereal before they go stale. I make a double batch, store half in the fridge, and the rest freezes perfectly for weeks. Not the prettiest, but the taste makes up for it—and my wallet thanks me every time. (Budget-friendly? More like budget hero.)
Step-by-step instructions for 3-Ingredient peanut butter Rice Krispie treats
Here's the magic—no oven, no stress, just three ingredients that transform into gooey, crunchy perfection.
Melt Butter and Peanut Butter Together
In a large microwave-safe bowl, combine the 0.5 cup unsalted butter and 1.5 cups creamy peanut butter. Microwave in 30-second intervals, stirring between each, until the mixture is completely smooth and melted. You're aiming for a glossy, creamy consistency—like warm peanut butter sauce. If it looks too thick, add 1 teaspoon of hot water to loosen it slightly. The butter and peanut butter should blend seamlessly, creating the perfect binding agent for your treats.
Here's the thing—don't rush this step. The mixture should be fully liquid and homogeneous. If you see any graininess or unmelted butter, give it another 10-15 seconds in the microwave. This ensures your treats will have that signature crispy-yet-gooey texture. Once melted, set the bowl aside to cool slightly for 2-3 minutes while you prepare the cereal.
Mix in the Rice Krispies Cereal
Add the 6 cups rice krispies cereal to the melted butter-peanut butter mixture. Using a sturdy wooden spoon or rubber spatula, stir vigorously until every single piece of cereal is fully coated. You'll notice the mixture will look dry at first, but keep stirring—it will gradually come together into a thick, clumpy dough. This is completely normal and exactly what you want.
I like to press the cereal into the mixture with the back of the spoon to ensure even distribution. The goal is to create a uniform texture where every bite delivers that perfect balance of crispy cereal and creamy peanut butter. If the mixture seems too dry after a minute of stirring, add 1-2 teaspoons of hot water to help bind it together. The dough should hold its shape when pressed in the bowl but still feel slightly crumbly.
Press into Pan for Perfect Shape
Lightly grease a 9x13-inch baking dish with non-stick cooking spray or a thin layer of butter. Press the cereal mixture firmly and evenly into the pan using a spatula or the back of a spoon. You want to create an even, smooth surface—this ensures clean slices and consistent texture throughout. Press down gently but firmly, making sure to reach all the corners of the pan.
Here's where patience pays off: don't rush the pressing. Take your time to create an even layer that's about ½-inch thick. If you notice any dry spots or uneven areas, press those down extra firmly. The mixture should hold together well when pressed, but if it crumbles too much, add another ½ teaspoon of hot water and mix briefly before pressing again. Once satisfied, smooth the top with the spatula for a polished finish.
Chill and Set for Clean Slices
Cover the pan tightly with plastic wrap and refrigerate for at least 2 hours, or until completely firm to the touch. This chilling step is absolutely critical—it allows the treats to set properly so they hold their shape when sliced. I know it's tempting to cut them sooner, but resist! The longer they chill (up to 4 hours works great), the cleaner your slices will be.
When checking for doneness, press a finger gently against the surface. If it springs back without leaving an indentation, your treats are ready. If you're still unsure, give them 15 more minutes in the fridge. Once set, remove from the pan and cut into 1-inch squares or your preferred shape. The edges should be clean and crisp, with no crumbling—this is your reward for the perfect no-bake magic.
Pro Tips For Making 3 Ingredient Peanut Butter Rice Krispie Treats
- MELT BUTTER LOW AND SLOW: I learned this the hard way—dumping butter straight into boiling peanut butter makes it seize up like a stubborn child. Instead, melt the butter in the same pot over low heat until it’s just liquid, then add the peanut butter and stir constantly. The goal is a smooth, creamy base, not a greasy mess.
- USE A THERMOMETER FOR PERFECT MIX: No guessing here: the peanut butter-butter mix should hit 160°F (71°C) before adding Rice Krispies. Too hot, and the cereal burns before it’s fully coated; too cool, and the treats stay sticky and gummy. A cheap thermometer saves you from both disasters.
- PACK CEREAL TIGHTLY: Loose cereal means air pockets and uneven cooking. Press the Rice Krispies into the greased pan firmly—like you’re tucking in a picky toddler—so they hold their shape and crisp up evenly. A wet spoon helps smooth the top without crushing.
- CHILL BEFORE SLICING: Cutting warm treats turns them into a sticky, crumbly nightmare. Let them cool completely in the pan (10–15 minutes), then pop them out and refrigerate for 20 minutes. This also makes slicing cleaner—no one wants a peanut butter glop on their fingers.
Dietary considerations for 3 ingredient peanut butter rice krispie treats
Peanut-Free Swaps
If you're avoiding peanuts due to allergies, sunflower seed butter makes an excellent substitute—it has a similar texture and nutty flavor. For a seed-free option, try creamy tahini (sesame paste), though the flavor will be more earthy. I've tested this with Joyva Sunflower Seed Butter and found it works beautifully, though you may want to add ½ teaspoon of vanilla extract to enhance sweetness. Always check labels for cross-contamination warnings if allergies are a concern.
Gluten-Free Adaptations
Rice Krispies are naturally gluten-free, but always verify the package label since formulations can change. For extra crunch, mix in ½ cup crushed gluten-free cornflakes or quinoa flakes—just reduce the Rice Krispies to 5.5 cups to maintain the right ratio. I've had great success with Nature's Path Gluten-Free Corn Flakes in this recipe. The texture remains delightfully crispy while keeping the treats safe for gluten-sensitive eaters.
Vegan Versions
For a vegan twist, replace the butter with vegan butter or coconut oil—both work equally well. I recommend Miyoko's Creamery Vegan Butter for the closest flavor profile. The peanut butter should already be vegan (most commercial brands are), but double-check for honey or dairy additives. The resulting treats will have the same rich texture, just without any animal products. This version is perfect for vegan parties or when you want to keep things plant-based.
Lower Sugar Options
If you're watching sugar intake, opt for natural peanut butter with no added sugar—brands like 88 Acres or Smucker's Natural work perfectly. For even lower sugar, add 1 teaspoon of erythritol or monk fruit sweetener to the melted butter mixture. You won't taste the sweetener, but it helps balance the natural sweetness of the peanut butter. Just be mindful that some sweeteners can crystallize when chilled, so mix them in last.
Nut-Free Crunch
To avoid nuts entirely while keeping that satisfying crunch, fold in ½ cup mini chocolate chips or crushed pretzels after mixing the cereal. I like Enjoy Life Mini Chocolate Chips for their allergy-friendly guarantee. For a salty-sweet combo, Honey Bunches of Oats cereal (crushed) adds a fun texture twist. These additions work best if sprinkled on top before the final pressing—they'll stay crunchy while the rest sets.
Nutrition facts
Frequently asked questions
Why does my peanut butter Rice Krispie treat mixture keep crumbling?
The most common reason is insufficient binding liquid. If your mixture feels too dry after mixing, add 1 teaspoon of hot water at a time until it holds together when pressed. Another trick is to press the cereal into the melted butter mixture more firmly—this helps the peanut butter coat each piece better. Remember, the dough should be crumbly but still moldable, not like dry cereal.
Can I make these treats without a microwave?
Melt the 0.5 cup butter in a small saucepan over low heat, stirring constantly until fully liquid. Then remove from heat and stir in the 1.5 cups peanut butter until smooth. Let the mixture cool slightly before adding the cereal. This stovetop method works just as well and gives you more control over the temperature.
How do I get perfectly clean cuts when slicing?
Use a hot knife for clean, crisp edges. Dip your knife in hot water between cuts, then wipe dry. This prevents the treats from sticking and creates sharp lines. For extra precision, chill the treats for 4 hours before cutting—they'll be firmer and hold their shape better. A 9x13-inch pan makes cutting easier since the treats are thicker and more stable.
What if I don't have Rice Krispies cereal?
You can substitute with crushed cornflakes or graham cracker crumbs for a similar texture. For a gluten-free option, use crushed gluten-free cornflakes or quinoa flakes. Just reduce the amount slightly (5.5 cups instead of 6 cups) since these alternatives are denser. The treats will still be delicious, though the flavor will differ slightly from classic Rice Krispies.
Can I add chocolate or other mix-ins?
Yes! Fold in ½ cup mini chocolate chips, crushed pretzels, or chopped nuts after mixing the cereal. For a peanut-free option, try sunflower seed butter with crushed graham crackers. Add mix-ins after the cereal is fully coated, then press into the pan. These additions work best when sprinkled on top before the final pressing to maintain their crunch.