
Main Courses
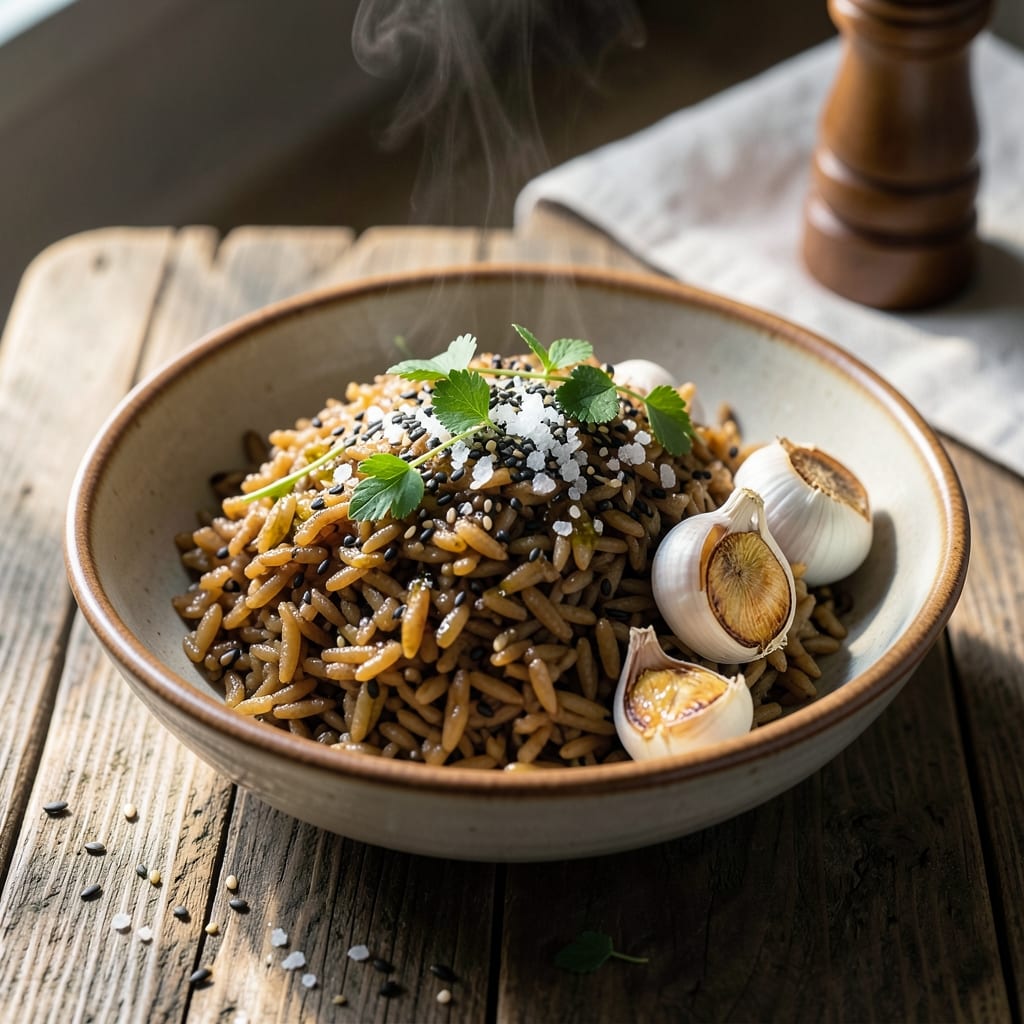
This amazing brown rice recipe transforms simple grains into nutty, toasted perfection with a satisfying crunch. 🌟 The secret? A quick rinse, proper soaking, and high-heat toasting that unlocks deep flavor without sacrificing texture. I've been perfecting this method for years—it's the kind of rice that makes people ask for seconds (and thirds). What sets this apart is the balance: chewy yet firm, with a toasted aroma that fills your kitchen. We'll use simple ingredients—just brown rice, water, and a pinch of salt—but the technique makes all the difference. No fancy equipment needed, just patience and attention to detail. By the end, you'll have rice that's perfect for stir-fries, grain bowls, or as a standalone side. The toasted edges add a subtle crunch, while the interior stays tender and nutty. This is the kind of rice that elevates any meal without stealing the spotlight. Whether you're meal prepping for the week or cooking for tonight, this method delivers consistent results. Let's get started—your taste buds will thank you!
Ingredients for amazing brown rice
Simple ingredients that transform into restaurant-quality rice with just a few key steps.
| Ingredient | Amount | Notes |
|---|---|---|
| Long-Grain Brown Rice 🌾 | 1 cup | Uncooked, rinsed thoroughly |
| Water 💧 | 2 ½ cups | Room temperature preferred |
| Kosher Salt 🧂 | ½ tsp | Diamond Crystal preferred |
| Olive Oil 🫒 | 1 tbsp | Extra-virgin for toasting |
| Garlic Cloves 🧄 | 1 whole | Minced for aroma (optional) |
| Sesame Seeds 🌰 | 1 tsp | Toasted for garnish (optional) |
The rice is everything here—Bob's Red Mill or Lundberg are my go-tos, but any long-grain brown rice works. Rinse it until the water runs clear (this removes excess starch for that perfect texture). The water ratio matters: 2.5 cups for 1 cup rice gives you fluffy, separate grains. For the garlic, I grab a single clove from the jar (no need to peel it yet—just mince it fresh when ready). Sesame seeds? Trader Joe's has them in bulk for cheap, but any store will do.
No olive oil? Avocado oil or butter works just as well for toasting. Short on garlic? Skip it—this isn't a garlic rice, but it adds depth if you've got it. The salt is non-negotiable though—Diamond Crystal dissolves better than table salt, but kosher will do. For extra crunch, toast the sesame seeds in a dry pan for 1-2 minutes until golden. Pro tip: if you're prepping for the week, cook double the batch—it reheats beautifully with a splash of water.
Store cooked rice in an airtight container for 5 days in the fridge or freeze for 3 months. The texture actually improves after a day or two as the grains firm up. For reheating, microwave with a damp paper towel over it—keeps it moist. This rice is perfect cold too, so portion it into containers for grain bowls. The toasted aroma lingers for days, making your kitchen smell like a Japanese izakaya.
Why You'll Love This Recipe
- Five-Ingredient Magic: I swear by this—just rice, water, salt, garlic, and olive oil. That’s it. No fancy gadgets, no stress, no measuring cups that never fit right. Honestly, it’s the kind of recipe where you can pour, stir, and forget about it while you chop veggies or wait for the chicken to brown.
- Garlic Kiss: Between us, that minced garlic sautéed in olive oil before the rice goes in? Chef’s kiss. It infuses the whole pot with this warm, nutty depth that turns basic brown rice into something you’ll actually crave. (Yes, even on a Tuesday night when you’re too tired to care.)
- Meal Prep MVP: This rice keeps perfectly for days—no soggy bits, no weird textures. Toss it into lunches, pair it with roasted veggies, or use it as a base for stir-fries. I’ll be real: I make a big batch every Sunday because it’s my secret weapon for lazy weeknights.
- Budget Booster: Long-grain brown rice is cheap, and this method stretches it further than any other I’ve tried. A single pot feeds four, and leftovers reheat like a dream. Not the prettiest, but the taste—and the wallet—will thank you. (My daughter picks out the garlic cloves, but still asks for seconds.)
Step-by-step instructions for nutty, toasted brown rice
Here's how to transform simple brown rice into restaurant-quality side dish with deep flavor.
🔥 Step 1: Toast the Rice for Maximum Flavor
Heat a medium saucepan over medium heat and add the 1 tablespoon olive oil. Swirl to coat the bottom evenly. Add the 1 cup long-grain brown rice and stir constantly for 2-3 minutes until it turns a beautiful golden brown and smells nutty.
This toasting step develops the rice's natural flavors and prevents the grains from sticking together. You'll know it's ready when the rice smells rich and toasty—like popcorn with a nutty aroma. Keep your eye on it; rice burns quickly once it starts browning.
🍳 Step 2: Add Aromatics and Liquid
Push the toasted rice to one side of the pan and add the 1 whole minced garlic cloves to the empty space. Sauté for 30 seconds until fragrant—you should smell that wonderful garlic aroma filling your kitchen.
Pour in the 2.5 cups water and add the ½ teaspoon kosher salt. Stir everything together gently, making sure all the rice is submerged in the liquid. Bring to a gentle boil, then immediately reduce heat to low.
⏰ Step 3: Simmer Until Tender and Fluffy
Cover the pan with a tight-fitting lid and simmer for 35-40 minutes without peeking. The rice needs undisturbed time to absorb the water and develop that perfect texture. You'll know it's done when the water is completely absorbed and the rice is tender but still has a slight bite.
If you check too often, you'll release steam and actually increase cooking time. The rice should look fluffy and separated—not mushy or dry. For best results, use a timer so you don't forget about it.
👨🍳 Step 4: Rest and Garnish for Perfect Texture
Once the rice is tender, remove it from heat and let it sit covered for 5 minutes. This resting period allows the steam to redistribute throughout the grains, ensuring each bite is perfectly textured.
Fluff the rice gently with a fork, then transfer it to a serving bowl. Sprinkle with the 1 teaspoon toasted sesame seeds right before serving. The seeds add a beautiful crunch and visual appeal that makes this rice look like it came from a high-end restaurant.
Pro Tips For Making Amazing Brown Rice
- TOAST THE RICE FIRST: Heat a dry pot over medium-high until it smells nutty—about 2 minutes. This crisps the outer layer and deepens the flavor. I used to skip this, and the rice always tasted bland until I tried it.
- USE 1:2 RATIO (NOT 1:3): Brown rice absorbs less water than white rice—stick to 1 part rice to 2 parts water. Too much liquid turns it mushy; too little leaves it dry. Trust the math, even if your recipe says otherwise.
- SALT THE WATER HARD: Add 1.5 teaspoons of kosher salt per 2 cups of water—more than you’d use for pasta. The rice needs it to develop that rich, savory depth. I learned this the hard way when my rice tasted flat.
- SWEAT THE GARLIC LOW: Cook the minced garlic in olive oil over low heat until just fragrant, not browned. High heat burns it fast, and you’ll taste bitterness. Patience here makes the difference between subtle and overpowering.
Essential equipment for perfect results
Must-Have Pot
Start with a heavy-bottomed saucepan—I swear by my All-Clad stainless steel 3-quart pot. The thick base distributes heat evenly, preventing hot spots that can burn your rice. If you're on a budget, a Calphalon nonstick pan works beautifully too. Avoid thin aluminum pans—they heat unevenly and make toasting difficult. 🔥
Lid Essentials
Your lid needs to fit tightly to trap steam during simmering. I use a glass lid with a metal rim (like from Le Creuset) because it lets me peek without losing much steam. If your lid doesn't seal well, wrap a damp paper towel around the edges before placing it on top. Pro tip: Never use a loose-fitting lid—it'll dry out your rice faster than you can say "mushy grains."
Measuring Tools
Precision matters! Use a stainless steel measuring cup for the rice (no plastic—they absorb odors) and a liquid measuring cup for water. I keep a OXO Good Grips set on my counter for this exact purpose. For the salt, a small spice scoop ensures you get the exact ½ teaspoon without overdoing it. Don't eyeball measurements—especially with brown rice, which absorbs water differently than white.
Optional Upgrades
For extra flavor control, grab a small garlic press (I use Garlic Press by Norpro) to mince that 1 clove in seconds. A fine-mesh strainer helps rinse the rice thoroughly—OXO's Good Grips model is my favorite. If you love sesame seeds, a small cast-iron skillet (like Lodge's 8-inch) is perfect for toasting them until golden. These tools might seem minor, but they make a world of difference in texture and flavor. ✨
Budget-Friendly Swaps
No fancy equipment? No problem! A basic stainless steel pot from Costco works perfectly for toasting. Use a wooden spoon (like OXO's Good Grips) to stir—it won't scratch your pan. For measuring, a standard measuring cup set and a teaspoon from your spice rack will do. The key is focusing on technique over tools—your rice will turn out amazing with just these basics. 💪
Nutrition facts
Frequently asked questions
Why does this recipe say to toast the brown rice first?
Toasting unlocks the rice's natural nutty flavors and creates that delicious crunch you get in restaurant versions. The dry heat caramelizes the starches on the surface, giving your rice depth that plain boiled rice can't match. It also prevents the grains from sticking together during cooking.
Can I use a rice cooker for this recipe?
Just follow the same toasting step in a pan first, then transfer the rice to your cooker with the water and salt. Most rice cookers will give you perfect results—just check the rice after 35 minutes and let it rest covered for 5 minutes before fluffing. The key is that resting time!
What if my rice comes out too dry or mushy?
Too dry? You likely used too much heat or didn't add enough water initially. For mushy rice, it probably simmered too long or you peeked too often. Next time, use 2.5 cups water per 1 cup rice, keep heat at low, and set a timer to avoid checking. If it's still too dry, sprinkle with warm water and cover for 5 minutes.
How do I make this rice extra flavorful without adding extra ingredients?
Boost the flavor by using vegetable or chicken broth instead of water (just reduce the salt). For even more depth, add a bay leaf while cooking and remove it before serving. The toasting step is your secret weapon—don't skip it! The nutty aroma alone makes this rice taste gourmet.
Is this brown rice good cold for meal prep?
Yes! This rice actually tastes better after chilling for 24 hours—the grains firm up and develop more flavor. Store in an airtight container and reheat with a splash of water. It's perfect for grain bowls, salads, or packed lunches. Just add a little sesame oil when serving for extra freshness.