
Main Courses
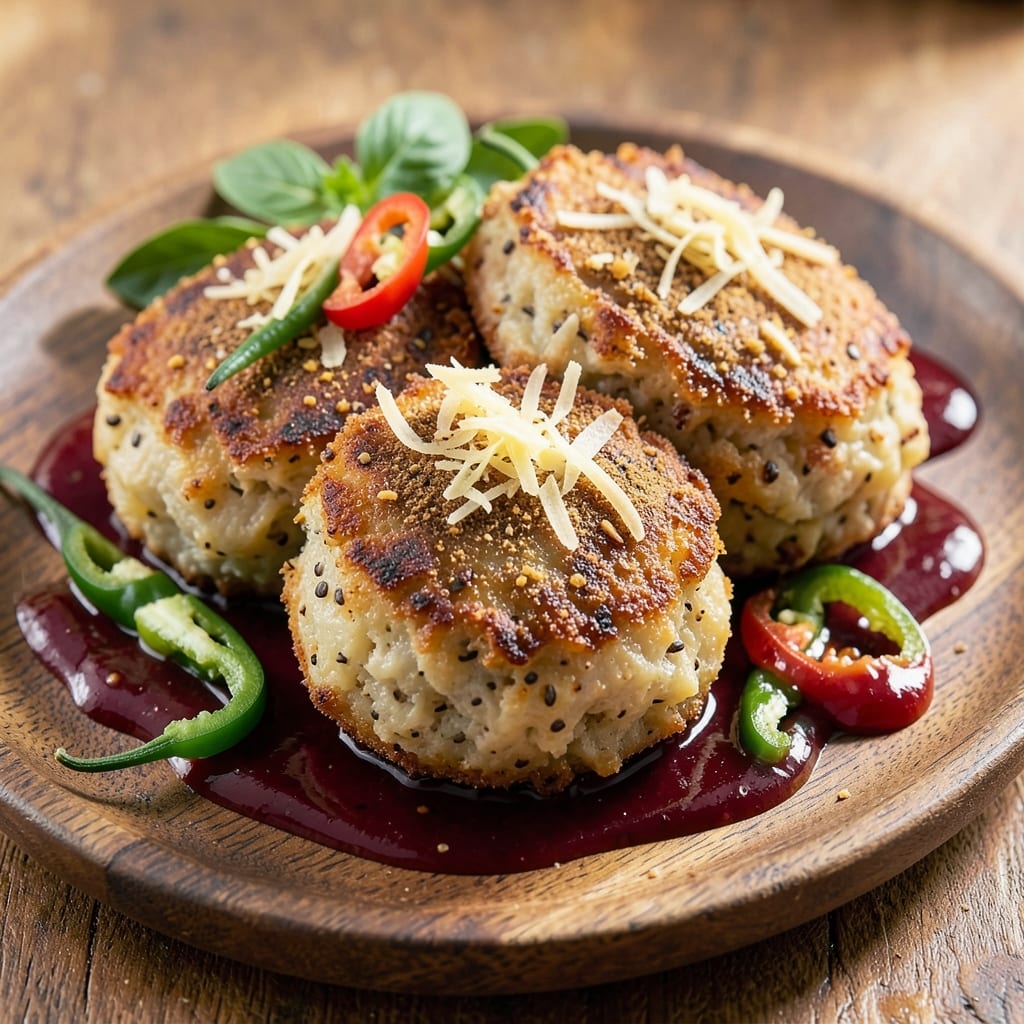
This aloo tikki recipe with rice flour delivers the perfect balance of crispy edges and tender centers—something I perfected after years of experimenting with traditional potato patties. The rice flour secret creates that signature crunch without compromising the spiced potato filling, making these crispy-edged bites irresistible. What sets this version apart is how the rice flour transforms the texture, giving you restaurant-quality results at home.
The magic happens in two simple steps: crafting the perfect spiced potato mixture and binding it with rice flour for that signature crisp. I've tested this recipe countless times, adjusting the moisture levels to ensure your patties hold together while achieving that golden, shatteringly crisp exterior. The spices—cumin, coriander, and garam masala—infuse every bite with warm, aromatic flavor that pairs beautifully with mint chutney or tamarind sauce.
What you'll end up with is a plate of golden, crispy aloo tikki that's light yet satisfying, with a satisfying crunch that gives way to tender, flavorful potato inside. The rice flour creates a delicate lattice of crispy edges that stay crisp even after dipping, making these perfect for snacking or serving as a main course with yogurt dip. This is comfort food at its finest—simple to make but impossible to resist.
Whether you're hosting a casual gathering or craving a quick weeknight meal, these patties deliver restaurant-quality flavor with minimal effort. The recipe scales easily, so you can make a big batch for sharing or just a few for yourself. Let's get started on creating these crispy, spiced potato delights that will have everyone asking for seconds.
Ingredients for aloo tikki recipe with rice flour
These golden, crispy-edged potato patties need just 13 simple ingredients for restaurant-quality flavor at home.
| Ingredient | Amount | Notes |
|---|---|---|
| Russet Potatoes 🥔 | 2 lb | Peeled and grated fine |
| Rice Flour 🌾 | ½ cup | Fine grain preferred |
| Cumin Seeds 🌿 | 1 tbsp | Toasted for deeper flavor |
| Fresh Ginger 🌿 | 1 tbsp | Grated, not powdered |
| Green Chilies 🌶️ | 2 whole | Finely chopped, adjust heat |
| Garam Masala 🌶️ | 1 ½ tsp | Freshly ground preferred |
| Ground Coriander 🌿 | 1 tsp | Freshly ground preferred |
| Salt 🧂 | 1 tsp | Diamond Crystal preferred |
| Fresh Cilantro 🌿 | ¼ cup | Chopped, for garnish |
| Vegetable Oil 🫒 | ½ cup | High smoke point preferred |
| Lemon Juice 🍋 | 1 tbsp | Freshly squeezed |
| Plain Yogurt 🥛 | ¼ cup | Whisked for binding |
| Cornstarch 🌾 | 1 tbsp | For extra crispiness |
The rice flour is non-negotiable here—it’s what gives these tikki that signature shatteringly crisp exterior. Bob’s Red Mill or Trader Joe’s carry the best fine-grain variety, but any rice flour works in a pinch. Look for potatoes with a high starch content like Russets—they hold up better to grating. Freshly grated ginger and green chilies make all the difference; Indian grocery stores often have the hottest, freshest chilies. Toast your cumin seeds in a dry pan for 30 seconds before grinding—this boosts their flavor exponentially. The yogurt needs to be plain and thick; if yours is too thin, strain it through a cheesecloth for 10 minutes.
No rice flour? Substitute half the amount with cornstarch, but expect slightly less crispiness. Fresh ginger powder won’t work—you need that raw, zesty bite. Running short on garam masala? Mix equal parts cinnamon, cardamom, and cloves for a close approximation. The cornstarch is your secret weapon for extra crunch; don’t skip it if you want that restaurant-style texture. For extra flavor, add 1/2 tsp of amchur (dry mango powder) to the spice mix. And if you’re feeling adventurous, swap half the potatoes for sweet potatoes—they add a subtle sweetness that pairs beautifully with the spices.
Store the raw potato mixture in an airtight container in the fridge for up to 2 days—it actually tastes better after resting. For the crispiest results, make the patties fresh and fry them immediately, but you can shape them ahead and refrigerate for 4 hours before cooking. Once fried, these tikki stay crisp for about 1 hour at room temperature, so serve them straight from the fryer. To reheat, pop them in a 350°F oven for 5-7 minutes—they’ll lose some crisp but still taste amazing. I always make a double batch and freeze half; they reheat beautifully straight from frozen.
Why You'll Love This Recipe
- Crispy Without Frying: The rice flour coating gives these tikki that perfect crunch—no deep fryer needed. I toss the mashed potato mix in a thin batter, then pan-fry until golden. Honestly, the difference in texture is night and day compared to the soggy versions I’ve tried.
- Spice-Packed Punch: Fresh ginger and green chilies cut through the potato’s richness, while cumin seeds add a toasty depth. Between us, the heat level is adjustable—mild for the kids, fiery for me. That first bite? Pure satisfaction, every time.
- Lunchbox Hero: These hold up beautifully for packed lunches—no reheating required. I make a double batch on Sundays, wrap them in foil, and they stay crispy until lunchtime. My daughter’s favorite, and she’s the toughest critic.
- Pantry Staple Magic: Russet potatoes and rice flour are always on hand, making this a budget-friendly staple. No specialty ingredients, no last-minute grocery runs. Plus, leftovers reheat like a dream—just a quick pan sear restores that golden crust.
Step-by-step instructions for aloo tikki recipe with rice flour
Here's how to make golden, crispy aloo tikki with that perfect crunchy exterior and tender center.
👨🍳 Step 1: Prepare the Spiced Potato Mixture
Start by grating the 2 lb russet potatoes using a box grater or food processor. I like to squeeze out excess moisture using a clean kitchen towel—this ensures your tikki won't be soggy. In a large bowl, combine the grated potatoes, 0.25 cup plain yogurt, 1 tbsp grated fresh ginger, 2 finely chopped green chilies, 1 tbsp toasted cumin seeds, 1.5 tsp garam masala, 1 tsp ground coriander, and 1 tsp salt.
Gently mix everything together with your hands—just until the spices are evenly distributed. The mixture should be soft but hold its shape when pressed. I know it seems weird to use your hands, but this helps bind the potatoes better than a spoon. Let the mixture sit for 10 minutes while you prepare the coating.
👨🍳 Step 2: Create the Crispy Coating
In a shallow bowl, whisk together the 0.5 cup rice flour, 1 tbsp cornstarch, and a pinch of salt. This combination gives you that signature crunch while keeping the tikki light. Add the 0.5 cup vegetable oil and 1 tbsp lemon juice to the flour mixture, stirring until it forms a thick, spreadable paste—like wet sand.
Here's the thing—this coating is what creates that irresistible crispy exterior. If it's too dry, add a splash of water; if too wet, add a bit more rice flour. The paste should cling to your fingers when you squeeze it. Keep this mixture covered while you shape the tikki.
🍳 Step 3: Shape and Coat the Tikki
Take about ½ cup of the potato mixture and shape it into a 3-inch round patty, about ½-inch thick. Press gently but firmly—too much pressure makes them dense. Place the shaped tikki on a plate and dip it into the flour-oil mixture, pressing lightly to adhere the coating evenly on all sides.
I like to make them about 3 inches wide and ½-inch thick—this size gives you that perfect balance of crispy edges and tender centers. Work quickly but carefully, as the coating sets fast. Arrange the coated tikki on a wire rack set over a baking sheet to allow air circulation on all sides.
🔥 Step 4: Pan-Fry to Golden Perfection
Heat ¼ inch of vegetable oil in a non-stick skillet over medium heat until it shimmers—about 350°F. Add 2-3 tikki at a time (don't overcrowd) and fry for 3-4 minutes per side until golden brown. You'll see the edges start to crisp—that's your signal to flip. The oil should sizzle gently but not smoke excessively.
Real talk: Don't rush this step. If the tikki browns too quickly, reduce the heat slightly. They're done when the exterior is deep golden brown and the center feels warm through when pressed gently. Transfer to a paper towel-lined plate to drain excess oil.
🔪 Step 5: Garnish and Serve Immediately
While still warm, sprinkle each tikki with 1 tablespoon of chopped fresh cilantro. The heat from the tikki will make the cilantro release its aroma, adding that fresh finish. Serve immediately with mint chutney, tamarind sauce, or even just a squeeze of lemon for that authentic street-food experience.
Here's the moment that matters: The contrast of crispy exterior with tender, spiced potato inside is what makes these tikki unforgettable. Enjoy them while they're hot—waiting just a few minutes will make that perfect crunch disappear. These taste even better the second time, so make extra!
Pro Tips For Making Aloo Tikki Recipe With Rice Flour
- Boil Potatoes Until Fork-Tender: Russets release starch when overcooked—your tikki batter will turn gluey if you don’t nail this. Test doneness by piercing with a fork: it should slide in easily but not fall apart. Drain immediately and spread on a tray to cool; cold potatoes mash smoother and absorb rice flour better.
- Toast Rice Flour First: Skip the raw flour—it’ll make your tikki dense and gummy. Dry-toast the rice flour in a pan over medium heat for 2-3 minutes until it smells nutty and smells faintly like popcorn. Let it cool before mixing; this step cuts down on oil absorption and adds a subtle crunch.
- Press Tikki Firmly: Loose tikki crumble when frying. After shaping, press each one hard with your palm—think of packing snow into a snowball. If it holds shape when flipped, it’s ready; if it falls apart, add 1 tablespoon more rice flour to the mix and reshape.
- Use Pre-Cooked Cumin: Whole cumin seeds need a head start. Toast them in a dry pan until they darken slightly (30 seconds), then grind them fresh. This cuts down on bitter aftertaste and ensures they release aroma while frying, not just when you bite in. (Yes, even if you’re impatient like me.)
Troubleshooting this dish
Dough Too Wet?
If your potato mixture feels too wet and sticks to your hands, squeeze out more moisture using a clean kitchen towel. For every ½ cup of excess liquid, add 1 tablespoon of rice flour to absorb it. I’ve found that russet potatoes release more moisture than Yukon golds—adjust accordingly. Let the mixture rest for 15 extra minutes to help the starches bind naturally. 💡
Crispy Exterior Failing?
For that signature crunch, ensure your coating is properly mixed—it should resemble wet sand. If the edges aren’t crisping, your oil might be too hot (375°F+ causes burning) or too cold (below 325°F makes them greasy). Test with a pinch of flour: if it sizzles immediately, lower the heat. Also, avoid crowding the pan—cook in batches for even browning. 🔥
Tikki Falling Apart?
This usually means the potato mixture isn’t binding well. Add 1 extra tablespoon of yogurt or 1 tablespoon of cornstarch to strengthen the structure. Press the patties gently but firmly when shaping—too much pressure makes them dense, but not enough causes crumbling. Chill the shaped tikki for 10 minutes before coating to help them hold together. ❄️
Oil Smoking Too Much?
If your oil is smoking excessively, it’s overheating and will burn the coating. Reduce heat to medium-low and let the oil return to 325-350°F before adding more tikki. Use a high-smoke-point oil like avocado or refined coconut oil for better stability. A thermometer helps, but if you don’t have one, watch for gentle sizzling—not aggressive bubbling. 🌡️
Uneven Cooking?
For perfectly even cooking, shape your tikki to the same size (3 inches diameter, ½-inch thick). Use a kitchen scale to portion the potato mixture (½ cup per tikki). If one side browns faster, flip it sooner—don’t wait for both sides to look ready. A non-stick skillet prevents sticking, but if yours isn’t cooperating, add a touch of oil to the pan before cooking. 🍳
Storing Leftover Tikki?
Let fried tikki cool completely, then store in an airtight container in the fridge for up to 2 days. Reheat in a 350°F oven for 5-7 minutes to restore crispiness. For longer storage, freeze uncooked shaped tikki on a tray, then transfer to a bag. Cook straight from frozen in the oven at 400°F for 12-15 minutes. Microwaving works but sacrifices crunch. 💫
Nutrition facts
Frequently asked questions
Why does rice flour make these tikki extra crispy?
Rice flour creates a delicate, lacy crust that's lighter than traditional wheat flour coatings. When combined with cornstarch and oil, it forms a crispy lattice that stays crunchy even after dipping. The starches in rice flour absorb moisture differently than wheat, creating that signature shatteringly crisp texture while keeping the interior tender. Think of it as a crispy, edible potato chip shell for your patty!
Can I make these tikki ahead of time?
Shape the patties and coat them, then refrigerate for up to 4 hours before cooking. For longer prep, freeze uncooked tikki on a tray, then transfer to a bag. Cook straight from frozen in a 400°F oven for 12-15 minutes—they'll be slightly less crisp but still delicious. The flavor actually improves after resting, as the spices meld together. Just don't freeze the cooked version unless you want to reheat them.
What's the best way to adjust the spice level?
Start with the green chilies as written, then adjust to taste. For milder heat, remove the seeds and membranes before chopping. Want more kick? Add ½ teaspoon of cayenne pepper or swap in serrano chilies. The garam masala already provides warmth—don't double it unless you love intense spice. Taste your potato mixture before shaping to ensure the balance is right. Remember, you can always add more chutney or yogurt to cool the heat when serving.
Are these tikki gluten-free?
Yes! This recipe uses only rice flour and cornstarch, making it naturally gluten-free. Just be sure to check your other ingredients (like garam masala blends) for hidden gluten. The texture remains perfectly crispy without wheat flour. For extra insurance, use certified gluten-free spices. These tikki work beautifully as a gluten-free appetizer or snack—just serve with tamarind sauce or mint chutney for dipping.
Can I bake these instead of frying?
You can try! Preheat oven to 425°F and brush the shaped tikki with oil before baking on a parchment-lined tray for 18-20 minutes, flipping halfway. They won't be as crispy as fried versions, but will still be flavorful. For better results, use an air fryer at 375°F for 10 minutes—this gives a closer crisp to frying. The key is higher heat and frequent flipping to ensure even browning.