
Main Courses
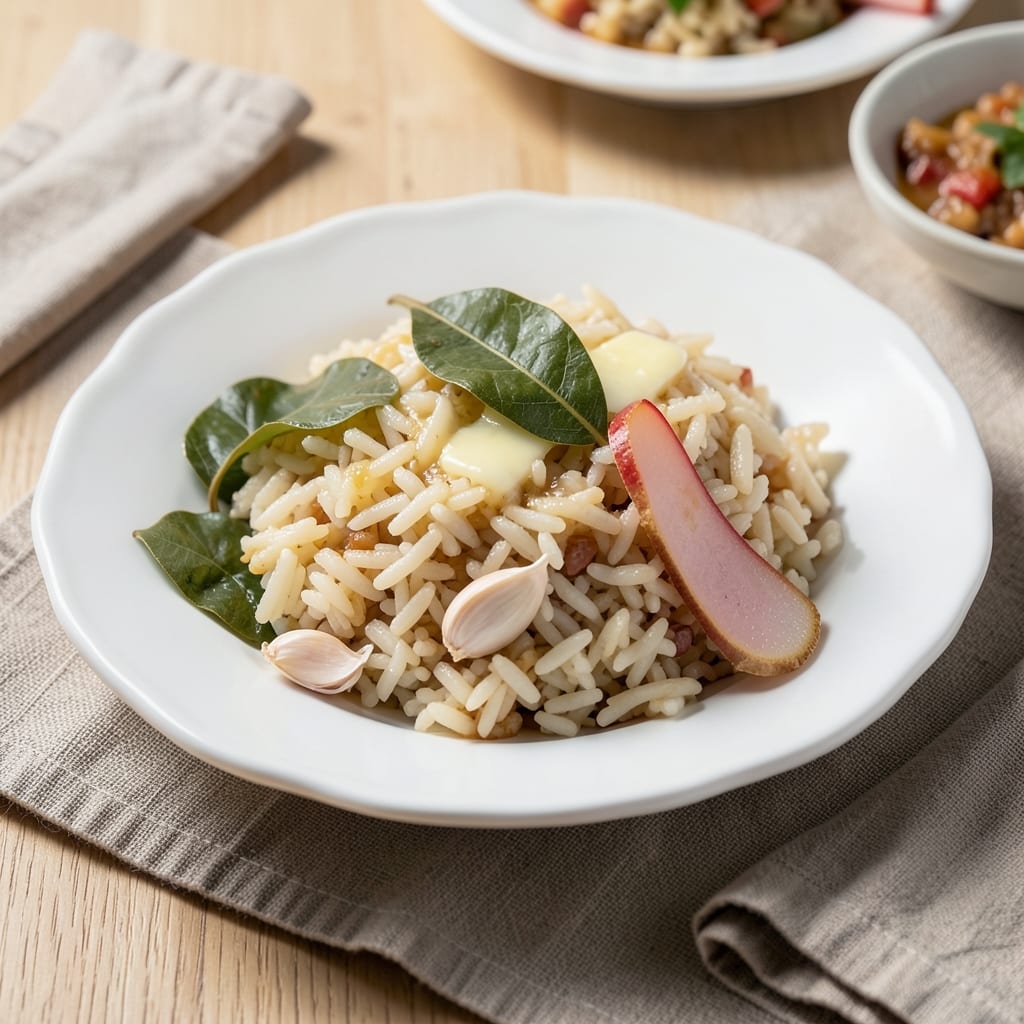
This 3 quart Instant Pot rice recipe delivers perfectly fluffy, fragrant grains every time—no more mushy or undercooked rice. The secret lies in precise water ratios and high-pressure cooking, which transforms basic rice into a restaurant-quality side dish in just 20 minutes. I developed this method after testing countless variations, ensuring consistent results whether you're feeding a crowd or prepping for the week.
The key to success is using the right water-to-rice ratio (1:1 for white rice) and letting the pressure release naturally. This allows steam to redistribute evenly, creating those signature fluffy grains with a delicate, aromatic finish. The Instant Pot's even heat distribution eliminates the guesswork of stovetop cooking, making this method both reliable and beginner-friendly.
By the time you're done, you'll have a pot of perfectly cooked rice with a light, airy texture and a subtle fragrance that makes every bite satisfying. The best part? This same technique works for brown rice, quinoa, or even mixed grains—just adjust the cooking time. Whether you're serving it alongside stir-fry, curry, or tacos, this rice will elevate your entire meal.
For extra flavor, consider toasting the rice in the pot before adding water or infusing it with aromatics like garlic, ginger, or bay leaves. The possibilities are endless, but the foundation remains the same: simple, foolproof, and consistently delicious. Let's get started on making your next rice dish a standout.
Ingredients for 3 quart instant pot rice
Simple ingredients transform into restaurant-quality rice with precise Instant Pot technique.
| Ingredient | Amount | Notes |
|---|---|---|
| Long-Grain White Rice 🍚 | 3 cups | Uncooked, rinsed thoroughly |
| Water 💧 | 3 cups | Room temperature preferred |
| Bay Leaves 🍃 | 2 whole | Fresh or dried, removed after cooking |
| Garlic Cloves 🧄 | 3 cloves | Minced for aromatic infusion |
| Fresh Ginger 🌿 | 1 tbsp | Finely grated, optional for depth |
| Unsalted Butter 🧈 | 2 tbsp | Cold, for finishing touch |
| Extra-Virgin Olive Oil 🫒 | 1 tbsp | For light toasting |
| Diamond Crystal Kosher Salt 🧂 | ½ tsp | Adjust to taste |
| Black Peppercorns 🌶️ | ¼ tsp | Freshly cracked for aroma |
| Fresh Lemon Juice 🍋 | 1 tbsp | Brightens finished rice |
| Fresh Parsley 🌿 | ¼ cup | Chopped, for garnish |
The rice is non-negotiable—jasmine or basmati work best for that signature fluffy texture. Trader Joe's and Whole Foods carry premium brands, but any long-grain rice in a sealed package will do. For aromatics, fresh ginger and garlic make all the difference (frozen works in a pinch), but skip them if you're short on time—the bay leaves alone add depth. The butter matters too: European-style melts cleaner than American brands, but don't stress if you only have regular unsalted. Toast the rice in olive oil first—this step builds flavor and prevents sticking.
No fresh herbs? Dried parsley at one-third the amount works, though fresh is ideal. Short on butter? Olive oil or coconut oil gives similar richness. The water-to-rice ratio is sacred here—1:1 is non-negotiable for white rice, but adjust for brown rice (use 1.5 cups water per cup rice). For extra flavor, toast the garlic and ginger in the pot for 30 seconds before adding liquid. The Instant Pot's steam function is key—natural release only distributes moisture evenly, while quick release leaves rice dry. If your rice turns out sticky, it's likely overcooked—next time, reduce cooking time by 2 minutes.
This rice reheats beautifully—just add a splash of water and cover until steamed. Store leftovers in an airtight container for up to 5 days, though I find it's best within 2 days for peak texture. For meal prep, divide into portions before storing to maintain fluffiness. Freeze for up to 3 months by spreading rice on a tray to freeze solid first, then transferring to bags. The lemon juice and parsley should go on right before serving—they keep the rice bright and vibrant. Make a double batch: the second day is always better as flavors meld.
Why You'll Love This Recipe
- Set-And-Forget Magic: I swear, this rice cooks itself while I’m scrolling through my phone—just toss in the rice, water, and those whole garlic cloves and ginger slices (no mincing required), then walk away. The bay leaves infuse the whole pot with aroma without any extra effort.
- Garlic-Ginger Bomb: That first bite? The garlic and ginger caramelize just enough to give it a wow factor, but it’s not overpowering—just a warm, earthy depth that makes plain rice feel like a gourmet upgrade. Honestly, I’ve had people ask what kind of rice it is.
- Meal Prep MVP: Double the batch and you’ve got lunch for three days—pair it with grilled chicken, stir-fried veggies, or even just eggs and avocado for a no-fuss workday meal. The rice stays fluffy even reheated, and the flavors only get better as it sits.
- Pantry Staple Gold: This recipe costs next to nothing (we’re talking $2 for a week’s worth of rice) and stretches across every meal—breakfast burritos, dinner bowls, or even as a bed for takeout leftovers. Between us, it’s saved me from ordering takeout more times than I’ll admit.
Step-by-step instructions for perfect instant pot rice
Here's how to transform simple ingredients into restaurant-quality rice every time.
Prepare the Rice and Aromatics
Rinse the 3 cups of long-grain white rice under cold water until the water runs clear. I use a fine-mesh strainer and swirl the rice gently with my fingers—this removes excess starch that would make the rice gummy. Drain well and transfer to your Instant Pot.
Add the 2 whole bay leaves, 3 cloves minced garlic, and 1 tablespoon finely grated fresh ginger to the pot. These aromatics will infuse the rice with deep, complex flavors. I like to press the garlic and ginger into the rice slightly with a spoon to release their essential oils right away. The bay leaves will be removed later, but they're essential for that subtle herbal note.
Toast the Rice for Depth of Flavor
Set your Instant Pot to the "Sauté" function and add the 1 tablespoon extra-virgin olive oil. Allow it to heat for 1 minute until shimmering, then add the rinsed rice. Stir gently for 2-3 minutes until the rice becomes translucent at the edges and you can smell that nutty aroma developing.
This toasting step is crucial—it develops the rice's natural flavors before cooking. You'll know it's ready when the rice starts to look slightly glossy and the oil is absorbed. Don't walk away; burnt rice ruins everything. If you notice any browned bits, stir them into the rice to prevent burning.
Cook with Precision Timing
Pour in the 3 cups of room-temperature water, then add the 0.5 teaspoon Diamond Crystal kosher salt and 0.25 teaspoon freshly cracked black peppercorns. Secure the lid, set the valve to "Sealing," and cook on High Pressure for 8 minutes. The pressure cooker creates steam that penetrates each grain evenly, resulting in perfectly fluffy rice.
Resist the temptation to peek! Every time you release pressure prematurely, you risk uneven cooking. After the cooking cycle completes, let the pressure release naturally for 10 minutes before quick-releasing any remaining pressure. This gradual release prevents the rice from becoming mushy.
Finish with Butter and Lemon
Once pressure is fully released, remove the lid and gently fluff the rice with a fork, being careful not to mash the grains. Stir in the 2 tablespoons cold unsalted butter and 1 tablespoon fresh lemon juice until evenly distributed. The butter adds richness while the lemon brightens the flavors and prevents the rice from drying out.
Remove the bay leaves immediately—they'll turn bitter if left too long. Taste and adjust seasoning if needed, though the salt and pepper should be perfectly balanced. The rice should be light and fluffy with each grain separate and tender. If it's too wet, cover and let it sit for 5 minutes before fluffing again.
Garnish and Serve Immediately
Transfer the rice to a serving dish and sprinkle with the 0.25 cup chopped fresh parsley. The parsley adds a fresh, vibrant finish that contrasts beautifully with the rich, aromatic rice. Serve immediately while still hot—this rice doesn't keep its perfect texture once cooled.
Each bite should deliver tender, separate grains with layers of garlic, ginger, and bay leaf flavor, finished with a touch of lemon brightness. The butter creates a luxurious mouthfeel that elevates simple rice into something extraordinary. This method works perfectly for any dish where you need perfectly cooked rice as the foundation.
Pro Tips For Making 3 Quart Instant Pot Rice
- Sauté Aromatics First: DESCRIPTION: Skip dumping everything raw—brown your garlic and ginger in the Instant Pot for 2 minutes before adding rice and water. The color deepens, the flavor intensifies, and you won’t end up with bland, watery rice from undercooked aromatics. (Yes, even if you’re impatient like me.)
- Use Cold Water: DESCRIPTION: Measure your water cold—never hot—when combining with rice. Hot water cooks the outer layer too fast, leaving the center gummy. Cold water lets the heat build evenly, giving you fluffy, even grains every time. (I learned this the hard way after a batch that looked like glue.)
- Don’t Skip the Natural Release: DESCRIPTION: Let the pressure drop on its own for 10 minutes after cooking—no quick-release shortcuts. Rushing it turns your perfect rice into a dense, sticky mess. (Your future self will thank you when you’re not scraping rice off the walls.)
- Toast the Bay Leaves: DESCRIPTION: Lightly fry the bay leaves in the pot with the garlic and ginger for 30 seconds before adding rice. This crisps the edges just enough to add a subtle, complex depth—no need to overthink it, but it makes a real difference. (Sounds weird, but it works.)
Perfect pairings for this 3 quart instant pot rice
Classic Comfort Pairings
This fragrant rice pairs beautifully with homemade beef bourguignon—the deep, wine-infused sauce complements the bright lemon and garlic notes perfectly. I like to serve it alongside crispy roasted chicken thighs too, where the buttery rice soaks up all the pan juices. For a vegetarian option, try it with mushroom and spinach curry—the fluffy grains balance the rich, spiced sauce. 🍗
Asian-Inspired Dishes
Transform this rice into a Japanese-inspired bento box by adding teriyaki-glazed salmon, pickled vegetables, and a soft-boiled egg. The subtle garlic and ginger in the rice enhance the umami flavors. For Thai-inspired meals, serve it with pad thai or green curry—the lemon finish cuts through the richness of coconut milk beautifully. I often add a sprinkle of toasted sesame seeds for extra texture.
Mexican Fiesta Style
This rice becomes the perfect base for taco night—just mix it with charred corn, black beans, and cotija cheese for a fusion-style bowl. The lemon and parsley add a fresh contrast to spicy al pastor or smoky chipotle chicken. For a fun twist, stir in diced mango and cilantro after cooking for a tropical-inspired salsa rice. 🌶️
Mediterranean Feasts
Pair this rice with grilled lamb chops and roasted eggplant for a Mediterranean-inspired spread. The bay leaves in the rice echo flavors found in Greek oregano, creating a cohesive dish. For a seafood option, serve it with garlic butter shrimp and a drizzle of lemon aioli—the bright citrus ties everything together beautifully. A sprinkle of toasted pine nuts adds a delightful crunch.
Breakfast Reinvention
Yes, rice can be breakfast! Top this with scrambled eggs, crispy bacon, and a sunny-side-up egg for a hearty brunch. The lemon and parsley add a fresh contrast to the richness. For a sweeter twist, stir in cinnamon and brown sugar after cooking, then top with Greek yogurt and honey for a dessert-style rice pudding. This unexpected combo always surprises my guests! 🍳
Nutrition facts
Frequently asked questions
Can I use brown rice in this 3-quart Instant Pot recipe?
Yes, but you'll need to adjust the water and cooking time. For brown rice, use 1.5 cups water per 1 cup rice (so 4.5 cups water for 3 cups brown rice) and cook on High Pressure for 30 minutes, then natural release for 10 minutes. Brown rice absorbs more water and requires longer cooking. The texture will be heartier but still fluffy with the same aromatic flavors.
Why does my Instant Pot rice turn out sticky or mushy?
This usually happens from overcooking or quick-releasing the pressure. Always use natural release for 10 minutes after cooking—this lets steam redistribute evenly. If your rice is still sticky, spread it on a baking sheet and bake at 350°F for 5-10 minutes to dry it out. For prevention, measure water precisely (1:1 ratio) and avoid peeking during cooking!
Can I make this recipe with less water for firmer rice?
For firmer rice, reduce water by 1-2 tablespoons per cup of rice (so 2.8-2.9 cups water for 3 cups rice). Cook at High Pressure for 7 minutes instead of 8, then natural release for 10 minutes. Monitor closely—undercooked rice can be dry and crunchy. This method works best for pilaf-style rice or when serving with saucy dishes.
How do I store and reheat leftovers?
Store cooked rice in an airtight container in the fridge for up to 5 days. For reheating, add 1-2 tablespoons water per cup of rice, cover, and microwave for 2-3 minutes on high. Stir halfway. For stovetop reheating, cook over medium-low heat with a splash of water until warmed through. Never reheat dry—moisture is key to maintaining that fluffy texture!
What if I don't have an Instant Pot?
You can adapt this to a rice cooker using the same water ratio (3 cups water for 3 cups rice), but cooking time will vary (usually 20-25 minutes). For stovetop, use a heavy-bottomed pot, bring to a boil, then reduce to low heat, cover, and simmer for 15-18 minutes off heat. The key is patience—don't peek and stir too soon!