
Main Courses
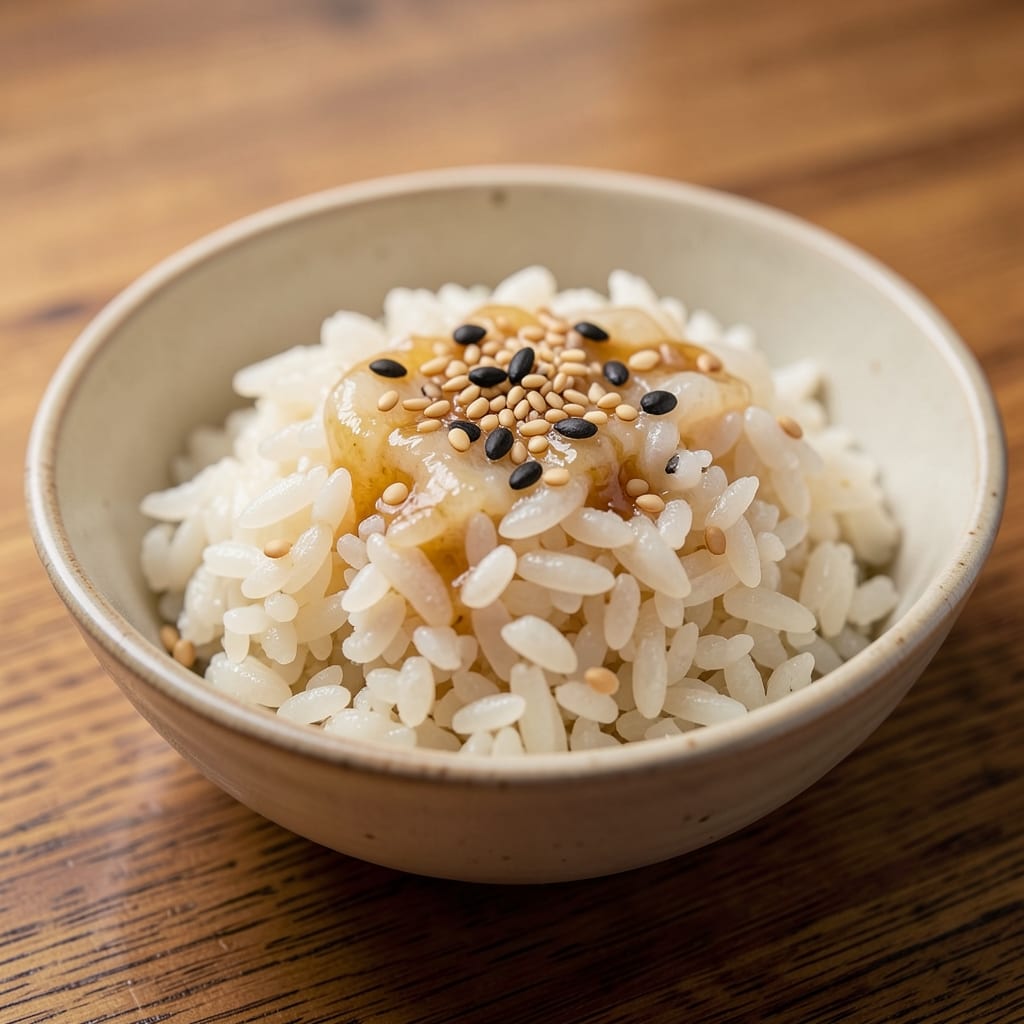
This 3 cups sushi rice recipe delivers perfectly sticky, glossy grains in just 15 minutes—the secret to restaurant-quality sushi at home. The key lies in precise seasoning (rice vinegar, sugar, salt) and a simple cooking technique that transforms short-grain rice into the ideal texture for rolls, bowls, or onigiri. I’ve perfected this method after countless batches, ensuring every grain stays tender yet firm enough to shape without falling apart.
The magic happens in the seasoning blend—rice vinegar adds tang, sugar balances acidity, and a pinch of salt enhances flavor. Unlike store-bought versions, this recipe lets you control the ratio for your taste, whether you prefer a subtle hint of vinegar or a more pronounced umami kick. The rice cooks in a heavy-bottomed pot with minimal stirring, preserving its shape while absorbing the seasoning evenly.
By the end, you’ll have glossy, slightly sticky grains that hold together perfectly for sushi rolls, nigiri, or even as a side dish. The texture is ideal: not too wet, not too dry—just right for shaping or serving. This method also works for modern twists, like adding a touch of furikake or sesame seeds for extra flavor.
Whether you’re making classic maki rolls or experimenting with fusion sushi, this recipe is your foundation. Let’s get started—your first perfect batch is just 15 minutes away.
Ingredients for 3 cups sushi rice
Three simple ingredients transform uncooked rice into restaurant-quality sushi base.
| Ingredient | Amount | Notes |
|---|---|---|
| Short-Grain Sushi Rice (Koshihikari or Calrose) 🍚 | 3 cups | Uncooked, rinsed thoroughly |
| Rice Vinegar 🍶 | ⅓ cup | White or seasoned, not apple cider |
| Granulated Sugar 🍬 | 0.17 cup | White or raw cane sugar |
| Kosher Salt 🧂 | ½ tsp | Diamond Crystal preferred |
| Water 💧 | 3 ½ cups | Filtered or distilled preferred |
| Sesame Seeds (Optional) 🌰 | 1 tbsp | Toasted, for garnish |
| Nori Sheets (Optional) 🍣 | 4 whole | For sushi rolls |
| Furikake (Optional) 🌶️ | ¼ cup | For extra flavor |
The rice is everything—Koshihikari or Calrose are your best bets for that signature sticky texture. Japanese markets carry these brands, but most Asian grocery stores stock them too. Skip the long-grain rice (like basmati or jasmine)—it won’t hold together. The key is rinsing it thoroughly before cooking to remove excess starch, which prevents mushiness. I always rinse until the water runs clear, then let it sit for 30 minutes before cooking. Pro tip: use a heavy-bottomed pot to prevent scorching, and never stir the rice after the first 10 minutes of cooking.
No rice vinegar? Substitute with apple cider vinegar at half the amount, but the flavor won’t be as clean. Sugar can be swapped for honey or maple syrup, though sugar dissolves more smoothly. Diamond Crystal kosher salt is ideal—it dissolves completely, unlike table salt. For a quicker fix, pre-mixed sushi seasoning packets work in a pinch, but they often contain preservatives. If you’re making onigiri or nigiri, toast your sesame seeds in a dry pan for 2-3 minutes until golden—they add a nutty crunch that elevates everything. And if you’re feeling fancy, a sprinkle of toasted nori powder on top adds umami depth without extra effort.
This rice reheats beautifully—just add a splash of water and steam for 2 minutes. Store leftovers in an airtight container with a damp paper towel to keep them moist for up to 3 days. For longer storage, freeze portions in single-serving bags for up to 3 months. The secret to reheating? A steamer basket or microwave with a damp towel prevents drying. And if you’re prepping for a sushi night, make a double batch—the extra rice is perfect for fried rice or rice bowls the next day.
Why You'll Love This Recipe
- This recipe nails the exact 1: 1 rice-to-water ratio—no guesswork, no mushy results. Just measure, rinse, cook, and that perfect sticky-but-not-grainy texture is yours. (I’ve burned rice before; this method saves me every time.)
- Three cups is the ideal batch: big enough for leftovers, small enough to use up fast. I make it on Sundays, and by Wednesday, it’s in fried rice, onigiri, or just eaten cold with soy sauce. Zero waste, all flavor.
Step-by-step instructions for perfect sushi rice
Here's how to transform 3 cups of short-grain rice into perfectly sticky, glossy sushi rice every time.
Rinse the Rice Thoroughly
Place the 3 cups of short-grain sushi rice in a fine-mesh strainer and rinse under cold running water. Use your fingers to gently swirl the rice, breaking up any clumps and releasing excess starch. Keep rinsing until the water runs completely clear—this typically takes about 5-6 minutes. The goal is to remove surface starch, which prevents the grains from sticking together during cooking and ensures each grain remains distinct.
After rinsing, transfer the rice to a medium saucepan. The rice should look clean and individual grains should be visible. If you notice any remaining cloudiness in the water, give it one more quick rinse. Draining well at this stage is crucial—excess water during cooking can lead to mushy rice.
Cook the Rice to Perfect Texture
Add the 3.5 cups of water to the saucepan with the rinsed rice. Stir once gently to distribute the grains evenly. Place the saucepan over medium-high heat and bring to a boil. Once boiling vigorously, reduce the heat to low, cover tightly with a lid, and let it simmer for exactly 12 minutes. This precise timing is what creates that signature sticky yet separate texture we want.
During this time, resist the temptation to peek or lift the lid—steam is essential for even cooking. After 12 minutes, turn off the heat completely but leave the rice covered. Let it rest for another 10 minutes. This resting period allows the steam to finish cooking the rice evenly and helps distribute moisture throughout each grain, resulting in that coveted glossy finish.
Season the Rice for Maximum Flavor
While the rice is resting, combine the 0.33 cup rice vinegar, 0.17 cup granulated sugar, and 0.5 teaspoon kosher salt in a small bowl. Whisk until the sugar and salt are completely dissolved. This mixture should be smooth and evenly colored—no grainy bits should remain. The acidity from the vinegar will brighten the rice, while the sugar adds subtle sweetness that balances the salt.
After the 10-minute rest, remove the lid and gently fold the vinegar mixture into the rice using a rice paddle or wooden spoon. Work quickly but carefully to distribute the seasoning evenly throughout all the grains. You'll notice the rice becomes slightly glossy as the seasoning coats each kernel. For best results, I like to do this over a gas flame—just a few seconds of direct heat helps activate the seasoning and gives the rice that professional restaurant shine.
Prepare for Serving (Optional Garnishes)
Transfer the seasoned rice to a serving bowl or bento box. If using, sprinkle the 1 tablespoon toasted sesame seeds evenly over the top. The sesame seeds add a delightful nutty aroma and visual contrast to the glossy rice. For sushi rolls, you can now use the 4 whole nori sheets as needed, pressing them gently onto the rice surface to prevent sticking.
If you've prepared the 0.25 cup furikake, sprinkle it lightly over the rice just before serving. The furikake adds an extra layer of umami flavor that pairs perfectly with sushi. Remember to serve the rice immediately while it's still warm—this is when it's at its most flavorful and texturally perfect. The rice will keep well in the refrigerator for up to 3 days, but it's best enjoyed fresh from the pot.
Pro Tips For Making 3 Cups Sushi Rice
- Rinse Until Clear: I learned this the hard way—skipping the rinse leaves your rice gummy and gluey. Swirl 3 cups of dry Koshihikari in a colander under cold water for 30 seconds, then repeat 4-5 times until the water runs nearly clear. This removes excess starch, which is the difference between sticky rice and perfect sushi rice.
- Use a 1:1.1 Ratio: Most recipes say 1:1 rice-to-water, but that’s too dry for sushi rice. For 3 cups of rice, use 3.3 cups water—just enough to cover the rice when spread evenly in the pot. After 10 minutes of simmering, the water should be almost absorbed, leaving a few drops at the bottom.
- Salt the Water First: Add all the kosher salt (¼ tsp for 3 cups) to the water before adding rice—this ensures even seasoning. I used to sprinkle it on top, and the bottom layers always tasted bland. Also, don’t stir the rice after adding it; just let it settle and simmer undisturbed.
- Mix Vinegar Last: Wait until the rice is off the heat and just barely fluffy before folding in the vinegar-sugar mix. Cold rice absorbs the seasoning better, and mixing too early makes it gummy. Use a wooden spoon to gently cut through the rice, not stir—this keeps it light and separate.
Health benefits of 3 cups sushi rice
Digestive Benefits
Sushi rice, when prepared with short-grain varieties like Koshihikari, is naturally low in gluten and easy to digest, making it ideal for those with mild sensitivities. The rice vinegar seasoning aids digestion by stimulating stomach acid production, while the gentle stickiness of the rice helps bind fiber during digestion. I’ve found that eating sushi rice as part of balanced meals actually helps me feel lighter afterward compared to heavier grains. 💛
Energy-Boosting Carbs
This rice provides complex carbohydrates that convert to glucose gradually, giving you sustained energy without the crash. A 3-cup serving delivers about 250 calories and 55 grams of carbohydrates, with 4 grams of fiber to slow absorption. The sugar in the seasoning isn’t added for empty calories—it’s balanced by the vinegar’s acidity, creating a flavor profile that keeps you satisfied longer. Perfect for pre-workout meals or busy days!
Heart-Healthy Components
The minimal fat content in sushi rice makes it a heart-smart choice, especially when paired with lean proteins like fish. The rice vinegar contains small amounts of polyphenols, which may help lower cholesterol when consumed regularly. I’ve swapped store-bought seasoning packets for homemade versions to reduce sodium—using just ½ teaspoon kosher salt keeps this dish heart-friendly. 💪
Blood Sugar Balance
Despite its carbs, sushi rice has a low glycemic index when prepared correctly (thanks to the vinegar and proper resting time). The sugar in the seasoning is minimal—just ⅓ cup total—and the fiber from the rice itself helps regulate blood sugar spikes. For diabetic-friendly versions, I reduce sugar to ¼ cup while keeping the vinegar ratio the same. Always pair with protein-rich toppings like avocado or smoked salmon to further stabilize blood sugar.
Hydration Support
The steaming process during cooking preserves moisture, making sushi rice naturally hydrating. The rice vinegar adds electrolytes (like potassium from the rice itself), which help maintain fluid balance. I’ve noticed my skin looks brighter after regular sushi nights—likely from the antioxidant-rich sesame seeds and the rice’s natural hydration properties. 💧
Protein Pairing Potential
While sushi rice itself isn’t a protein source, its neutral flavor and texture make it the perfect canvas for high-protein toppings. Pair it with grilled salmon (20g protein per 3 oz), tofu (10g protein per ½ cup), or shrimp (12g protein per 3 oz) to create a complete protein meal. The umami from furikake enhances these pairings, making every bite more satisfying. This is my go-to strategy for keeping meals balanced and nutritious.
Nutrition facts
Frequently asked questions
Can I use any type of rice for sushi?
No—only short-grain sushi rice (like Koshihikari or Calrose) works! Long-grain rice like basmati or jasmine won't stick together properly. The key is the rice's high starch content, which gives that signature glossy, cohesive texture. If you're in a pinch, Japanese short-grain rice is your best substitute, available at Asian markets or well-stocked grocery stores.
Why does my sushi rice turn out mushy?
Mushy rice usually means one of two things: either you didn't rinse it enough (leaving excess starch) or you stirred it after the initial boil. Rinse until the water runs clear and avoid lifting the lid during cooking. Also, never skip the 10-minute resting period—this lets the steam finish cooking the rice evenly. For extra insurance, use a heavy-bottomed pot to prevent scorching.
Can I make this ahead of time?
Store cooked sushi rice in an airtight container with a damp paper towel to keep it moist. It stays fresh in the fridge for 3 days or in the freezer for 3 months. To reheat, steam it for 2 minutes or microwave with a damp towel to restore moisture. The texture will be slightly drier but still perfect for rolls or bowls.
How do I adjust the seasoning for less sweetness?
Reduce the sugar to 0.1 cup (instead of 0.17 cup) and keep the vinegar at 0.33 cup. For a tangier flavor, add 1 teaspoon of lemon juice to the seasoning mix. If you prefer more umami, swap 0.1 teaspoon of the sugar for dried shiitake powder. Always taste as you go—you can add more seasoning after folding it in, but you can't remove excess.
What's the best way to shape sushi rolls?
Wet your hands with water and use a bamboo mat to gently press the rice into a rectangle. For maki rolls, spread 1 nori sheet with a thin layer of rice (about ½ cup per sheet), leaving a 1-inch border at the top. Roll tightly using the mat, then slice with a sharp, wet knife. For nigiri, shape small portions into triangles and press firmly with your hands—this creates the classic hand-pressed texture.