
Main Courses
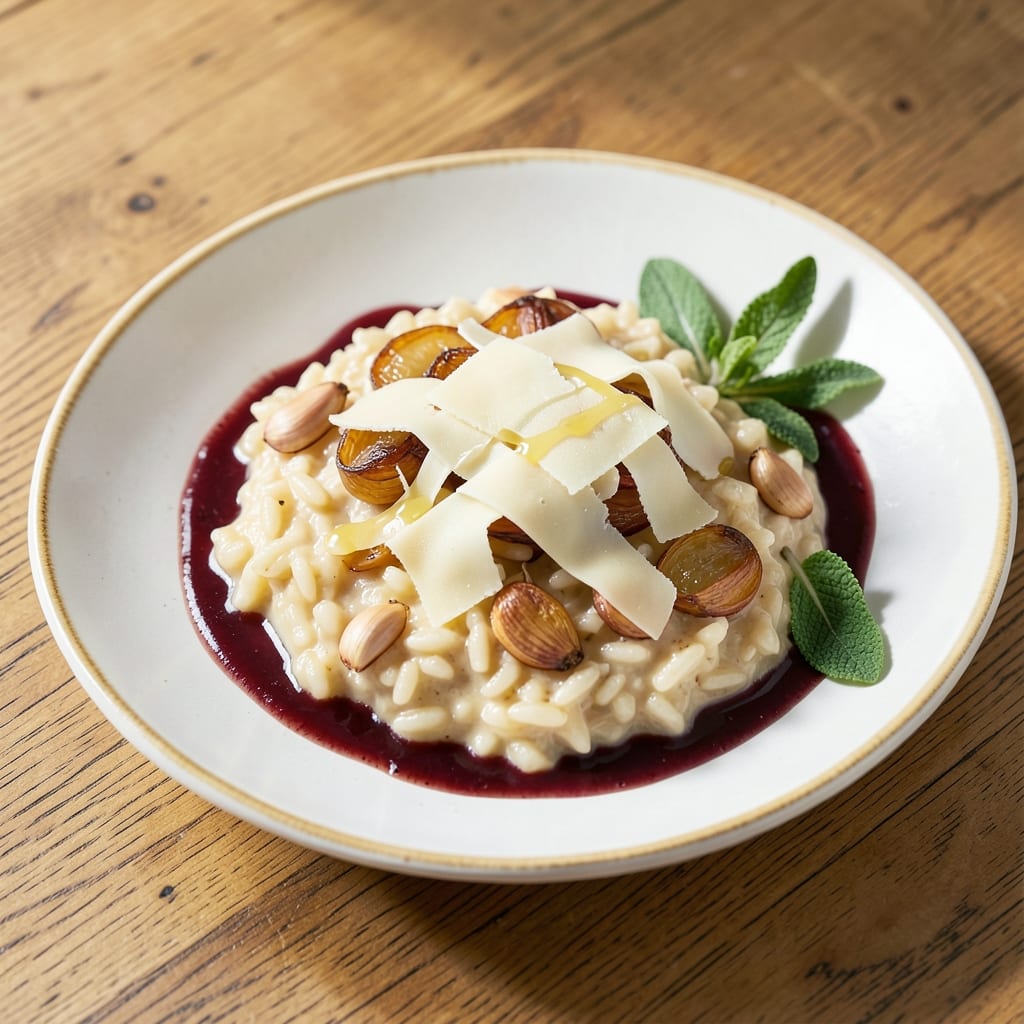
This Asiago rice recipe transforms simple Arborio rice into a luxurious, one-pan dish where creamy melted cheese meets nutty toasted herbs. The secret lies in slow-cooking the rice in rich broth until tender, then finishing it under the broiler for that perfect golden crust. I developed this recipe after craving something comforting yet elegant—something that feels restaurant-worthy but comes together in under an hour.
The magic happens in layers: first, the rice absorbs flavorful broth while developing a satisfying al dente texture, then the Asiago cheese melts into a velvety blanket, and finally, the broiler creates crispy, caramelized edges. This dish is versatile enough to stand alone as a main course or pair beautifully with grilled proteins or fresh greens. The combination of nutty Asiago, aromatic herbs, and buttery rice creates a dish that's both hearty and refined.
What you'll end up with is a dish that's rich, creamy, and packed with flavor—each bite delivering a perfect balance of cheesy indulgence and herby brightness. The texture is what sets this apart: tender rice with pockets of melted cheese and a crispy top layer that adds just the right contrast. It's the kind of meal that feels special without requiring complicated techniques or ingredients.
Optional variations include adding white wine for depth, tossing in roasted vegetables for extra texture, or sprinkling fresh herbs for a pop of color. This recipe is perfect for weeknight dinners, holiday gatherings, or anytime you want to impress with minimal effort. Let's get started on creating this comforting, cheesy masterpiece.
Ingredients for asiago rice
These 13 ingredients transform simple rice into a restaurant-worthy, cheesy, herby masterpiece.
| Ingredient | Amount | Notes |
|---|---|---|
| Arborio Rice 🍚 | 1 ½ cups | Unrinsed for creamy texture |
| Asiago Cheese 🧀 | 2 cups | Grated, aged variety preferred |
| Chicken Broth 💧 | 2 ½ cups | Low-sodium, homemade or high-quality |
| Butter 🧈 | 4 tbsp | Unsalted, cut into small pieces |
| White Wine 🍷 | ½ cup | Dry, optional for depth |
| Garlic Cloves 🧄 | 4 cloves | Minced, fresh preferred |
| Shallots 🧅 | 2 whole | Thinly sliced, or sub onions |
| Fresh Thyme 🌿 | ¼ cup | Leaves only, chopped |
| Fresh Rosemary 🌿 | ⅛ cup | Needles only, chopped |
| Salt 🧂 | 1 ½ tsp | Kosher or sea salt |
| Black Pepper 🌶️ | ½ tsp | Freshly ground preferred |
| Olive Oil 🫒 | 1 tbsp | For finishing, extra-virgin |
| Parmesan Cheese 🧀 | ¼ cup | Freshly grated, for garnish |
The Asiago cheese is non-negotiable here—it's what gives this dish its signature nutty, creamy depth. Look for aged Asiago at specialty cheese shops or well-stocked grocery stores—the kind with visible crystals and a vibrant yellow hue. If you can only find young Asiago, age it yourself by grating and letting it sit uncovered in the fridge for 24 hours. The Arborio rice should be short-grain and starchy; brands like Lidio or Barilla are my go-tos. For the broth, homemade is ideal, but Pacific Foods or Swanson low-sodium are solid store-bought options. Don't skip the butter—it's what makes this rice velvety. Use Plugra unsalted if you want to be precise with your seasoning.
No white wine? Extra chicken broth or vegetable stock works just fine—just reduce the liquid slightly. Fresh herbs are ideal, but if you're using dried, reduce to one-third the amount. For example, 1/4 cup fresh thyme becomes 1 teaspoon dried. The shallots can be swapped for onions, but they add a more delicate sweetness. If you're feeling adventurous, toss in sautéed mushrooms or roasted cherry tomatoes for extra texture. The garlic should be minced finely—a food processor makes quick work of it. And if you're worried about the dish being too rich, add a splash of lemon juice at the end for brightness.
This dish reheats beautifully—just add a splash of broth or water and cover tightly. It keeps well in the fridge for 3-4 days, though I find it's best enjoyed within the first two. For meal prep, portion into individual containers and reheat only what you need. The cheese will separate slightly when reheated, but a quick broil under the oven's broiler setting brings back that perfect golden crust. Freezes for up to 3 months, though the texture might get a bit grainy. If you're making this ahead for a party, assemble it just before serving and broil for 3-5 minutes—that crispy top is everything.
Why You'll Love This Recipe
- No Pansy Prep: I swear by this—just toast the rice in butter, splash in wine, and let the broth do the work. No stirring like a maniac, no constant checking. The Asiago melts in like a dream, and honestly? I’ve made this while scrolling through my phone.
- Umami Bomb: That first bite of creamy, nutty Asiago with the toasty Arborio edges? Ridiculously good. The wine cuts through the richness, and the broth keeps it from being heavy. It’s the kind of flavor that makes you reach for seconds without thinking.
- Weeknight to Weekend: Same recipe, different vibes. Serve it with grilled chicken for a Tuesday dinner, or pile it high on a charcuterie board for a Sunday brunch. Between us, I’ve even used it as a fancy side for steak night—no one ever guessed it was this easy.
- Leftovers That Don’t Suck: Most rice turns to mush, but this? Reheats like a champ. Toss it in a skillet with a little extra butter, and it’s just as good the next day. Budget-friendly too—one batch feeds four, and the cheese stretches further than you’d think. My secret weapon for lazy lunches.
Step-by-step instructions for Asiago rice with toasted herbs
This creamy, cheesy rice comes together in one pan with minimal effort but maximum flavor.
Sauté Shallots and Garlic Until Fragrant
Heat the 1 tablespoon olive oil in a large, deep skillet over medium heat. Add the 2 whole sliced shallots and cook for 3-4 minutes until they soften and turn translucent. Here's the thing—don't rush this step. You want the shallots to caramelize slightly, adding depth to the rice.
Add the 4 cloves minced garlic and cook for another 30 seconds until the aroma fills your kitchen. You'll know it's ready when the garlic turns golden and stops smelling raw. Remove the pan from heat for just a moment—this prevents burning while you prepare the next ingredients.
Toast the Rice with Butter and Herbs
Return the skillet to medium heat and add 2 tablespoons of the butter. Toss in the 1.5 cups unrinsed Arborio rice, stirring constantly for 2-3 minutes until the grains turn translucent at the edges. This toasting step releases the rice's natural starches, creating that signature creamy texture.
Add the 0.25 cup chopped fresh thyme and 0.125 cup chopped fresh rosemary, stirring for 30 seconds until fragrant. The herbs will infuse the rice with their earthy aroma, but don't let them burn—watch closely as they darken quickly. This is where the magic begins.
Deglaze with Wine and Add Broth
Pour in the 0.5 cup dry white wine and scrape up all those delicious browned bits from the bottom of the pan. Let it simmer for 1-2 minutes until mostly evaporated—this prevents a watery rice. Then add 1 cup of the chicken broth and stir well.
Bring to a gentle simmer, then reduce heat to low. Here's the critical part: cover the pan with a tight-fitting lid and cook for 10 minutes without stirring. This allows the rice to absorb the liquid evenly and develop that perfect al dente texture. If the broth evaporates too quickly, add more later.
Layer in Cheese and Finish with Remaining Broth
After 10 minutes, remove the lid and stir in 1 cup of the grated Asiago cheese. The cheese should melt into the rice, creating pockets of gooey goodness. Add the remaining 1.5 cups chicken broth and the 0.5 tsp black pepper. Return to a simmer and cook uncovered for another 8-10 minutes until the rice is tender but still slightly firm to the bite.
Real talk: your rice should be creamy but not mushy. If it's too dry, add a splash of broth. If it's too wet, uncover and cook longer. The cheese should be melted but not stringy—this means you've hit the perfect balance.
Finish with Butter and Fresh Herbs
Remove from heat and stir in the remaining 2 tablespoons butter until melted and creamy. This final step adds richness and helps distribute the cheese evenly. Sprinkle with the 0.25 cup freshly grated Parmesan cheese and the 1.5 tsp salt, stirring gently to combine.
Let the rice rest for 5 minutes before serving—this allows the flavors to meld and the texture to set just right. Garnish with extra fresh thyme or rosemary if you're feeling fancy. The result? A creamy, cheesy rice that's perfect for any occasion.
Pro Tips For Making Asiago Rice
- Toast the Rice First: Heat your dry Arborio rice in a dry pan for 1-2 minutes until it smells nutty and the edges turn translucent. This step deepens the flavor and prevents the rice from turning mushy—trust me, your taste buds will notice the difference, especially when paired with that rich Asiago. ---
- Grate the Asiago Fresh: Skip the pre-shredded stuff—it’s coated in anti-caking agents that make the cheese clump and lose its melt. Use a box grater for fine, even shreds, and add the cheese in stages so it melts smoothly into the rice instead of sitting in clumps. (Yes, it’s a pain, but the texture is worth it.) ---
- Keep the Wine Moving: Don’t just dump the wine in and stir once. After adding the white wine to the rice, keep it on medium heat and stir constantly for 2-3 minutes until it’s nearly fully evaporated—this builds the creamy base without making the rice watery. (I used to rush this, and the dish always tasted flat.) ---
- Finish with Cold Butter: Stir in 1-2 tablespoons of cold butter at the very end, off the heat. The contrast in temperature makes the rice glossy and coats each grain evenly—no need for extra oil or a greasy finish. (Sounds weird, but it works: the butter melts instantly and binds everything together.)
Pro cooking tips for this dish
Cheese Melting Mastery
To achieve that perfect creamy yet slightly crispy cheese texture, I swear by the low-and-slow method for the first cheese addition. Stir in 1 cup grated Asiago when the rice has absorbed the initial broth, then let it melt gently at low heat for 2-3 minutes before adding the remaining broth. This gradual melting prevents clumping and creates those beautiful pockets of gooey goodness throughout the rice. 🧀
Broth Ratio Precision
Use a 1:1.5 ratio of rice to liquid (1.5 cups rice to 2.5 cups broth total) for ideal texture. Start with 1 cup broth after the wine deglazing, then add the remaining 1.5 cups after the first cheese addition. If your rice finishes too dry, add a splash of warm broth—never cold, as it shocks the rice and creates a gummy texture. I keep a small saucepan of warm broth on standby for exactly this reason.
Herb Toasting Tricks
Fresh herbs need just 30 seconds of toasting to release their aromatic oils—any longer and they'll turn bitter. I like to toast the thyme and rosemary separately in the butter before adding the rice: cook the thyme first, then remove and set aside, then toast the rosemary in the same butter. This layered approach prevents overcooking while maximizing flavor. 🌿
Broiler Finish Secret
For that golden, crispy top layer, transfer the rice to a baking dish and broil on high for 2-3 minutes—watch it like a hawk! The broiler should be 6 inches from the heat source for even browning. I like to sprinkle an extra 2 tablespoons grated Asiago on top right before broiling for maximum crispiness. This step transforms ordinary rice into something restaurant-worthy.
Pan Selection Matters
Use a heavy-bottomed Dutch oven or deep skillet (like Le Creuset or All-Clad) to prevent scorching and ensure even heat distribution. A 12-inch cast iron skillet works perfectly—just make sure it's large enough to accommodate the rice as it expands. If your pan is too small, the rice will boil over and create a messy cleanup. I've learned this the hard way!
Resting Time Non-Negotiable
Let the rice rest for 5 minutes after cooking before serving—this crucial step allows the starches to set and the flavors to meld. During this time, I like to tent the pan loosely with foil to keep it warm. Skipping this step results in a gummy, uneven texture. Trust me, your taste buds will thank you for the patience. ⏳
Nutrition facts
Frequently asked questions
Can I substitute Asiago cheese with another type?
Yes! While Asiago provides that signature nutty depth, you can use Parmigiano-Reggiano for a sharper flavor or Gruyère for extra creaminess. For a vegetarian option, try vegan Parmesan or nutritional yeast (though texture will differ). The key is aged, hard cheese—avoid soft cheeses like mozzarella as they won't melt properly.
Why did my rice turn out mushy?
Mushy rice usually happens from overcooking or too much liquid. Stick to the 1:1.5 rice-to-broth ratio and uncover the pan for the last 8-10 minutes to evaporate excess moisture. Also, avoid stirring too much—this releases starches prematurely. For extra insurance, use 1/2 cup less broth if your pan is small.
Can I make this dish ahead of time?
This rice actually tastes better the next day. Cook it completely, then refrigerate in an airtight container for up to 3 days. Reheat with 2 tablespoons broth per cup of rice, covered on low heat. For the crispy top, broil for 2-3 minutes right before serving. The flavors meld beautifully overnight!
What's the best way to add protein?
Grilled chicken, shrimp, or crispy prosciutto work beautifully. For a vegetarian option, try sautéed mushrooms or roasted vegetables (like bell peppers or zucchini) mixed in during the last 5 minutes of cooking. Keep proteins separate until serving if you prefer them warm and crispy.
How do I prevent the cheese from separating?
Use low heat when melting cheese and stir gently to distribute it evenly. For extra insurance, mix 1 tablespoon cornstarch with 2 tablespoons cold water and stir it into the rice during the last 2 minutes of cooking. This creates a natural thickener that keeps everything cohesive.