
Main Courses
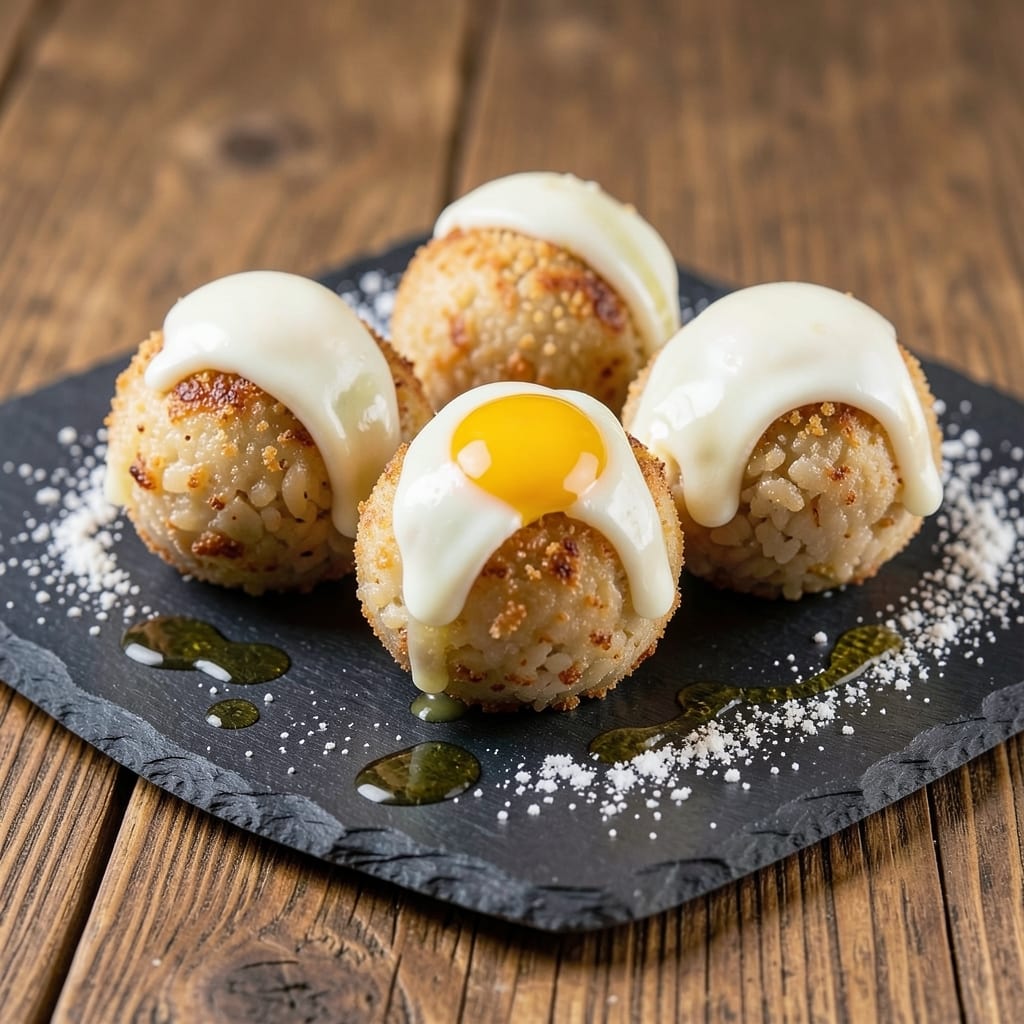
Arborio rice balls recipe transforms humble risotto into crispy, golden bites with a gooey mozzarella surprise inside—this is the dish that proves comfort food can be restaurant-worthy. The secret lies in perfectly cooked arborio rice, bound with melted cheese and breadcrumbs, then fried to a crispy shell that gives way to creamy, cheesy goodness. I've perfected this technique after countless batches, ensuring every bite delivers that satisfying crunch and melt-in-your-mouth texture.
What sets these rice balls apart is the balance between technique and simplicity—no special equipment needed, just a few key ingredients and a method that guarantees foolproof results. The rice must be cooked al dente and still slightly firm, while the mozzarella should be warm and stretchy when stuffed. This isn't just another appetizer; it's a showstopper that transforms any meal into something special.
By the time you're done, you'll have a plate of golden, crispy rice balls with gooey mozzarella hearts peeking through—each bite is a perfect harmony of textures and flavors. The exterior stays crunchy while the inside remains creamy and rich, making these irresistible as appetizers, party snacks, or even a hearty main course when served in a bowl.
These rice balls reheat beautifully, making them perfect for meal prep or gatherings. Whether you're serving them at a dinner party or enjoying them as a quick snack, this recipe delivers professional-quality results with minimal effort. Let's get started on creating these golden, cheesy bites that everyone will love.
Ingredients for arborio rice balls
Perfectly cooked arborio rice, creamy mozzarella, and crispy panko transform simple ingredients into restaurant-worthy bites.
| Ingredient | Amount | Notes |
|---|---|---|
| Arborio Rice 🍚 | 1 ½ cups | Uncooked, cooked al dente |
| Fresh Mozzarella Cheese 🧀 | 12 oz | Low-moisture preferred, sliced |
| Panko Breadcrumbs 🍞 | 1 ½ cups | Japanese-style for extra crunch |
| Large Eggs 🥚 | 2 whole | Room temperature for binding |
| All-Purpose Flour 🌾 | ½ cup | For coating rice balls |
| Vegetable Oil 🫒 | 3 cups | For deep frying, high smoke point |
| Granulated Garlic Powder 🧄 | 1 tbsp | For seasoning coating |
| Granulated Onion Powder 🧅 | 1 tbsp | For seasoning coating |
| Diamond Crystal Kosher Salt 🧂 | ½ tsp | For seasoning coating |
| Freshly Ground Black Pepper 🌶️ | ¼ tsp | For seasoning coating |
| Parmesan Cheese 🧀 | ¼ cup | Freshly grated, for topping |
| Fresh Basil Leaves 🌿 | ¼ cup | Chopped, for garnish |
| Vegetable Broth 💧 | 2 cups | For risotto cooking |
| White Wine 🍷 | ½ cup | Dry variety for risotto |
The arborio rice is the foundation—look for short-grain varieties labeled specifically for risotto, like Carnaroli or Vialone Nano. Whole Foods or specialty Italian markets carry the best quality, though most grocery stores stock arborio. For the mozzarella, low-moisture is critical—it melts beautifully without making the rice balls soggy. I always grab Galbani or BelGioioso from the deli section, pre-sliced for convenience. The panko should be Japanese-style—it stays crispy far better than regular breadcrumbs. If you can't find it, toast regular breadcrumbs in a dry pan for 3-4 minutes to mimic the texture.
No panko? Toasted breadcrumbs with a pinch of baking powder work in a pinch—the baking powder adds lift. Running low on fresh mozzarella? Shredded mozzarella from a block (not pre-shredded) melts better, though it releases more liquid. The vegetable oil is non-negotiable for frying—high smoke point oils like avocado or canola prevent burning. For the risotto base, dry white wine adds depth, but a splash of apple cider vinegar works if you're avoiding alcohol. The garlic and onion powders should be freshly ground—pre-ground spices lose potency quickly. If you're short on time, toast whole spices in a dry pan for 30 seconds to revive their flavor.
Store cooked rice balls in an airtight container between layers of parchment paper to maintain crispiness for up to 3 days. For longer storage, freeze them on a tray first, then transfer to a bag—they reheat beautifully straight from frozen. The secret to reheating? 375°F for 10-12 minutes until golden and crispy again. These make perfect party appetizers—double the batch and freeze half for later. The basil and Parmesan should be added fresh after reheating to preserve their vibrant flavors.
Why You'll Love This Recipe
- Crispy in Minutes: I swear, the panko and egg wash create that perfect golden crust in under 10 minutes of baking—no flipping, no fuss, just pure satisfaction. The mozzarella inside melts just enough to make every bite feel like a little cheesy hug.
- Creamy-Crunch Combo: That creamy arborio rice center with gooey mozzarella? Chef’s kiss. But here’s the magic: the panko crust adds this addictive crunch that makes it impossible to eat just one. (Yes, even on a Tuesday night.)
- Lunchbox Hero: I pack these for work all the time—they’re sturdy enough to handle a bag, warm up beautifully in the microwave, and taste like you slaved over them. Kids love them too; my picky eater actually asks for seconds.
- Budget-Friendly Feast: Arborio rice and mozzarella stretch to feed four for under $10, and leftovers reheat like a dream. Honestly, it’s my go-to for potlucks or when I’m trying to stretch groceries without sacrificing flavor.
Step-by-step instructions for perfect arborio rice balls
Here's the professional method for creating golden, crispy rice balls with gooey mozzarella centers.
Cook the Arborio Rice to Al Dente Perfection
Rinse the 1.5 cups Arborio Rice under cold water until the water runs clear, then drain well in a fine-mesh strainer. In a medium saucepan, combine the rice with the 2 cups vegetable broth and 0.5 cup white wine. Bring to a boil over medium-high heat, then immediately reduce to a simmer, cover, and cook for 12-14 minutes until the rice is al dente with a slight bite remaining.
Here's the thing—Arborio rice needs gentle handling. After 10 minutes, check for doneness by tasting a grain. It should be tender but still firm to the bite. If it's not quite there, continue cooking for another 1-2 minutes. Once done, remove from heat and let it sit covered for 5 minutes to steam through. This resting period is crucial for even texture.
Prepare the Mozzarella Hearts and Seasoning Coating
While the rice cooks, prepare the mozzarella by slicing the 12 oz fresh mozzarella cheese into 12 equal 1-ounce pieces (about ½-inch thick). These will form the gooey centers of your rice balls. In a shallow bowl, combine the 1.5 cups Panko breadcrumbs, 1 tbsp granulated garlic powder, 1 tbsp granulated onion powder, 0.5 tsp Diamond Crystal kosher salt, and 0.25 tsp freshly ground black pepper. Mix well to distribute the seasoning evenly.
For the egg wash, crack the 2 whole large eggs into a separate shallow bowl and whisk lightly with a fork—just enough to combine, but don't overbeat. The 0.5 cup all-purpose flour will be used later for dusting the rice balls before frying. This layered coating is what creates that perfect crispy exterior we're after.
Assemble and Coat the Rice Balls
Transfer the cooked rice to a clean work surface and let it cool slightly (about 5 minutes). Using your hands, gently form the rice into 12 equal balls—about 1.5 inches in diameter. Press a mozzarella slice into the center of each ball, then carefully enclose it completely by folding the rice around the cheese. You want a smooth, even surface for even frying.
Roll each rice ball in the 0.5 cup all-purpose flour, then dip into the beaten egg wash, allowing any excess to drip off. Finally, press each ball firmly into the seasoned Panko mixture, coating them completely. The coating should adhere well—if it crumbles, press harder. Place the coated balls on a wire rack set over a baking sheet to keep them separate.
Deep-Fry to Golden Crispiness
In a deep skillet or Dutch oven, heat the 3 cups vegetable oil to 350°F using a deep-fry thermometer. Once the oil reaches temperature, carefully add 4-5 rice balls at a time, being cautious of splattering. Fry for 2-3 minutes on the first side until golden brown, then gently flip and cook for another 2-3 minutes until evenly crisped.
This is where precision matters most. The oil temperature should stay consistent—if it drops below 325°F, the balls will absorb oil and become greasy. Remove the fried balls with a slotted spoon and drain on a wire rack or paper towels. Repeat with the remaining balls, maintaining the 350°F temperature between batches. The result should be a crispy, golden exterior that contrasts beautifully with the gooey mozzarella center.
Finish and Serve Immediately
While still warm, sprinkle each fried rice ball with 1 tablespoon of the 0.25 cup freshly grated Parmesan cheese and a pinch of the 0.25 cup chopped fresh basil leaves. Serve immediately with additional basil leaves on the side for garnish. The mozzarella should be molten and stretchy, creating that perfect pull-apart texture with each bite.
These rice balls are best enjoyed fresh while the coating is still crisp. If you need to hold them, keep them warm in a 200°F oven for up to 15 minutes, but they won't be as crispy. The contrast of temperatures—crispy exterior, warm gooey center—is what makes this dish truly special. Pair with a simple marinara sauce for dipping if desired.
Pro Tips For Making Arborio Rice Balls
- Cook Rice Al Dente: Arborio rice for these balls needs to be firm—think 1-2 minutes undercooked compared to risotto. I learned this the hard way: mushy rice turns your crispy panko coating into a soggy mess. Toast the grains slightly in olive oil first if you’re nervous about doneness. ---
- Drain Mozzarella Well: Fresh mozzarella is 60% water—skip the draining, and your rice balls will leak like a sieve. Wrap it in paper towels, press between two plates for 10 minutes, or use a clean kitchen towel. Trust me, your frying pan will thank you. ---
- Chill the Mixture: Mixing the rice, cheese, and egg? Give it 20 minutes in the fridge before shaping. Cold ingredients bind better, and your balls won’t fall apart when breading. I used to rush this—now I just set a timer and grab a drink while waiting. ---
- Double-Coat the Panko: One layer of panko looks pretty but won’t crisp properly. Dip shaped balls in flour, egg wash, then panko—repeat. The second layer seals in moisture and guarantees that satisfying crunch. Yes, it takes 30 seconds extra, but it’s worth it.
Wine and beer pairings for this dish
Italian White Wine
For these rich, cheesy rice balls, a crisp Italian white wine like Pinot Grigio or Vermentino is my go-to choice. The bright acidity cuts through the richness of the mozzarella while complementing the savory garlic and onion notes in the coating. I love a chilled glass of Vermentino from Sardinia—its citrusy finish refreshes your palate between bites. 🍷
Crisp Lager Pairing
A crisp Italian lager like Peroni or Birra del Borgo works beautifully with these rice balls. The light, effervescent quality balances the fried exterior while the subtle malt sweetness harmonizes with the creamy mozzarella. For a craft option, try a Belgian witbier—the coriander and citrus notes add a refreshing contrast to the fried richness.
Dry Rosé Refreshment
If you prefer something lighter, a dry rosé like Prosecco or Lambrusco adds a fruity yet crisp element. The light red fruit flavors complement the savory garlic and onion seasoning while keeping the meal feeling fresh. I often reach for a chilled glass of Prosecco when serving these as appetizers—it’s elegant and pairs perfectly with the crispy texture.
Spicy Beer Option
For those who love a little heat, a spicy IPA like Dogfish Head's 60 Minute IPA can work surprisingly well. The hoppy bitterness balances the richness of the mozzarella, while the subtle spice echoes the garlic and onion in the coating. Serve it slightly chilled to enhance its refreshing qualities. 🍺
Nutrition facts
Frequently asked questions
Can I make these rice balls without frying?
For a healthier version, bake them at 400°F for 12-15 minutes after coating. Brush with olive oil first for extra crispiness. The texture will be slightly different but still delicious—just less golden and crunchy. Pro tip: Use an air fryer at 380°F for 8-10 minutes for a crispy middle ground.
How do I prevent the rice balls from falling apart?
The key is using al dente rice that's still slightly firm when forming the balls. Overcooked rice will be too soft. Also, make sure the mozzarella is room temperature and patted dry—excess moisture causes separation. Press the coating firmly onto each ball to create a strong bond. If they still crumble, add 1 extra egg yolk to the egg wash for better binding.
Can I make these ahead of time?
Yes! Assemble the coated rice balls and refrigerate them uncovered for 1-2 hours to dry the coating slightly. Then freeze them on a tray before transferring to a bag. Fry from frozen, adding 1-2 extra minutes per side. For reheating, bake at 375°F for 10-12 minutes until crispy again. The texture won't be as perfect as fresh, but they'll still be tasty.
What's the best way to store leftover rice balls?
Keep them in an airtight container between layers of parchment paper to maintain crispiness for up to 3 days at room temperature. For longer storage, freeze them (as above) for up to 3 months375°F oven for 10 minutes to restore crispiness. Avoid reheating in the microwave—it makes them soggy.
Can I use different cheeses in these rice balls?
For a vegetarian option, try fontina or provolone—they melt beautifully. For extra richness, mix in 1/4 cup ricotta with the mozzarella. Avoid pre-shredded cheese (it contains anti-caking agents that prevent proper melting). For a spicy kick, add 1/2 tsp cayenne pepper to the coating or stuff with pepper jack cheese.