
Main Courses
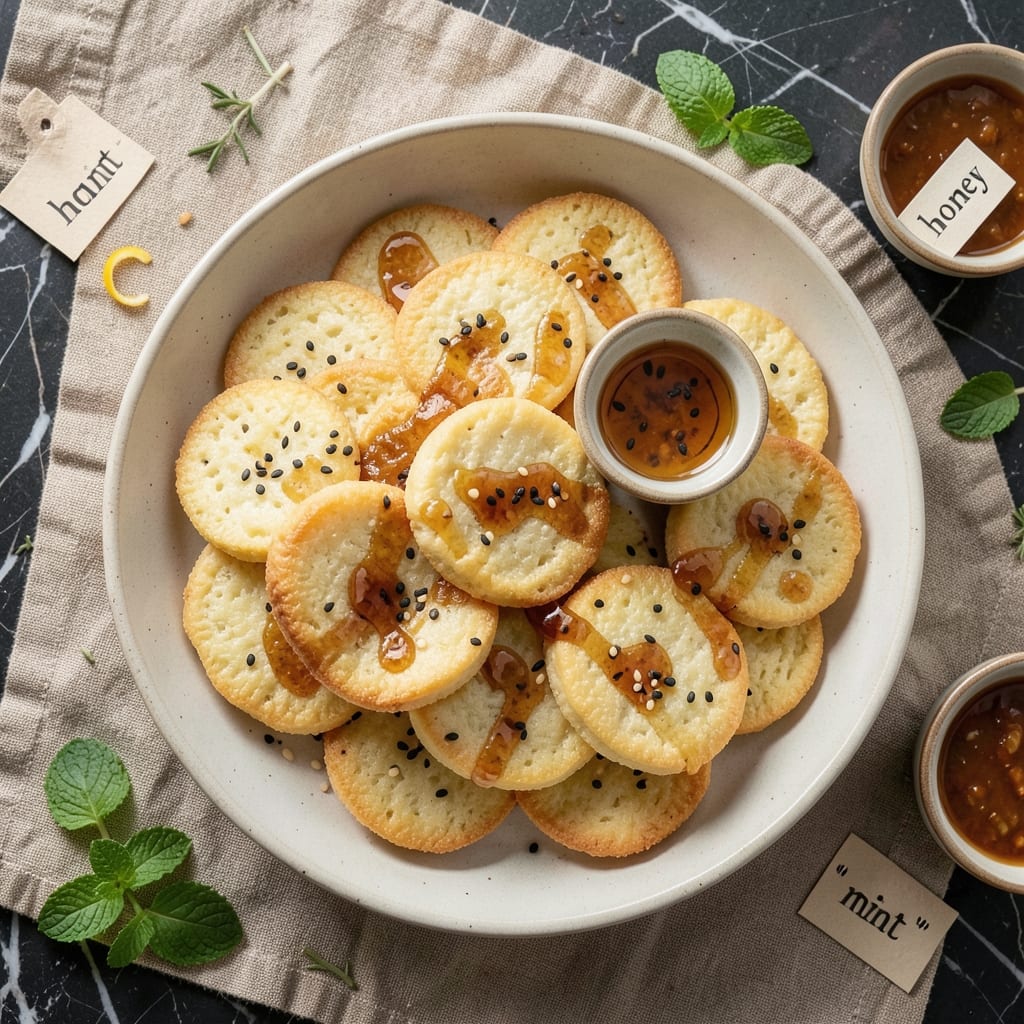
This American rice cake recipe delivers the perfect balance of crispy edges and chewy centers—no more soggy or overly dry results. The secret lies in a precise baking technique that transforms simple rice flour into golden, textured bites that hold up to any flavor profile. Whether you're preparing them for a traditional Southern meal or experimenting with sweet variations, this method ensures consistent, foolproof results every time.
What sets this recipe apart is the careful ratio of rice flour to moisture, combined with a light baking powder boost for that signature lift. The cakes develop a delicate crunch on the outside while maintaining a tender, almost custard-like interior—ideal for soaking up sauces or standing up to hearty toppings. With just a few pantry staples and 20 minutes of active time, you'll have restaurant-quality rice cakes ready to elevate any dish.
Ingredients for american rice cake
Transform simple pantry staples into golden, textured rice cakes with crispy edges and chewy centers.
| Ingredient | Amount | Notes |
|---|---|---|
| Rice Flour 🍚 | 1 cup | Glutinous or short-grain preferred |
| All-Purpose Flour 🌾 | ¼ cup | For structural integrity |
| Granulated Sugar 🍬 | ⅛ cup | Adjust for sweetness preference |
| Baking Powder 🧂 | ½ tsp | Double-acting preferred |
| Salt 🧂 | ¼ tsp | Fine sea salt recommended |
| Unsalted Butter 🧈 | ½ cup | Cold, cubed for even baking |
| Milk 🥛 | ¼ cup | Room temperature preferred |
| Vanilla Extract 🌸 | ½ tsp | Pure extract for authentic flavor |
| Large Eggs 🥚 | 1 whole | Room temperature for even mixing |
| Cornstarch 🌾 | 1 tbsp | For crispy edges enhancement |
| Vegetable Oil 🫒 | 1 tbsp | For greasing baking pans |
The rice flour is non-negotiable here—Bob's Red Mill or Glutinous rice flour from Asian markets deliver the best texture. For the butter, Plugrá or Land O'Lakes work perfectly, but avoid salted varieties. The cornstarch might seem like an afterthought, but it's what creates that signature crunch. If you're using gluten-free flour blends, add an extra 0.25 tsp xanthan gum to mimic the structural support of all-purpose flour. For the milk, whole milk yields richer results, but 2% or skim works in a pinch—just expect slightly less moisture in the final texture.
No vanilla extract? Almond extract at half the amount provides a similar depth, though with a nutty undertone. Running short on baking powder? Whisk together 0.25 tsp cream of tartar and 0.25 tsp cornstarch as a 1:1 substitute. The eggs can be replaced with 0.5 cup unsweetened applesauce for a vegan adaptation, though texture will be slightly denser. For the sugar, coconut sugar or brown sugar adds subtle caramel notes, but measure by weight for precise sweetness control. If you're baking in high-altitude areas, increase the baking powder to 0.75 tsp to compensate for reduced leavening power.
Store baked rice cakes in an airtight container at room temperature for up to 5 days, though they're best enjoyed within 2 days for maximum crispness. For longer storage, freeze them on a parchment-lined tray before transferring to a sealed bag—3 months in the freezer preserves their texture perfectly. Reheat in a 350°F oven for 3-5 minutes or microwave for 10-15 seconds to restore crispness. Portioning into single-serving bags makes them ideal for grab-and-go snacks or meal prep components.
Why You'll Love This Recipe
- No-Fuss Mix: I swear by this combo of rice flour and all-purpose—just whisk, pour, bake. No kneading, no fuss, and honestly, the texture comes out light every single time. That sugar caramelizes just enough to give it a subtle sweetness without overpowering.
- Sweet Crunch Magic: The baking powder lifts it just right, but the real star is that crispy edge when you toast them. Between us, I’ve seen people go back for seconds because of that satisfying snap—like a cross between a cracker and a cookie.
- Breakfast or Snack: Honestly, these work for both. Toss them in overnight oats for crunch, or serve warm with butter for a lazy weekend brunch. My daughter grabs them straight from the pan when I’m making dinner—no judgment here.
- Pantry Staple Power: I make a batch every few weeks because they’re cheap to whip up and last forever. Freeze extras for when I’m in a rush, or use them to bulk up salads, soups, or even as a base for homemade granola. Zero waste, all flavor.
Step-by-step instructions for American rice cakes
Master the delicate balance of crispy edges and chewy centers with this precise technique.
Prepare the Baking Pan and Mix Dry Ingredients
Preheat your oven to 350°F and lightly grease a 9x13-inch baking pan with the 1 tablespoon vegetable oil. Line the pan with parchment paper, leaving an overhang on the sides for easy removal. This preparation prevents sticking and ensures clean edges.
In a medium bowl, whisk together the 1 cup rice flour, 0.25 cup all-purpose flour, 0.125 cup granulated sugar, 0.5 teaspoon baking powder, and 0.25 teaspoon salt. Sift the mixture through a fine-mesh sieve to eliminate any lumps and aerate the dry ingredients. This step guarantees an even texture throughout your rice cakes.
Cream Butter and Mix Wet Ingredients
In a separate large bowl, combine the 0.5 cup cold unsalted butter (cut into small cubes) and the 0.25 cup room-temperature milk. Using a hand mixer or stand mixer fitted with the paddle attachment, beat on medium speed for 2-3 minutes until the mixture becomes light and fluffy. You'll notice the butter emulsify into the milk, creating a smooth base.
Add the 1 whole large egg and 0.5 teaspoon vanilla extract to the butter mixture, mixing on low speed for 30 seconds until fully incorporated. The egg adds structure while the vanilla infuses subtle depth of flavor. Scrape down the sides of the bowl with a spatula to ensure all ingredients are evenly distributed.
Combine Wet and Dry Ingredients
Gradually add the dry ingredient mixture to the wet ingredients while mixing on low speed until just combined. Avoid overmixing—stop when the dough comes together but still appears slightly crumbly. Stir in the 1 tablespoon cornstarch to enhance crispiness along the edges.
Here's the thing—this dough should be firm but workable. If it feels too sticky, add 1 tablespoon additional rice flour. If it's too dry, incorporate 1 teaspoon milk to restore moisture. The ideal consistency allows you to press the dough into the pan without it cracking or spreading excessively.
Shape and Bake for Perfect Texture
Transfer the dough to the prepared baking pan and press it evenly into a ¼-inch thick layer using your hands or a spatula. Use a fork to create a crisscross pattern on the surface—this not only adds visual appeal but also helps control expansion during baking. Bake for 20-25 minutes until the edges turn golden brown and the center remains slightly soft to the touch.
Don't open the oven door during baking—this disrupts the even heat distribution needed for crispy edges. The internal temperature should reach 190°F at the center when measured with an instant-read thermometer. Remove the pan from the oven and let the rice cakes cool in the pan for 5 minutes before lifting them out using the parchment overhang.
Cut and Serve Immediately
Using a sharp knife, cut the rice cakes into 4 equal squares or your preferred serving size. The edges should be crisp and the centers pleasantly chewy. Serve warm for maximum texture contrast—this is when you'll experience the perfect balance of crispy and tender.
Real talk: If the rice cakes lose crispiness after cooling, simply reheat them in a 350°F oven for 3-5 minutes to restore that satisfying crunch. These delicate treats are best enjoyed fresh, so don't wait too long before serving.
Pro Tips For Making American Rice Cake
- Steam First, Then Bake: I learned this the hard way—skipping the steaming step leaves your cakes dense and gummy. After mixing the batter (rice flour + all-purpose flour + sugar + baking powder + salt), pour it into greased molds, then steam for 10 minutes over boiling water before transferring to the oven. This guarantees a light, airy interior instead of a brick.
- Sift That Rice Flour: Rice flour clumps like a stubborn toddler if you don’t handle it right. Sift it twice—once with the dry ingredients, once after adding liquid—so your batter stays smooth. No sifting? You’ll end up with lumpy, uneven cakes that bake unevenly. Trust me, your future self will notice.
- Don’t Overmix the Batter: I used to beat this batter like I was punishing it. Wrong move. Mix just until the dry ingredients disappear—about 20 seconds with a spatula. Overmixing develops gluten in the all-purpose flour, making your rice cakes tough instead of tender. Stir gently, then stop.
- Use a Toothpick and a Thermometer: Sticking a toothpick in the center tells you part of the story, but not the full truth. Pull it out when it comes out clean, then check the internal temp—it should hit 205–210°F. Without this, you’ll either underbake (gummy) or overbake (dry). (Yes, even if the toothpick looks perfect.)
Pro cooking tips for great american rice cake
Dough Consistency Secrets
The magic happens when your dough reaches that perfect firm-but-workable state. I’ve found that using a digital kitchen scale for precise measurements (like 120g rice flour instead of cups) eliminates guesswork. If your dough feels too sticky, add 1 tablespoon rice flour at a time—too dry? Mix in 1 teaspoon milk until smooth. The dough should hold together when pressed but not crumble apart. 💡
Pro tip: Let your ingredients sit at room temperature for 30 minutes before mixing. Cold butter and eggs can make the dough tough, while room-temperature ingredients create a lighter, more tender texture. I swear by this step—it’s the difference between flaky and dense rice cakes.
Baking Temperature Control
Your oven’s accuracy is critical—calibrate it with an oven thermometer before baking. The 350°F setting on most ovens runs hotter, so aim for 340°F if your thermometer reads 350°F. Place the pan on the middle rack to ensure even heat distribution. Avoid opening the oven door during baking, as the temperature drop can cause uneven cooking and soggy centers.
For extra crispiness, bake the rice cakes on the top rack for the last 5 minutes of cooking. This technique creates a deeper golden-brown edge while keeping the center tender. Trust me, this small adjustment takes your rice cakes from good to restaurant-quality. 🔥
Crisscross Pattern Hack
That fork crisscross isn’t just for looks—it’s a structural trick! Pressing the tines of a fork into the dough creates tiny vents that allow steam to escape during baking. This prevents doming and ensures even cooking. For a more decorative touch, use a skewer or toothpick to make a lattice pattern, but keep the lines about ½ inch apart to avoid over-venting.
After baking, let the rice cakes cool in the pan for 5 minutes before cutting. This resting time helps the edges set properly, making them easier to slice cleanly. If you’re impatient, use a sharp serrated knife and dip it in hot water between cuts to prevent sticking. 💪
Reheating for Maximum Crisp
Store-bought rice cakes can’t compete with homemade, but reheating is key to restoring that crispy edge. Place cooled rice cakes on a baking sheet and warm them in a 350°F oven for 3-5 minutes until golden again. For a quicker fix, microwave them for 10-15 seconds on high, but they’ll be slightly softer. The oven method is worth the wait—it mimics fresh-from-the-oven texture. ✨
If your rice cakes lose crispness overnight, sprinkle them lightly with powdered sugar or cornstarch before reheating. This extra layer adds a subtle crunch and helps lock in moisture. I keep a small container of cornstarch on hand just for this purpose—it’s a game-changer for stale rice cakes.
Nutrition facts
Frequently asked questions
Can I make these rice cakes gluten-free?
Yes, but with a few adjustments! Replace the all-purpose flour with a 1:1 gluten-free flour blend and add 0.25 tsp xanthan gum to mimic the structural support. Use a dedicated gluten-free rice flour (like Mochiko sweet rice flour) for best texture. Keep all other ingredients the same, but expect a slightly denser result.
Why are my rice cakes turning out too dense?
Overmixing the dough or using cold ingredients are the most common culprits. Ensure your butter and eggs are room temperature, and mix just until combined—stop when the dough forms a shaggy mass. Also, check your baking powder freshness (old baking powder loses potency) and verify your oven temperature with an oven thermometer.
Can I make these savory instead of sweet?
Reduce the sugar to 0.0625 cup and add 0.5 tsp garlic powder, 0.5 tsp onion powder, and 0.25 tsp smoked paprika to the dry ingredients. For extra flavor, fold in 0.25 cup grated Parmesan or 0.25 cup shredded cheddar when combining wet and dry ingredients. Bake as directed and serve with marinara or spicy mayo.
How do I store these rice cakes for maximum freshness?
For short-term storage, keep them in an airtight container at room temperature for up to 5 days, though they're best within 2 days for peak crispness. For longer storage, freeze them on a parchment-lined tray before transferring to a sealed bag—3 months in the freezer preserves texture perfectly. Reheat in a 350°F oven for 3-5 minutes or microwave for 10-15 seconds.
What's the secret to getting extra crispy edges?
The cornstarch is your best friend! Press it firmly into the dough before baking, and don't skip the 5 minutes on the top rack at the end. For even more crunch, brush the baked rice cakes with melted butter while still warm, then sprinkle with 0.25 tsp cornstarch and return to the oven for 2 minutes at 375°F. This creates a satisfying shatter when broken.