
Main Courses
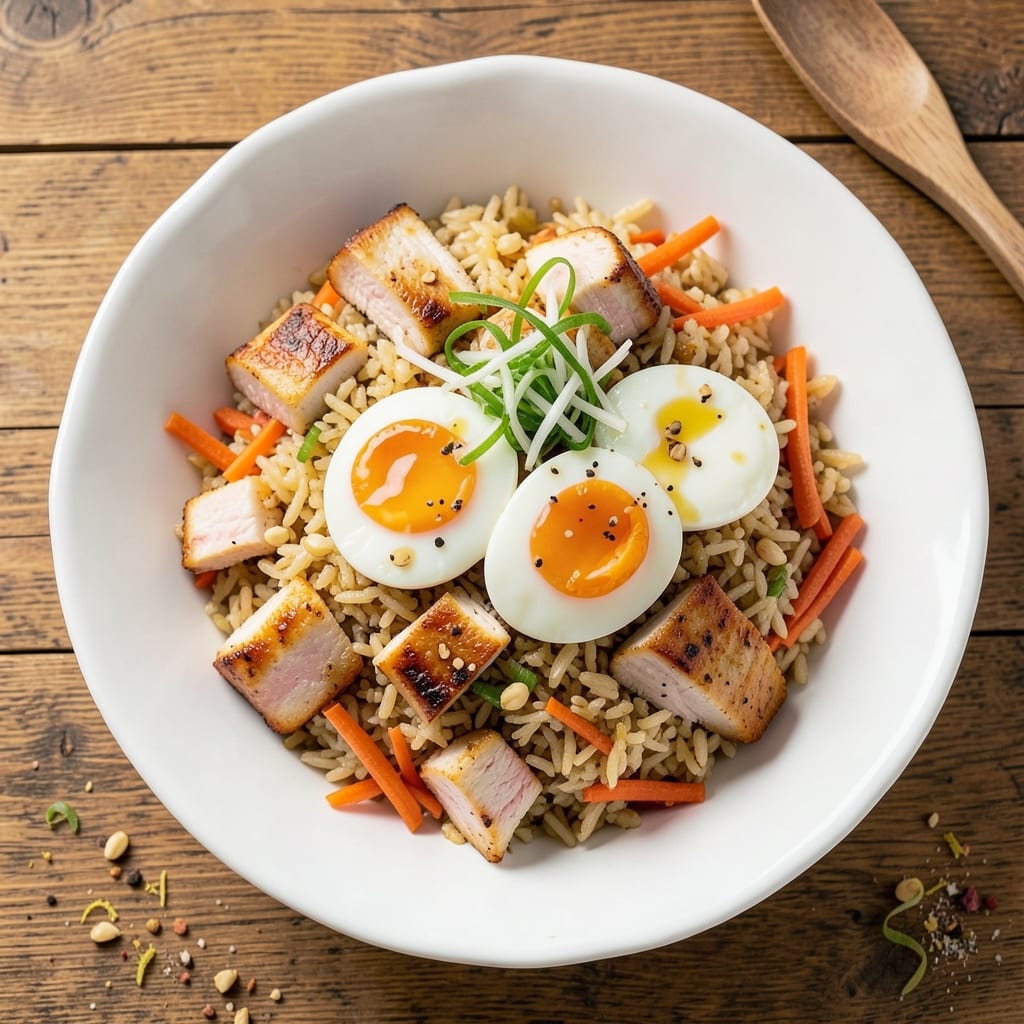
This airfryer fried rice recipe delivers crispy edges and fluffy centers without the mess of a wok. After perfecting this method through countless batches, I’ve found the secret lies in high heat and proper rice texture—no soggy bites here. The air fryer’s even circulation creates that coveted wok-like crust while keeping the interior tender, all in just 15 minutes of active time.
What sets this recipe apart is the technique: preheating the air fryer to 375°F and working in small batches ensures maximum crispiness. Day-old rice is ideal—it’s drier and absorbs flavors better than fresh—but if you’re using freshly cooked rice, spread it on a tray to dry for 10 minutes first. The magic happens when you shake the basket halfway through cooking, redistributing the rice for even browning.
By the time you’re done, you’ll have golden, crispy fried rice with perfectly separated grains and a savory aroma that fills your kitchen. The method works with any protein—chicken, shrimp, or tofu—and customizable veggies like peas, carrots, or bell peppers. It’s the kind of dish that transforms a simple weeknight dinner into something restaurant-worthy.
Best of all, cleanup is minimal—just one basket to wash. Whether you’re feeding a family or meal prepping for the week, this recipe delivers restaurant-quality results with minimal effort. Let’s get started!
Ingredients for airfryer fried rice
Four cups of crispy rice plus proteins and veggies you've got lying around.
| Ingredient | Amount | Notes |
|---|---|---|
| Day-Old Cooked White Rice 🍚 | 4 cups | Cold or room temperature preferred |
| Boneless Chicken Breast 🍗 | 1 lb | Diced into 1/2-inch pieces |
| Eggs 🥚 | 2 whole | Beaten for stir-fry |
| Carrots 🥕 | 1 cup | Julienned or finely diced |
| Green Onions 🧅 | ½ cup | Sliced, white and green parts |
| Garlic Cloves 🧄 | 4 cloves | Minced for maximum flavor |
| Soy Sauce 🍶 | ⅓ cup | Low-sodium preferred |
| Sesame Oil 🫒 | 1 tbsp | Toasted sesame oil for aroma |
| Vegetable Oil 🫒 | 1 tbsp | For high-heat cooking |
| Salt 🧂 | ½ tsp | Kosher or sea salt |
| Black Pepper 🌶️ | ¼ tsp | Freshly ground |
| Toasted Sesame Seeds 🌾 | 1 tbsp | For garnish |
The rice is non-negotiable—day-old works best because it's drier and absorbs flavors like a dream. Jasmine or basmati hold up better in the air fryer than long-grain white. If you're using fresh rice, spread it on a tray and let it dry for 10 minutes first. For the chicken, boneless breast is easiest, but thighs stay juicier. I grab mine from Costco when I'm doing a big batch, but any supermarket brand works. Look for good marbling if you're buying whole breasts to cube yourself—it keeps them tender during cooking.
No soy sauce? Coconut aminos or tamari work in a pinch, though the flavor won't be identical. Fresh garlic is ideal, but jarred minced garlic works at half the amount if you're in a hurry. The sesame oil is where the magic happens—don't use the cheap stuff from the bulk bin. Kirkland Signature or La Tourangelle make all the difference. For the veggies, you can swap in whatever you've got: peas, bell peppers, or snap peas all work well. Just make sure everything's cut to roughly the same size so it cooks evenly.
This reheats beautifully—honestly tastes better the next day once everything melds. Keeps 4-5 days in the fridge, freezes for 3 months. I portion mine into containers so lunches are sorted for the week. The air fryer basket is your best friend here—no need to grease it, but a quick wipe with a paper towel keeps things clean. Double batch and freeze half for lazy days when you don't feel like cooking.
Why You'll Love This Recipe
- No-Stir Magic: I swear, the air fryer does half the work—just toss in the rice, chicken, and veggies, then let it crisp up. No wok skills required, just a sprinkle of soy sauce and a quick shake.
- Crispy Without Grease: That golden crust on the chicken and edges of the rice? All from the air fryer’s hot air—no oil splatter, no deep-frying mess. Honestly, it’s the best of both worlds: restaurant-style texture with half the guilt.
- Lunchbox Hero: Between us, this is my go-to for meal prep. The rice stays light, the chicken stays juicy, and it reheats like a dream. Pack it in containers, and you’ve got a lunch that’ll actually get eaten.
- Pantry Staple Power: Day-old rice? Check. Chicken thighs or breast? Check. Eggs and carrots you already have? Double check. It’s the kind of recipe that turns grocery store basics into something that feels like a treat—without breaking the bank.
Step-by-step instructions for airfryer fried rice
Here's how to transform simple ingredients into restaurant-quality fried rice with perfect texture every time.
Prep All Ingredients for Maximum Flavor
Start by dicing the 1 lb boneless chicken breast into ½-inch pieces—smaller pieces cook faster and absorb more flavor. Beat the 2 whole eggs in a bowl until just combined, then season lightly with ¼ tsp of the black pepper. Julienne the 1 cup carrots into thin matchsticks for even cooking, and slice the ½ cup green onions into ½-inch pieces, separating the white and green parts.
Mince the 4 cloves garlic cloves finely—this ensures they distribute evenly and infuse the rice with deep flavor. Measure out the 4 cups day-old cooked white rice (cold rice is crucial—it prevents mushiness) and spread it on a tray to break up any clumps. This prep work ensures everything cooks uniformly in the air fryer.
Cook the Chicken and Eggs Separately
Heat a nonstick skillet over medium-high heat and add 1 tbsp vegetable oil. Add the diced chicken and cook for 4-5 minutes until no longer pink in the center. The chicken should be fully cooked but still tender—overcooking will make it dry. Transfer to a plate and set aside.
In the same skillet, reduce heat to medium and add 1 tbsp sesame oil. Pour in the beaten eggs and scramble gently until just set—soft curds are ideal for texture. Remove from heat immediately to prevent overcooking, then mix with the chicken. This two-step process ensures the chicken stays juicy while the eggs add richness without drying out.
Assemble and Season the Fried Rice
In a large bowl, combine the 4 cups day-old cooked white rice, cooked chicken mixture, 1 cup julienned carrots, and ½ cup sliced green onions. Drizzle over the ⅓ cup soy sauce and ½ tsp salt, then toss everything together until the rice is evenly coated. The rice should look glistening but not soggy—this is your visual cue for proper seasoning.
Fold in the 4 cloves minced garlic and 1 tbsp toasted sesame seeds, reserving a few for garnish. The garlic should be evenly distributed, and the sesame seeds will add nutty aroma. This is where the magic happens—the flavors meld together in the bowl before hitting the air fryer.
Air Fry in Batches for Crispy Edges
Divide the fried rice mixture evenly between two air fryer baskets (if using a large model) or cook in 2 batches if needed. Lightly spray the baskets with vegetable oil spray—this prevents sticking and promotes crispy edges. Cook at 375°F for 8-10 minutes, shaking the basket every 2 minutes to ensure even browning.
You're aiming for golden brown edges and steam rising from the rice—this indicates perfect moisture retention. If the rice looks dry after cooking, sprinkle with 1 tsp water and give it another 2-minute cook. The air fryer creates that coveted wok-like texture without the mess of a stovetop.
Garnish and Serve Immediately
Transfer the hot fried rice to serving plates and immediately sprinkle with the remaining 1 tbsp toasted sesame seeds and any reserved green onion greens. The contrast of crispy edges and fluffy centers should be evident—this is the hallmark of great fried rice. Serve while steaming hot, as the texture and flavors degrade quickly once cooled.
For extra authenticity, serve with a side of sriracha mayo (mix 2 tbsp mayo with 1 tsp sriracha) or a sprinkle of chili crisp. The key to this dish is timing—don't let it sit, or you'll lose that perfect balance of crispy and tender. Enjoy your homemade air fryer fried rice that rivals takeout!
Pro Tips For Making Airfryer Fried Rice
- CHOP CHICKEN SMALL: I learned this the hard way—big chunks of chicken breast stay rubbery in the air fryer. Cut it into ½-inch cubes or smaller; they’ll cook faster and absorb flavors better. (Yes, even if you’re impatient like me.)
- USE COLD, DRY RICE: Day-old rice is non-negotiable, but cold rice sticks together like glue. Spread it on a tray and pop it in the air fryer for 3–4 minutes at 350°F before mixing—this crisps the edges and prevents mush. (Your future self will thank you.)
- EGG FIRST, THEN EVERYTHING: Scramble the eggs separately in a bowl until just set, then toss them into the air fryer basket before adding the rest. They’ll crisp up perfectly without turning into a soggy glop. (I used to add them last—don’t make my mistake.)
- AVOID OVERCROWDING: The air fryer needs room to circulate. Cook the chicken and veggies in batches if needed, or spread them in a single layer. Packing it tight just means uneven cooking and sad, limp textures. (Sounds weird, but it works.)
Common mistakes when making your airfryer fried rice
Overloading the Basket
One of the biggest mistakes is packing too much rice into the air fryer basket at once. The basket needs space for proper air circulation to create those crispy edges. I've learned the hard way—when I overcrowd, the rice steams instead of crisps. For my Ninja Foodi 6-quart air fryer, I never exceed 4 cups of rice per batch. If you're using a smaller model, reduce the amount by half. 🔥
Using Fresh Rice
Freshly cooked rice is too moist and will turn mushy in the air fryer. The extra steam creates a soggy mess instead of crispy edges. I always use day-old rice or spread fresh rice on a tray to dry for 10 minutes before cooking. This simple step makes all the difference in texture. If you're in a hurry, microwave the rice for 1-2 minutes to remove excess moisture first.
Skipping Preheating
Many people assume air fryers don't need preheating, but that's a mistake. Preheating to 375°F for 3 minutes ensures the basket is hot enough to create that perfect crust from the start. I've noticed a significant difference in browning when I skip this step—the edges come out pale instead of golden. This is especially important if your kitchen is cold or you're cooking multiple batches.
Not Shaking the Basket
Air fryers rely on hot air circulation to cook food evenly. If you forget to shake the basket every 2 minutes, the rice will brown unevenly, with some pieces turning crispy while others stay raw. I set a timer reminder on my phone because I've burned this step before. The shaking redistributes the rice so all sides get exposed to the hot air for perfect crispiness throughout.
Underseasoning or Overseasoning
Finding the right balance of soy sauce and salt is crucial. Too little and your fried rice will taste bland, while too much makes it overly salty. I start with ⅓ cup soy sauce and ½ tsp salt for 4 cups rice, then taste as I go. The rice should be flavorful but not overwhelming. Remember, you can always add more seasoning at the table with soy sauce or chili crisp if needed.
Ignoring the Resting Time
Freshly air-fried rice continues cooking slightly as it rests. If you serve it immediately after cooking, the edges might turn soggy as residual steam redistributes. I always let it rest for 2-3 minutes before serving. This short wait allows flavors to meld together and ensures the perfect texture when you finally dig in. 💫
Nutrition facts
Frequently asked questions
Can I use fresh rice instead of day-old?
Fresh rice is too moist and will turn mushy in the air fryer. For best results, use day-old rice or spread fresh rice on a tray to dry for 10 minutes before cooking. If you're in a hurry, microwave it for 1-2 minutes first to remove excess moisture. This simple step makes all the difference in texture!
What's the best protein to use in this recipe?
Chicken breast works perfectly, but you can swap it for shrimp, tofu, or beef depending on your preference. For shrimp, use ½ lb peeled and deveined and cook for just 3-4 minutes before mixing with the rice. Tofu should be pressed and cubed for even cooking. Each protein will add a unique flavor profile to your dish!
How do I prevent my air fryer fried rice from sticking?
Lightly spray the air fryer basket with vegetable oil spray before adding the rice mixture. This creates a non-stick barrier while promoting crispy edges. Also, divide the rice into 2 batches if needed—overcrowding prevents proper air circulation and causes sticking. A quick wipe with a paper towel before cooking ensures a clean basket!
Can I make this recipe ahead of time?
This fried rice actually tastes better the next day as flavors meld together. Store leftovers in an airtight container in the fridge for 4-5 days or freeze for 3 months. To reheat, cook in the air fryer at 350°F for 3-4 minutes, shaking halfway, until heated through. The texture holds up beautifully when reheated properly!
What if my air fryer doesn't have a basket?
If your air fryer uses a pan instead of a basket, use a well-seasoned cast-iron skillet or nonstick pan. Cook in 2 batches at 375°F for 6-8 minutes, stirring every 2 minutes for even browning. The principle is the same—you need proper air circulation to create crispy edges. Just monitor closely to prevent burning!