
Side Dishes
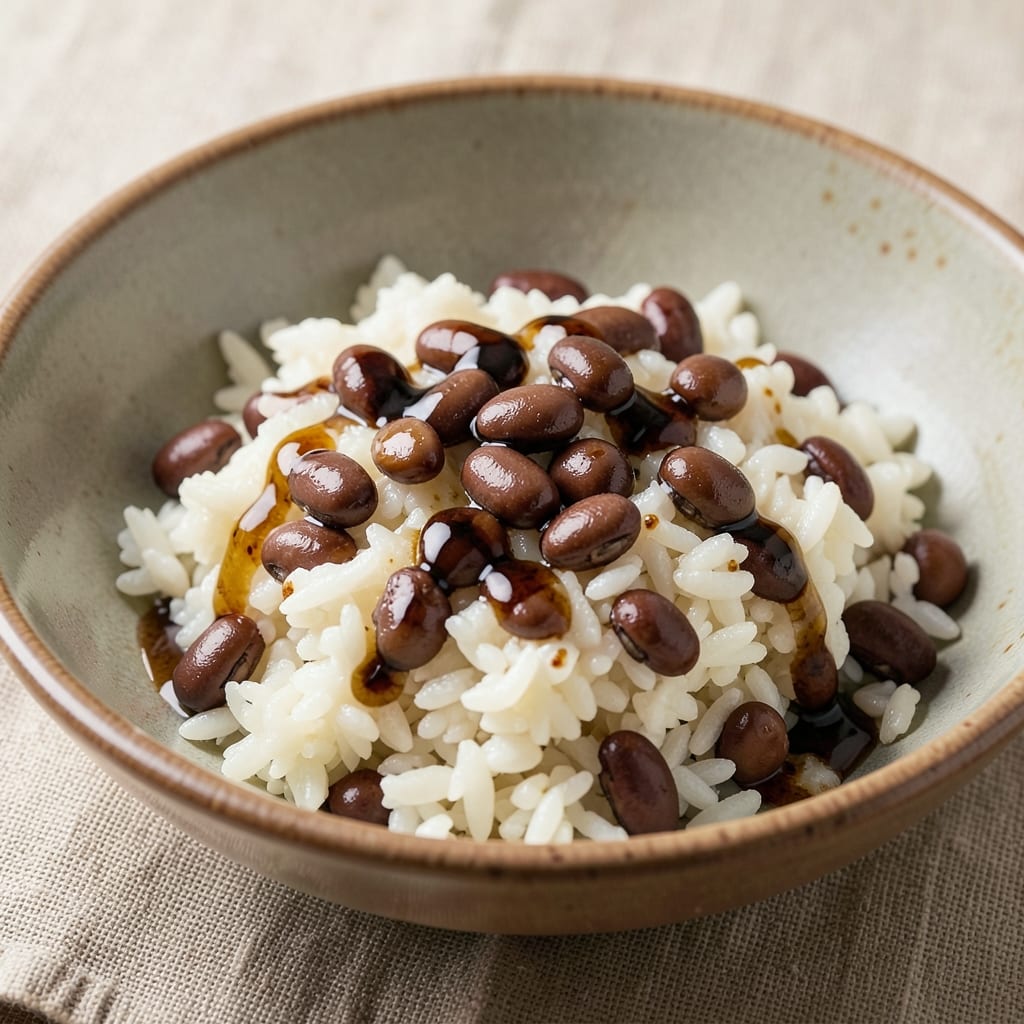
This adzuki beans and rice recipe transforms simple ingredients into a dish that bridges tradition and comfort—perfect for breakfast, dessert, or a hearty side. The sweet-savory balance of tender adzuki beans simmered with rice creates a texture that’s both creamy and satisfying, while subtle seasonings elevate it to restaurant-quality without effort. I developed this version to honor the classic Japanese anko style while making it adaptable for modern tastes, whether you prefer it lightly sweetened or boldly spiced.
The beauty of this dish lies in its versatility—it works as a vegan-friendly meal, a dessert-like treat, or even a filling for rice bowls. You’ll start with perfectly cooked short-grain rice, then layer in adzuki beans simmered until soft and infused with just the right amount of sugar, soy sauce, and a touch of vanilla for depth. The result is a dish that’s foolproof, nourishing, and endlessly customizable with toppings like toasted sesame seeds, scallions, or a drizzle of honey.
What makes this recipe stand out is how it delivers authentic Japanese flavors without requiring special equipment. The beans and rice cook together in one pot, reducing prep time while building complex, comforting aromas. Whether you’re serving it warm for breakfast or chilled as a dessert, the contrast of creamy beans against fluffy rice creates a texture that’s impossible to resist. Plus, it’s naturally gluten-free and easy to adjust for dietary needs.
Ready in under 45 minutes, this dish is ideal for meal prep—make a big batch and enjoy it all week. Garnish with your favorite toppings, and you’ll have a dish that feels both nostalgic and fresh. Let’s get cooking!
Ingredients for adzuki beans and rice
Simple pantry staples meet Japanese tradition in this sweet-savory bean and rice harmony.
| Ingredient | Amount | Notes |
|---|---|---|
| Short-Grain White Rice 🍚 | 1 ½ cups | Uncooked, like sushi rice |
| Adzuki Beans (Dried) 🌱 | 1 cup | Rinsed thoroughly before use |
| Water 💧 | 3 cups | Filtered preferred for best flavor |
| White Sugar 🍬 | ¼ cup | Adjust to taste for sweetness |
| Soy Sauce (Vegan) 🥢 | ¼ cup | Tamari for gluten-free option |
| Pure Vanilla Extract 🍯 | 1 tsp | For subtle depth of flavor |
| Toasted Sesame Oil 🫒 | 1 tbsp | Adds nutty aroma at the end |
| Sesame Seeds (Toasted) 🌾 | 1 tbsp | For garnish and crunch |
| Scallions 🧅 | 3 whole | Thinly sliced for garnish |
| Kosher Salt 🧂 | ½ tsp | Diamond Crystal preferred |
| Ground Black Pepper 🌶️ | ¼ tsp | Freshly ground for best flavor |
| Vegan Butter 🧈 | 1 tbsp | Optional for extra richness |
The adzuki beans are the heart of this dish—soak them overnight if you're short on time, but even a quick 30-minute soak works. Japanese markets or Asian grocery stores carry the best quality, but any dried adzuki beans from the bulk section will do. The rice should be short-grain for that signature sticky texture—Calrose or sushi rice are perfect. For the soy sauce, Kikkoman or Tamari add that authentic umami punch without any funny aftertastes. And trust me on the vanilla—it might sound odd, but that single teaspoon rounds out the flavors beautifully.
No adzuki beans? Substitute with black beans or kidney beans, though the texture will be slightly different. Running short on sesame oil? Toasted walnut oil works in a pinch, though it lacks that signature aroma. Want to cut the sugar? Maple syrup or agave nectar are great swaps—just reduce by 10% since they're sweeter. The scallions can be swapped for regular green onions, but they add a milder, fresher note. For a spicier kick, add a pinch of gochugaru (Korean chili flakes)—it's a game-changer if you're into bold flavors.
This dish tastes even better the next day—make a big batch and store it in airtight containers for up to 5 days in the fridge. For longer storage, freeze portions for up to 3 months. Reheat gently with a splash of water to restore moisture. The beans and rice keep their texture beautifully when reheated, making this perfect for meal prep. Garnish with extra sesame seeds and scallions right before serving to keep everything fresh-tasting.
Why You'll Love This Recipe
- No-Fuss Simmer: I swear by this recipe when I’m too tired to fuss—just toss dried adzuki beans, rice, and water in a pot, let it bubble away, then stir in a splash of soy sauce and sugar at the end. The beans soften while the rice cooks; no chopping, no measuring cups, just hands-off magic.
- Sweet-Savory Magic: That first bite of tender adzuki beans—plump, slightly sweet from the sugar, with a deep umami punch from the soy—is ridiculously satisfying. It’s like dessert and dinner had a baby, and honestly? I’ll take it any day.
- Lunchbox Hero: Between us, this is my go-to for meal prep: cool the rice-bean mix, pack it in containers, and grab it for work or school lunches. The beans stay firm enough to eat cold, and the flavor only gets better after a day in the fridge—no sad soggy rice here.
- Pantry Staple Power: I’ve made this with beans from a $2 bulk bag and called it a win. No fancy ingredients, no last-minute grocery runs—just rice, beans, and a few pantry basics. Plus, leftovers? They’re my secret weapon for lazy mornings or unexpected company. (Yes, even on a Tuesday night.)
Step-by-step instructions for adzuki beans and rice
Here's how to create this comforting Japanese-inspired dish with perfect texture and balanced sweet-savory flavor.
Prepare the Adzuki Beans
Begin by rinsing the 1 cup dried adzuki beans under cold water until the water runs clear. This removes any surface debris and prevents bitterness. Place the beans in a medium saucepan and add 3 cups of water. Bring to a boil over high heat, then immediately reduce to a gentle simmer.
Cover the pan and cook for 45 minutes, stirring occasionally to prevent sticking. The beans are ready when they're tender but still hold their shape—you should be able to crush them slightly between your fingers. Here's the thing: don't overcook them or they'll turn mushy. Drain any remaining water and set aside.
Cook the Short-Grain White Rice
While the beans cook, rinse the 1.5 cups short-grain white rice under cold water until the water runs clear. This removes excess starch that would make the rice gummy. In a separate pot, combine the rinsed rice with 3 cups of fresh water. Add the 0.5 teaspoon kosher salt and 0.25 teaspoon ground black pepper.
Bring to a boil over high heat, then reduce to the lowest possible simmer. Cover tightly with a lid and cook for 15 minutes. Here's what I do: I turn off the heat immediately after 15 minutes and let the rice steam undisturbed for another 10 minutes. This resting period allows the rice to absorb all the water and develop that perfect sticky texture we want for this dish.
Combine and Season the Mixture
Transfer the cooked rice to a large mixing bowl. Add the cooked adzuki beans, 0.25 cup white sugar, and 0.25 cup vegan soy sauce. Using a wooden spoon or spatula, gently fold everything together until well combined. The mixture should look moist but not wet—if it's too dry, add 1-2 tablespoons of water.
Here's where the magic happens: stir in the 1 teaspoon pure vanilla extract. This might seem unusual, but it adds a subtle depth that complements the sweet-savory profile beautifully. The vanilla also helps balance the earthy flavor of the beans. Let the mixture cool slightly while you prepare the garnishes.
Assemble and Garnish
Thinly slice the 3 whole scallions into rings. Toast the 1 tablespoon sesame seeds in a dry skillet over medium heat for 1-2 minutes until fragrant and golden. Be careful not to burn them—they should just be warm and nutty.
Transfer the rice and bean mixture to a serving dish. Drizzle with the 1 tablespoon toasted sesame oil and gently fold it in. Top with the toasted sesame seeds and scallions. For extra richness, add the 1 tablespoon vegan butter and fold it in at the end. Serve warm, straight from the pot for that comforting, home-cooked feel.
Pro Tips For Making Adzuki Beans And Rice
- SOAK BEANS 8 HOURS: I learned this the hard way—skipping the soak leaves adzuki beans tough as leather. Cover them in plenty of cold water (at least 3 cups per cup of beans) and let them sit overnight. The longer they soak, the creamier they’ll get when cooked, and you’ll avoid that gummy texture that ruins everything.
- USE TWO-POT METHOD: Split the cooking: simmer the beans in their soaking water until tender (about 1.5 hours), then drain. Meanwhile, toast the rice in a dry pan for 2 minutes—this removes excess starch and prevents mushiness. Cook rice separately in fresh water with a pinch of salt. Combine only at the end, or the beans will turn to glue.
- SWEAT BEANS FIRST: Don’t just dump raw beans into boiling water. Sauté them in a dry pan for 3-4 minutes until they darken slightly and smell nutty. This step deepens their flavor and cuts cooking time by 20 minutes. Add a splash of water if they stick, but resist the urge to rush—patience here makes the difference.
- SAVE SOY SAUCE FOR END: Add soy sauce only after the beans are fully cooked, or it’ll turn bitter. Stir in 1-2 tablespoons with the sugar (about 1/4 cup) and let it melt into a glossy syrup. If the mixture looks too thin, simmer uncovered for 2 minutes to thicken. This is the thing that matters most—balance the saltiness without overpowering the natural sweetness of the beans.
Creative variations of this adzuki beans and rice
Sweet Red Bean Rice
This is the classic Japanese anko variation—perfect for breakfast or dessert. After cooking the rice and beans together, add an extra 2 tablespoons of sugar and 1 teaspoon of mirin to deepen the sweetness. For a restaurant-style finish, top with kinako (roasted soybean flour) instead of sesame seeds. I like to serve this chilled in small bowls with a drizzle of black sesame syrup for an elegant touch. 🌸
Spicy Adzuki Rice Bowl
Transform this into a savory meal by reducing the sugar to 1 tablespoon and adding 1 teaspoon of gochugaru (Korean chili flakes) or ½ teaspoon of cayenne pepper to the bean mixture. Serve over steamed rice with toppings like avocado slices, pickled ginger, and a soft-boiled egg for a Korean-inspired bibimbap twist. The heat cuts through the sweetness beautifully. 🌶️
Vegan Breakfast Hash
For a hearty morning dish, sauté 1 diced sweet potato and ½ cup diced bell peppers in a skillet with 1 tablespoon olive oil until tender. Stir in the cooked bean-rice mixture and warm through. Top with crumbled tempeh bacon and sliced scallions for a protein-packed breakfast that’s ready in 20 minutes. This is my go-to for busy weekdays! 🍳
Dessert-Inspired Mochi Twist
Turn this into a mochi-like treat by spreading the bean-rice mixture onto a parchment-lined baking sheet and chilling for 1 hour until firm. Cut into squares, then pan-fry in ½ inch of neutral oil until golden on both sides. Roll in crushed pistachios for a crunchy, sweet finish. Serve with matcha whipped cream for a fusion dessert that’s surprisingly easy to make. 🍡
Protein-Packed Black Bean Swap
When adzuki beans are hard to find, use black beans or kidney beans instead—they work surprisingly well. For extra protein, stir in ½ cup cooked quinoa or ½ cup lentils with the beans. Add 1 teaspoon of smoked paprika and ½ teaspoon of cumin for a Mexican-inspired arroz con frijoles vibe. The texture stays creamy, but the flavor profile shifts to savory and smoky. 🌱
Savory Soy-Glazed Version
Skip the sugar entirely and increase the soy sauce to ⅓ cup. Add 1 tablespoon of rice vinegar and 1 teaspoon of grated ginger to the bean mixture for a tangy, umami-rich glaze. Garnish with thinly sliced cucumber and toasted nori strips for a refreshing, no-waste side dish that pairs perfectly with grilled fish or tofu. This version is my secret weapon for summer potlucks. 🍱
Nutrition facts
Frequently asked questions
Can I use canned adzuki beans instead of dried?
Yes, but with adjustments! Canned beans save time, but they're often saltier and less flavorful. Rinse them well and reduce the soy sauce to 2 tablespoons to avoid over-salting. For texture, add 1 tablespoon of aquafaba (chickpea brine) or a splash of water when combining with rice to mimic the creaminess of dried beans.
Why is my rice mushy instead of sticky?
Overcooking or improper rice-to-water ratio causes mushiness. Use 1.5 cups uncooked rice to 3 cups water and turn off the heat exactly at 15 minutes, then let it steam 10 minutes undisturbed. For extra stickiness, add 1 teaspoon of rice vinegar to the cooking water.
How do I make this recipe gluten-free?
Swap regular soy sauce for tamari and use certified gluten-free rice. Double-check all ingredients—some sesame oils contain wheat. For extra safety, toast your own sesame seeds at home using a dedicated skillet to avoid cross-contamination. The vanilla and sugar are naturally gluten-free!
Can I prepare this ahead of time for meal prep?
This dish tastes even better the next day. Store in airtight containers for 5 days in the fridge or freeze for 3 months. Reheat gently with 1 tablespoon of water per cup to restore moisture. Garnish with fresh scallions and sesame seeds right before serving for maximum freshness.
What's the secret to balancing sweet and savory flavors?
The vanilla extract is key! It adds depth without overpowering. For perfect balance, start with ¼ cup sugar and ¼ cup soy sauce1 teaspoon. Taste as you go—flavor builds as it cools!