
Side Dishes
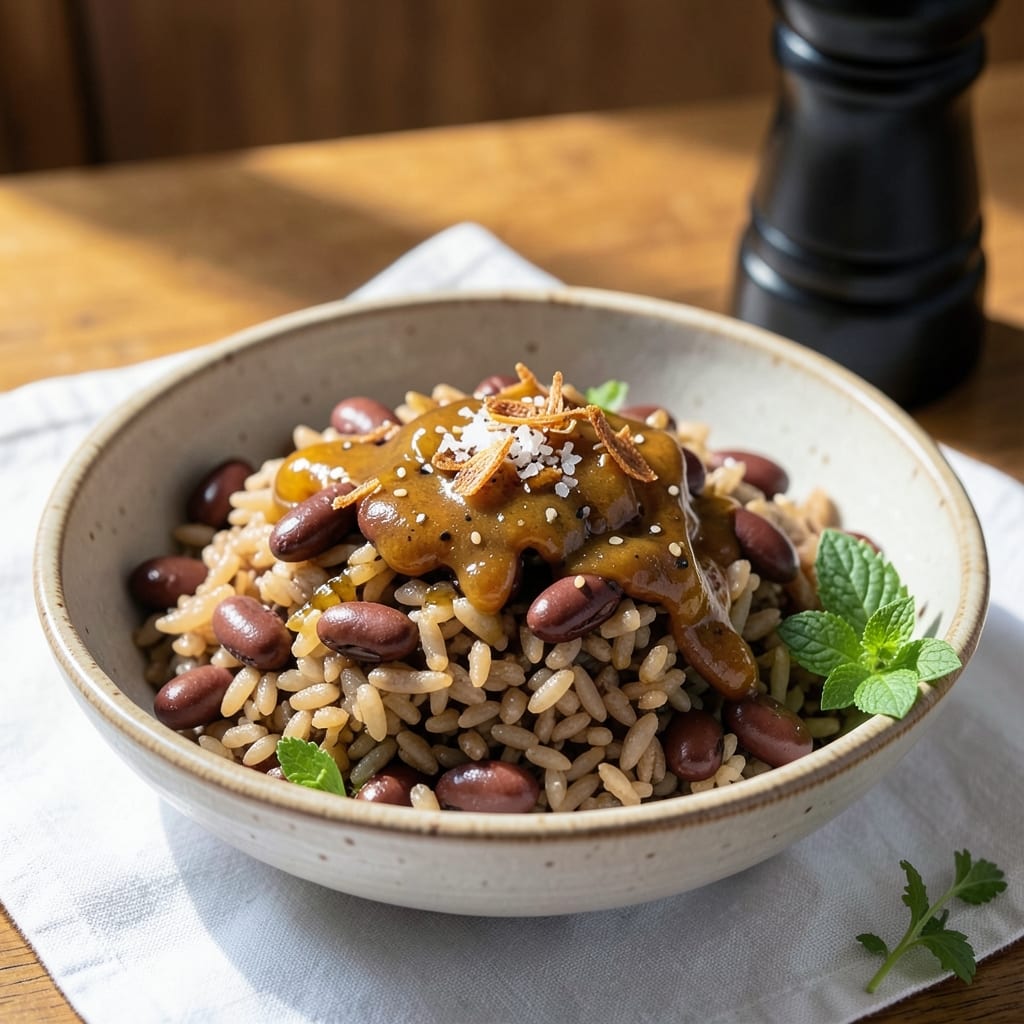
This one-pot adzuki beans and brown rice recipe brings the comforting flavors of Japan to your table with minimal effort. The sweet-savory balance comes from traditional seasonings like soy sauce and sesame oil, creating a dish that's both hearty and elegant. I developed this recipe to simplify Japanese home cooking while keeping the authentic taste—no complex techniques required, just a single pot and about 45 minutes of hands-off time.
The beauty of this dish lies in its simplicity: brown rice and adzuki beans simmer together until tender, absorbing the rich flavors of the seasonings. A touch of sugar enhances the natural sweetness of the beans, while soy sauce adds depth. The result is a perfectly balanced side that pairs beautifully with grilled fish, tofu, or even as a standalone meal. This recipe is naturally vegetarian and can be made gluten-free with tamari instead of soy sauce.
What you'll achieve is a one-pot meal that's fragrant, tender, and full of Japanese-inspired flavor. The adzuki beans become soft and slightly sweet, while the brown rice stays chewy and nutty. Garnish with toasted sesame seeds or pickled ginger for an extra layer of brightness and texture. It's the kind of dish that transforms a simple weeknight dinner into something special.
Perfect for meal prepping or serving alongside your favorite proteins, this recipe delivers restaurant-quality results with minimal effort. The one-pot method means less cleanup, and the flavors only get better as it sits. Let's get started on creating this comforting, flavorful dish that's as nourishing as it is delicious.
Ingredients for adzuki beans and brown rice
Pantry staples and a few Japanese pantry finds make this comforting one-pot dish shine.
| Ingredient | Amount | Notes |
|---|---|---|
| Short-Grain Brown Rice 🍚 | 1 cup | Uncooked, rinsed well |
| Adzuki Beans 🌱 | 1 cup | Dried, soaked overnight |
| Vegetable Broth 💧 | 3 cups | Low-sodium preferred |
| Soy Sauce 🍶 | 2 tbsp | Regular or tamari for GF |
| Sesame Oil 🫒 | 1 tbsp | Toasted, for aroma |
| White Sugar 🍯 | 1 tbsp | Adjust to taste |
| Garlic Cloves 🧄 | 2 cloves | Minced, fresh preferred |
| Ginger Root 🌿 | 1 tsp | Freshly grated |
| Toasted Sesame Seeds 🌰 | 1 tbsp | For garnish |
| Sea Salt 🧂 | ½ tsp | Adjust to taste |
| White Wine Vinegar 🍶 | 1 tsp | Brightens flavors |
| Pickled Ginger 🍋 | 2 tbsp | Optional garnish |
The adzuki beans are the star here. Japanese markets have them pre-packaged, but most grocery stores carry them in the bulk section—just make sure they're not mixed with other beans. Soaking overnight cuts cooking time by half, but if you're short on time, a quick 2-hour soak works too. For the brown rice, short-grain varieties like Koshihikari give that perfect chewy texture. If you can't find it, medium-grain brown rice will do, though it'll be a bit firmer. The sesame oil is non-negotiable for that authentic aroma—Kadoya or La Choy are reliable brands.
No soy sauce? Coconut aminos or even a pinch of salt plus a dash of liquid smoke can stand in, though it won't be identical. Fresh ginger and garlic are ideal, but if you're using dried, cut the amount to one-third—they're much more concentrated. The sugar balances the savory flavors, but if you're avoiding it, maple syrup or coconut sugar work just as well. For the vinegar, white wine vinegar is classic, but rice vinegar adds a nice depth. Pro tip: toast your sesame seeds in a dry pan for 2 minutes before adding them—they'll taste so much richer.
This keeps beautifully for 4 days in the fridge, with flavors deepening over time. Freeze portions for up to 3 months—just thaw overnight in the fridge. I like to double the recipe and portion it out for easy lunches. The rice and beans firm up when reheated, so add a splash of water or broth when warming. Garnish with those toasted sesame seeds and pickled ginger right before serving—they add that perfect pop of color and brightness.
Why You'll Love This Recipe
- One-Pot Magic: I swear by this recipe when I’m too tired to wash dishes—just toss everything (rice, beans, broth) in one pot, let it simmer, and boom. No straining, no fuss, just hands-off cooking while I sip tea and pretend I’m not burning dinner.
- Sweet-Savory Balance: That caramelized adzuki bean is where it’s at—naturally sweet with a deep umami kick from the soy sauce, then a dash of sesame oil that makes my whole kitchen smell like a Tokyo street stall. Honestly, I’ll eat this plain just to taste it again.
- Meal Prep MVP: Between us, this is my lunchbox lifesaver. Cook a big batch on Sunday, and I’ve got five days of filling, fiber-packed bowls. The rice stays fluffy, the beans hold their shape, and I’m not scrambling for ideas at 6 AM.
- Budget-Friendly Powerhouse: Short-grain brown rice and dried adzuki beans are cheap—like, "I can feed my family for a week cheap" cheap. Plus, the vegetable broth stretches easily, so I’m not breaking the bank for fancy ingredients, just solid, satisfying flavor.
Step-by-step instructions for sweet-savory Japanese-inspired one-pot
Here's how to make this comforting, flavorful dish in a single pot.
Prepare the Beans and Rice
First, drain the soaked adzuki beans and rinse them thoroughly under cold water. In a large pot with a tight-fitting lid, combine the 1 cup adzuki beans, 1 cup short-grain brown rice, and 3 cups vegetable broth. Stir gently to distribute the rice and beans evenly throughout the liquid. The beans should be mostly submerged, but don't worry if they float slightly—they'll settle as they cook.
Bring the mixture to a boil over medium-high heat. Once it reaches a rolling boil, immediately reduce the heat to low and let it simmer uncovered for 5 minutes. This initial simmer helps soften the beans and rice before we add the other ingredients. You'll notice small bubbles forming around the edges—that's your signal the liquid is at the right temperature for even cooking.
Add Aromatics and Seasonings
After the initial simmer, add the minced 2 cloves garlic and freshly grated 1 tsp ginger root to the pot. Stir gently to combine, letting the flavors meld with the broth. Then add the 2 tbsp soy sauce, 1 tbsp white sugar, and 0.5 tsp sea salt. The sugar helps balance the savory flavors while the soy sauce deepens the umami profile. Stir everything together and let the mixture simmer uncovered for another 5 minutes, allowing the aromatics to infuse the broth.
Here's where it gets good—add the 1 tbsp sesame oil and 1 tsp white wine vinegar. The sesame oil will add a nutty aroma while the vinegar brightens the flavors. Give it one more stir and let it simmer for an additional 10 minutes. You'll know it's ready when the rice is tender but still has a slight bite, and the beans are beginning to soften. The liquid should reduce slightly but still coat the bottom of the pot.
Simmer to Perfect Texture
Now comes the crucial part—cover the pot with a tight-fitting lid and reduce the heat to the lowest setting. Let it cook undisturbed for 30 minutes. This low-and-slow approach ensures the brown rice and adzuki beans cook evenly without turning mushy. You'll want to check on it after 20 minutes to make sure there's still some liquid remaining in the pot—if it looks dry, add ¼ cup water and stir gently.
After 30 minutes, remove the lid and check the texture of the rice and beans. They should be tender but still hold their shape with a slight bite. If they're not quite there, continue cooking uncovered for another 5-10 minutes, stirring occasionally to prevent sticking. The perfect texture is when the rice is fluffy and the beans are soft but still retain their shape. This balance is key to the dish's satisfying mouthfeel.
Finish and Garnish
Once the rice and beans are perfectly tender, turn off the heat and let the pot sit covered for 5 minutes. This resting period allows the flavors to meld and the liquid to redistribute. Then, give it one final stir and taste. Adjust the seasoning if needed—you might want to add a touch more soy sauce for saltiness or a pinch more sugar to balance the flavors.
To serve, transfer the mixture to bowls and garnish each serving with ½ tbsp toasted sesame seeds and ½ tbsp pickled ginger. The sesame seeds add a delightful crunch and nutty flavor, while the pickled ginger provides a bright, tangy contrast to the sweet-savory base. The pickled ginger is optional but adds that authentic Japanese touch that elevates the dish.
Pro Tips For Making Adzuki Beans And Brown Rice
- SOAK BEANS OVERNIGHT: I learned this the hard way—rushing adzuki beans means they stay stubbornly hard no matter how long you simmer. Toss them in cold water for at least 8 hours (or quick-soak: boil 2 minutes, then rest 1 hour). The texture difference is night and day, especially when paired with chewy brown rice.
- COOK RICE SEPARATELY: Mixing beans and rice in one pot is tempting, but you’ll end up with mushy rice and undercooked beans. Brown rice needs a 1:2 rice-to-water ratio and 45 minutes of simmering—don’t skimp. Cook the beans first, then fold them in at the end with a splash of broth and soy sauce.
- SALT THE BROTH LATE: Adding soy sauce or salt early to the broth turns the beans mealy. Wait until the last 5 minutes of cooking to stir in 1 tablespoon of soy sauce and a pinch of salt. This keeps the beans tender and lets the flavor bloom without overpowering them.
- FINISH WITH SESAME OIL: Drizzle sesame oil over the hot dish right before serving—yes, even if it’s just for you. The aroma evaporates fast, and adding it early makes the rice taste bitter. A teaspoon at the end adds nutty depth without overpowering the earthy adzuki and rice.
Dietary considerations for this dish
Vegetarian Powerhouse
This dish is a complete vegetarian protein source, thanks to the adzuki beans which pack 17 grams of plant-based protein per cup. The combination of beans and brown rice provides all nine essential amino acids, making it a complete protein—perfect for vegans or anyone looking to reduce meat consumption. I've made this my go-to weekday dinner because it keeps me full and energized without any animal products. 💪
Gluten-Free Friendly
With just one simple swap, this recipe becomes entirely gluten-free. Replace the regular soy sauce with tamari or coconut aminos, both of which are naturally gluten-free alternatives. I always keep tamari on hand for recipes like this—it has that same rich umami flavor without the gluten. The rest of the ingredients are naturally gluten-free, so this makes an excellent option for those with celiac disease or gluten sensitivities.
Low Glycemic Index
The brown rice in this recipe has a lower glycemic index than white rice, thanks to its higher fiber content. When combined with the adzuki beans, you get a dish that helps stabilize blood sugar levels better than refined grains. This makes it particularly suitable for people managing diabetes or simply looking to maintain steady energy throughout the day. The beans' natural sweetness also helps satisfy sugar cravings in a healthier way.
Rich in Fiber
This one-pot meal delivers an impressive 15 grams of fiber per serving, thanks to both the beans and brown rice. That's over half the recommended daily intake! The fiber supports digestive health and keeps you feeling satisfied longer. I've noticed that when I include this dish in my meals, my digestion improves and I experience less bloating. The beans' skin contains soluble fiber that helps lower cholesterol levels as well.
Nutrient-Dense Ingredients
The adzuki beans bring iron, magnesium, and potassium to the table, while the brown rice contributes B vitamins and selenium. Together they create a nutrient powerhouse that supports everything from energy production to immune function. The sesame seeds you garnish with add extra calcium and healthy fats. This dish truly gives you a complete nutritional package in every bite. ✨
Meal Prep Perfect
This recipe stores beautifully for 4-5 days in the fridge, making it ideal for meal prepping. The flavors actually deepen over time, which is why I often double the recipe and portion it out for lunches. The high fiber and protein content also help keep the dish satisfying when reheated. Just add a splash of water when warming to prevent drying out. It's my secret weapon for easy, healthy lunches all week long.
Nutrition facts
Frequently asked questions
Why should I soak the adzuki beans overnight?
Soaking overnight reduces cooking time by 30-40 minutes and prevents beans from becoming mushy. The longer soak also makes them easier to digest, breaking down complex sugars that can cause bloating. For a quick version, soak them for at least 2 hours—just don't skip this step!
Can I substitute white rice for brown rice in this recipe?
Technically yes, but the texture and nutrition will change. Brown rice stays chewy and nutty, while white rice becomes softer and loses fiber. For a closer match, use jasmine or short-grain white rice and reduce cooking time by 5-10 minutes. The sweet-savory balance will still work, but the dish won't be as hearty.
How do I fix mushy adzuki beans?
Mushy beans usually mean overcooking or insufficient soaking. If it happens, stir in 1 tbsp toasted sesame seeds and ½ tsp salt to enhance flavor. For next time, reduce simmering time by 5 minutes and check texture earlier. The beans should hold their shape but still be tender.
What's the best way to reheat leftovers?
Add 2 tbsp water or broth per cup of leftovers, cover, and heat on low for 3-5 minutes. Stir gently to redistribute moisture. Microwaving works too—use 50% power for 1-2 minutes, then let sit covered for 1 minute. The beans and rice will firm up slightly but stay delicious.
Can I make this recipe without sesame oil?
Yes! Replace it with 1 tsp neutral oil (like avocado or vegetable) plus ½ tsp toasted sesame seeds. For extra depth, add ¼ tsp ground ginger or a pinch of smoked paprika. The dish will still taste great, though it'll lack that signature nutty aroma.