
Main Courses
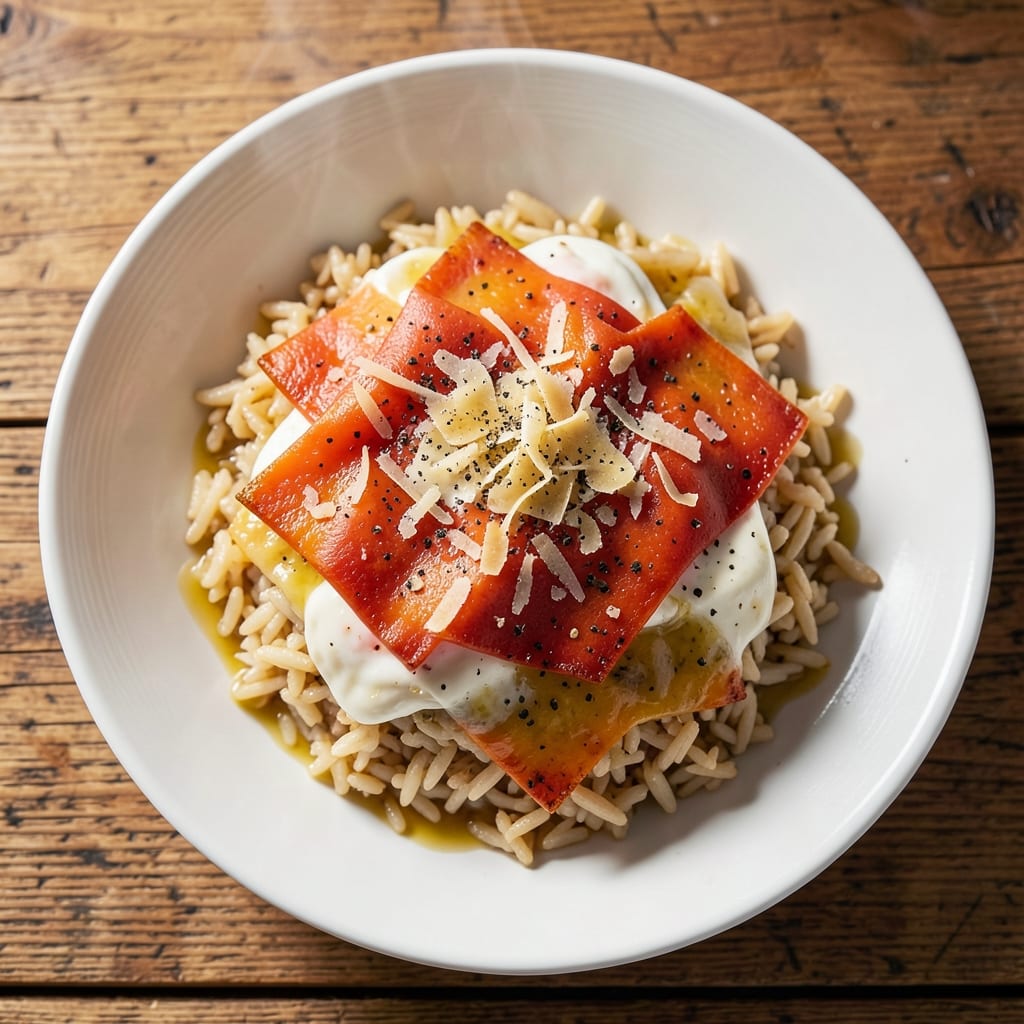
This 4 cheese rice recipe transforms simple white rice into a luxurious, cheesy masterpiece with a golden crust and melty edges—no risotto skills required. The secret lies in layering four distinct cheeses (sharp cheddar, Gruyère, mozzarella, and Parmesan) that create a creamy, flavorful base while developing that coveted crispy top. I perfected this technique after years of experimenting with baked rice dishes, and it consistently delivers restaurant-quality results at home.
The magic happens in two stages: first, cooking the rice until tender and absorbing the cheese mixture, then finishing under the broiler to achieve that perfect golden crust. This method ensures every grain is coated in rich, cheesy goodness while maintaining the ideal texture—creamy yet firm enough to hold its shape. The combination of sharp cheddar for tang, Gruyère for nutty depth, and mozzarella for meltability creates a flavor profile that's impossible to resist.
What you'll end up with is a dish that's equal parts comforting and impressive—ideal for feeding a crowd, meal prepping, or elevating a simple weeknight dinner. The aroma alone will have everyone gathering around the table, and the first bite delivers that perfect balance of creamy cheese and crispy edges. This recipe is your go-to for turning basic rice into something extraordinary.
Pair it with a simple green salad or roasted vegetables for a complete meal, or serve it as a side to grilled meats for added indulgence. The best part? It's easier than it looks, and the results are always worth the effort. Let's get started on creating this cheesy masterpiece.
Ingredients for 4 cheese rice
Four cheeses, one magical golden crust—here's the ingredient lineup for your next cheesy masterpiece.
| Ingredient | Amount | Notes |
|---|---|---|
| Long-Grain White Rice 🍚 | 1 ½ cups | Uncooked, jasmine or basmati preferred |
| Sharp Cheddar Cheese 🧀 | 1 cup | Shredded, aged 6+ months |
| Gruyère Cheese 🧀 | ¾ cup | Shredded, French or Swiss |
| Mozzarella Cheese 🧀 | ¾ cup | Fresh, part-skim or whole milk |
| Parmesan Cheese 🧀 | ½ cup | Freshly grated from block |
| Chicken Broth 💧 | 1 ½ cups | Low-sodium, homemade preferred |
| Heavy Cream 🥛 | ½ cup | Full-fat for richness |
| Butter 🧈 | 2 tbsp | Unsalted, melted |
| Garlic Cloves 🧄 | 3 cloves | Minced, fresh preferred |
| Shallot 🧅 | 1 whole | Minced, or sub 2 tbsp onion |
| Salt 🧂 | 1 tsp | Kosher or sea salt |
| Black Pepper 🌶️ | ½ tsp | Freshly ground |
| Dried Thyme 🌿 | ¼ tsp | Or 1 tbsp fresh thyme |
| Olive Oil 🫒 | 1 tbsp | For greasing baking dish |
The cheeses are where the magic happens. Gruyère brings that nutty depth, sharp cheddar adds tang, and fresh mozzarella delivers meltability—don't skip any! I grab my Gruyère from Whole Foods since it's consistently high-quality, but any good cheese shop will have it. For the mozzarella, fresh is non-negotiable—pre-shredded gets rubbery. The Parmesan? Always grate it yourself from a wedge—pre-grated tastes like sawdust. If you're feeling fancy, aged Gouda can replace some cheddar for extra complexity.
No Gruyère? Comté or aged Gouda works in a pinch. Short on mozzarella? Fontina melts just as beautifully. The chicken broth can be subbed with vegetable broth plus 1 tsp chicken bouillon if you're vegetarian. For the garlic, fresh is ideal, but if you're using jarred, add an extra clove. The butter matters here—full-fat is a must for that rich, velvety texture. And if you're prepping ahead, make the cheese sauce first—it keeps for 2 days in the fridge.
This reheats beautifully—just cover with foil and warm in the oven for 15-20 minutes. The crust gets even crispier the second time around, honestly. Store leftovers in an airtight container for 3-4 days, or freeze portions for up to 2 months. I always make a double batch—half for dinner, half for lunches. The cheese sauce alone? Freeze it separately for quick rice toppings later.
Why You'll Love This Recipe
- I swear by this trick: just toss everything—rice, cheeses, even a splash of broth—into one pot and let it simmer. No separate pans, no fuss, and honestly? The Gruyère melts into that perfect stringy, gooey goodness without a single extra dish.
- One-Pot Magic: I swear by this trick: just toss everything—rice, cheeses, even a splash of broth—into one pot and let it simmer. No separate pans, no fuss, and honestly? The Gruyère melts into that perfect stringy, gooey goodness without a single extra dish.
- Cheese Overload Bliss: Between the sharp bite of cheddar, the nutty depth of Gruyère, and that salty crunch of Parmesan, every forkful is a flavor party. Mozzarella stretches into little pockets of meltiness that make this dish feel like a hug for your taste buds—no sad, dry rice here.
- Lunchbox Hero: Between us, this is my go-to for meal prep. Pack it cold or reheat it, and it’s still delicious—kids love the cheesy bits, adults appreciate the simplicity. I’ve sent this to work, school lunches, and even potlucks, and no one’s ever complained.
Step-by-step instructions for 4 cheese rice with melty edges
Here's how to create that perfect golden crust with gooey, melted cheese throughout.
Sauté Aromatics for Flavor Foundation
Heat the 1 tablespoon olive oil in a large skillet over medium heat. Add the minced shallot and cook for 3-4 minutes until softened and translucent. This is your flavor base - don't rush it.
Add the 3 cloves minced garlic and cook for another 30 seconds until fragrant. Immediately transfer the shallot-garlic mixture to your greased 9x9-inch baking dish (use the same 1 tablespoon olive oil you started with). Spread it evenly across the bottom - this creates the perfect aromatic layer for your rice.
Layer Cheeses and Prepare Rice Mixture
In a large bowl, combine the 1.5 cups long-grain white rice with the 1.5 cups chicken broth, 0.5 cup heavy cream, 2 tablespoons melted butter, 1 teaspoon salt, 0.5 teaspoon black pepper, and 0.25 teaspoon dried thyme. Mix gently but thoroughly - you want the rice evenly coated but not broken.
Sprinkle half of the 1 cup sharp cheddar cheese, 0.75 cup gruyère cheese, and 0.75 cup mozzarella cheese evenly over the shallot-garlic mixture in the baking dish. Pour the rice mixture on top, spreading it out to create an even layer. This careful layering ensures maximum melty cheese pockets throughout.
Create the Golden Crust and Bake
Sprinkle the remaining 1 cup sharp cheddar, 0.75 cup gruyère, 0.75 cup mozzarella, and 0.5 cup freshly grated parmesan evenly over the top of the rice mixture. Press down gently with your fingers - this creates the perfect crust while keeping the interior tender.
Cover the baking dish tightly with aluminum foil and bake at 375°F for 30 minutes. After 30 minutes, remove the foil and increase the oven temperature to 400°F. Bake uncovered for another 15-20 minutes until the top is deep golden brown and the edges are bubbling with melted cheese.
Rest and Serve for Perfect Texture
Remove the baking dish from the oven and let it rest for 10 minutes before serving. This resting period allows the cheese to set slightly and makes it easier to create clean slices. The interior should be creamy with pockets of melted cheese while the exterior maintains that perfect golden crust.
Use a sharp knife to cut through the crust and serve immediately. The contrast between the crispy exterior and creamy, cheesy interior is what makes this dish truly special. Each bite should deliver that perfect combination of textures and flavors - salty cheddar, nutty gruyère, creamy mozzarella, and rich parmesan all working together in harmony.
Pro Tips For Making 4 Cheese Rice
- COOK RICE SEPARATELY: I used to mix the rice in with the cheeses right away, thinking it’d blend better—wrong move. Cook the rice first until it’s just tender (not mushy), drain any excess water, then fold in the melted cheeses. This keeps the texture light and prevents a gluey mess.
- GRATE CHEESES DIFFERENTLY: Sharp cheddar and Gruyère need a fine grate (like a box grater) for even melting, while mozzarella and Parmesan can stay slightly chunkier. Mozzarella’s stringy when melted—toss it in after the other cheeses are already combined to avoid clumping.
- WATCH THE TEMPERATURE: Low and slow is your friend here. Once the cheeses start melting, drop the heat to medium-low and stir constantly. I learned this the hard way—burning Gruyère once made the whole dish taste bitter. Keep it moving, even if it takes 10 minutes.
- UPGRADE WITH BUTTER: Swap out some of the milk for 2 tablespoons of cold butter (yes, even if the recipe doesn’t say it). Stir it in at the end—it adds richness and helps the cheeses cling better to the rice. (Your future self will notice the difference.)
Essential equipment for this dish
Baking Dish Essentials
You'll need a 9x9-inch baking dish with at least 2-inch sides—I recommend Ceramic or stainless steel for even heat distribution. Avoid dark-colored dishes that can over-bake the edges. My personal favorite is a USA Pan 9x9-inch because it holds heat beautifully and releases easily. Grease it well with olive oil before adding ingredients to prevent sticking—this is non-negotiable for clean slices later. 🧈
Oven Thermometer
Your oven's temperature display can be off by 25°F or more, and precision matters here. I use a Thermoworks Oven Thermometer to verify 375°F and 400°F settings—critical for that perfect crust. Place it near your baking dish during cooking. If your oven runs hot, reduce the temperature by 15°F to prevent over-browning.
Cheese Tools
For maximum meltability, invest in a microplane for freshly grating Parmesan (pre-grated tastes like sawdust). A sharp cheese slicer works best for Gruyère and cheddar—it creates even shreds that melt uniformly. Store cheeses in airtight containers in your fridge to maintain freshness. Pro tip: Let cheeses sit at room temperature for 15 minutes before shredding for easier handling.
Broiler Pan Handle
When you're ready for the final broil, a heat-resistant silicone oven mitt or broiler pan handle is a game-changer. This protects your hands while achieving that deep golden crust at 400°F. I keep one near my oven at all times—it's worth the $10 for safety and convenience. Watch closely after 5 minutes to prevent burning.
Knife & Cutting Board
Use a sharp 8-inch chef's knife (like Wüsthof) and a cutting board for clean slices through the crust. A serrated knife works too, but a sharp chef's knife gives you more control. For even cleaner cuts, dip the knife in hot water between slices—this helps it glide through the cheesy layers. 🔪
Optional: Sprinkle Tools
For even cheese distribution, a fine-mesh sprinkle (like Norpro) ensures no clumps form. If you don't have one, use a small sieve or even a paper towel to gently press cheese through. Avoid using your fingers—it's harder to distribute evenly. This step is key for that restaurant-quality finish without extra effort.
Nutrition facts
Frequently asked questions
Can I make this recipe with instant rice?
Yes, but with adjustments! Use 1 cup instant rice instead of 1.5 cups long-grain, and reduce the broth to 1 cup (it absorbs liquid faster). Cut the baking time to 20 minutes total (10 covered at 375°F, then 10 uncovered at 400°F). The texture will be slightly softer but still creamy and delicious.
Why did my cheese sauce get watery?
This usually happens if the rice isn't fully cooked before baking or if you overmixed the ingredients. Make sure your rice is tender and the liquid is absorbed before adding cheese. For extra insurance, press down gently on the cheese layer before baking to help it melt properly. Also, avoid pre-shredded cheese—it contains anti-caking agents that can make the sauce grainy.
Can I prepare this ahead of time?
Assemble the dish up to 24 hours ahead and refrigerate uncovered. When ready to bake, add 10-15 minutes to the baking time (cover for 40 minutes at 375°F, then broil for 5-10 minutes at 400°F). The cold cheese will take longer to melt, but the result is just as good. For meal prep, store leftovers in an airtight container for 3-4 days.
What's the best way to reheat leftovers?
For best results, cover with foil and reheat at 350°F for 15-20 minutes until warmed through. If you want that crispy crust back, broil for 2-3 minutes at the end. Microwaving works in a pinch (cover with a damp paper towel, 30-second intervals), but it won't recreate the oven's golden finish. The cheese sauce reheats beautifully, making this dish perfect for lunches!
Can I make this vegetarian?
Yes! Simply swap the chicken broth for vegetable broth and add 1 teaspoon chicken bouillon for depth. For extra richness, stir in 1 tablespoon nutritional yeast with the broth. The cheese combination works perfectly without meat, and the dish still delivers that satisfying, creamy texture.