
Main Courses
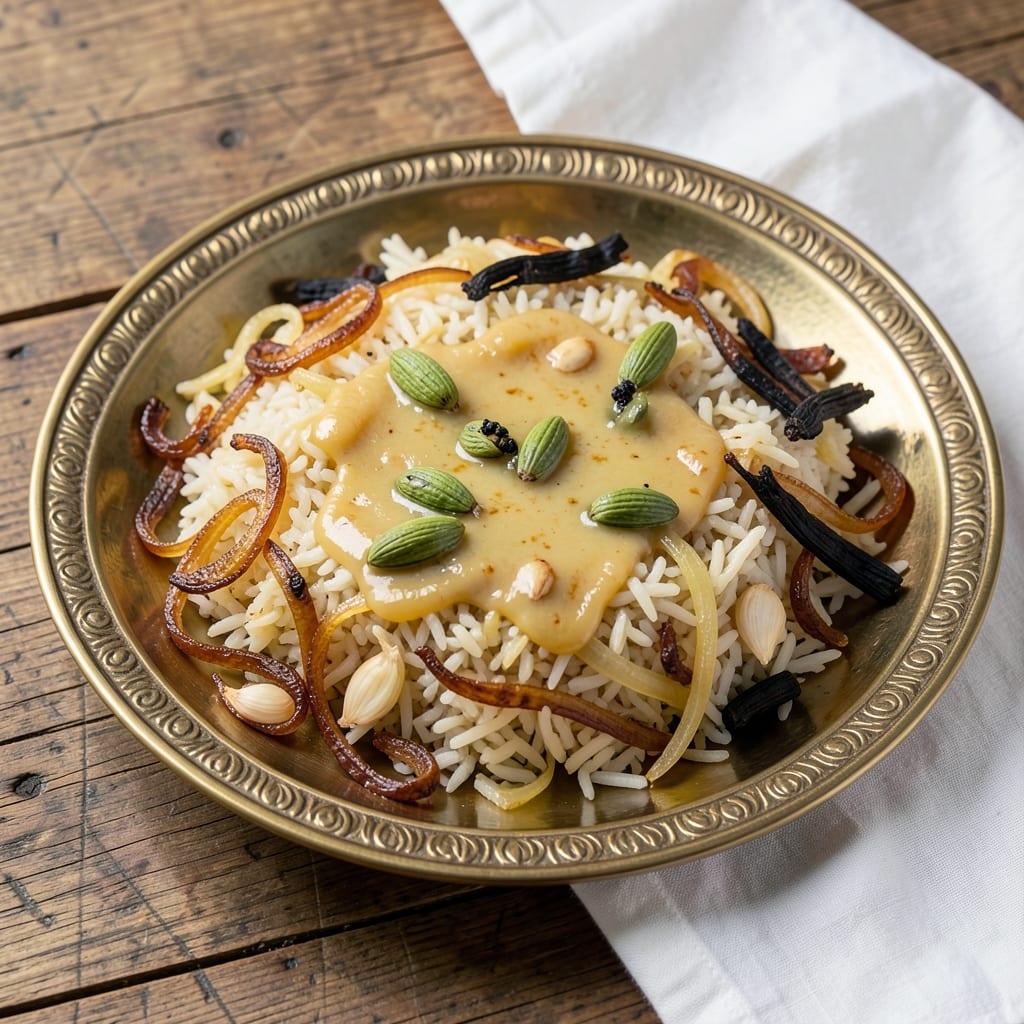
This 1 kg ghee rice recipe transforms simple basmati into a luxurious, fragrant centerpiece that rivals restaurant biryani—rich, nutty, and threaded with saffron's golden hue. The secret lies in slow-toasting whole spices in ghee until they release deep, aromatic oils that infuse every grain. I developed this after years of testing; the difference between good rice and extraordinary rice comes down to this one step: patience in the ghee.
What sets this apart is the layered flavor profile: caramelized onions form a sweet base, toasted spices add warmth, and saffron dissolves into the ghee for its signature floral note. The rice cooks in its own steam, absorbing the ghee's richness without becoming greasy. This method works equally well for special occasions or weeknight dinners—just scale the ghee accordingly. For maximum indulgence, finish with fried onions and chopped herbs.
The result is rice that's irresistibly fragrant, with each grain coated in a delicate ghee sheen that melts at the first bite. The texture is perfectly firm yet tender, with a subtle crunch from the toasted spices. This isn't just rice—it's a flavor experience that elevates any meal, whether paired with grilled meats, yogurt-based raitas, or simply enjoyed as-is. The aroma alone will have everyone gathering at the table.
For those short on time, I'll show you how to adapt this to a pressure cooker without sacrificing flavor. The key is maintaining the ghee infusion—never skip the spice toasting, as that's where the magic happens. Let's create rice that tastes like a celebration, every single time.
Ingredients for 1 kg ghee rice
Ghee, saffron, and spices—just these ingredients transform ordinary rice into a fragrant, luxurious centerpiece.
| Ingredient | Amount | Notes |
|---|---|---|
| Basmati Rice 🌾 | 1 kg | Long-grain, high-quality preferred |
| Ghee 🧈 | 1 ½ cups | Pure, unsalted, high-quality |
| Yellow Onions 🧅 | 2 whole | Medium-sized, thinly sliced |
| Garlic Cloves 🧄 | 8 cloves | Peeled, minced finely |
| Green Cardamom Pods 🌿 | 6 whole | Lightly crushed |
| Black Cardamom Pods 🌿 | 2 whole | Lightly crushed |
| Cinnamon Sticks 🌿 | 2 whole | 2-inch pieces |
| Cloves 🌿 | 4 whole | Whole, lightly crushed |
| Bay Leaves 🌿 | 2 whole | Fresh or dried |
| Saffron Threads 💛 | ¼ tsp | High-quality, soaked in 1 tbsp warm water |
| Salt 🧂 | 1 ½ tsp | Fine sea salt |
| Fresh Cilantro 🌿 | ¼ cup | Chopped, for garnish |
| Fresh Mint Leaves 🌿 | 0.15 cup | Chopped, for garnish |
| Fried Onions 🧅 | ¼ cup | Store-bought or homemade |
The ghee is non-negotiable here. Gujarat or Amul brands are my go-tos, but any pure, unsalted ghee works—just avoid the heavily processed stuff. For the rice, Tilda or India Gate basmati is what I stock up on; they stay separate from other grains to prevent cross-contamination. The saffron? Iranian or Kashmiri is worth the splurge—it's the only time I don't skimp on quality. Toast your whole spices in the ghee until they're fragrant and just starting to brown—this step makes all the difference. If you're buying whole spices, spice markets or bulk bins are your best bet for freshness.
No cardamom? Skip it entirely—this dish can handle the absence. Out of saffron? A pinch of turmeric (⅛ tsp) adds color, though it won't replicate that floral note. For the onions, yellow or red work fine, but avoid sweet onions—they'll caramelize too quickly. If you're short on time, pre-minced garlic from the jar is a decent shortcut (just rinse it first). The fried onions can be store-bought—Trader Joe's has great ones, or make your own by frying thin onion slices in ghee until crispy. For the herbs, fresh cilantro and mint are ideal, but dried oregano at half the amount works in a pinch.
This rice keeps beautifully—3-4 days in the fridge, covered tightly. Reheat gently with a splash of water or ghee to restore that silky texture. For leftovers, store in an airtight container with a paper towel on top to absorb any moisture. The aroma alone will wake up your kitchen, so I always make extra for lunches. Freezes well too—up to 3 months—though the texture might get slightly softer after thawing. If you're prepping ahead, toast the spices and store them in the ghee in the fridge for up to 1 week—just bring to room temp before using.
Why You'll Love This Recipe
- Here’s what sold me: you’re basically turning rice into a centerpiece without breaking the bank. Ghee feels indulgent, but a kilogram goes a long way, and the rest of the ingredients? Simple, cheap, and always in my pantry. Feels like a splurge for pennies.
- One-Pot Magic: I swear by this—just rice, ghee, and a handful of aromatics in the same pot. No extra bowls, no mess. The onions caramelize right there while the rice cooks, and honestly? That lazy-but-luxurious smell alone is half the win.
- Rich Without Effort: Between us, 1 kg of ghee isn’t just a number—it’s the secret to that silky texture and nutty depth. The cardamom pods crack open like tiny flavor bombs, while the garlic fries until it’s sweet and golden. Not fancy, just ridiculously satisfying.
- Leftover Goldmine: This keeps for days—better than fresh, if you ask me. The ghee makes it reheat like a dream, and the flavors only meld more as time passes. Pack it for lunch, serve it at dinner, or freeze half for when you’re too tired to cook.
Step-by-step instructions for saffron-kissed, nutty-caramelized ghee rice
This luxurious rice transforms ordinary grains into a fragrant, golden masterpiece.
Bloom the Spices in Ghee
In a heavy-bottomed pot, melt the 1.5 cups ghee over medium-low heat. Add the 2 whole yellow onions (thinly sliced) and cook for 8-10 minutes until they turn translucent and begin to caramelize at the edges. This is where the magic starts—those onions will develop deep, sweet flavors that infuse the rice.
Next, add the 6 whole green cardamom pods, 2 whole black cardamom pods, 2 whole cinnamon sticks, 4 whole cloves, and 2 whole bay leaves. Let them bloom for 2-3 minutes until the air fills with an intoxicating aroma. You'll know it's perfect when the spices release their oils and the ghee takes on a subtle golden hue. This step builds the aromatic base that makes this rice extraordinary.
Add Garlic and Saffron
Stir in the 8 cloves minced garlic and cook for 1-2 minutes until fragrant but not browned. Browned garlic can turn bitter, so watch it closely. The garlic should smell pungent and sweet—this is your signal to move quickly to the next step.
In a small bowl, soak the 0.25 tsp saffron threads in 1 tablespoon warm water for 5 minutes. Once fragrant, add this saffron infusion to the pot along with the 1.5 tsp salt. Stir gently to distribute the saffron evenly. The rice will develop its signature golden color and delicate floral notes from this step. Let the mixture simmer together for 1 minute to meld all the flavors.
Toast the Rice
Add the 1 kg basmati rice to the pot and stir gently for 2-3 minutes until each grain is lightly coated with the ghee and spices. This toasting step is crucial—it prevents the rice from becoming mushy and gives it that signature nutty aroma. You'll see the rice grains become translucent at the edges, indicating they're properly toasted.
Pour in 2 cups water (just enough to cover the rice) and bring to a gentle boil. Once boiling, reduce heat to low, cover the pot with a tight-fitting lid, and let it simmer for 15 minutes. The rice should cook in its own steam, absorbing all the rich flavors from the ghee and spices. Avoid peeking or lifting the lid—this disrupts the cooking process and can lead to uneven texture.
Rest and Garnish
After 15 minutes, turn off the heat and let the rice sit covered for another 10 minutes. This resting period allows the steam to redistribute and the rice to finish cooking perfectly. The grains should be tender but still have a slight bite—al dente.
Fluff the rice gently with a fork, then stir in the 0.25 cup fried onions, 0.25 cup chopped fresh cilantro, and 0.15 cup chopped fresh mint leaves. The fried onions add a satisfying crunch, while the herbs bring freshness to balance the richness of the ghee. Serve immediately while still warm for the best texture and flavor experience.
Pro Tips For Making 1 Kg Ghee Rice
- Bloom the Onions Slowly: Ghee rice needs onions that melt into sweet, caramelized strands—not crispy bits. After frying the onions in ghee, drop the heat to medium-low and stir constantly for 8-10 minutes. I used to rush this, and the onions never broke down properly—now they turn golden and jammy, which is where the real flavor hides. ---
- Toast the Cardamom First: Lightly crush the green cardamom pods and fry them in ghee for 30 seconds before adding onions. This releases their aromatic oils and prevents them from turning bitter later. (Yes, even if you’re impatient like me—just don’t burn them.) ---
- Use Double the Ghee: Skip the oil shortcut—this isn’t the time to cut corners. Ghee’s smoke point is higher than butter, and 1 kg rice needs at least 150-200g of it (yes, it sounds excessive). The extra fat makes the rice grains glisten and adds a rich, buttery depth that nothing else can. ---
- Rest the Rice Covered: After cooking, spread the rice on a tray for 5 minutes to release steam, then cover with a damp cloth and let it sit for 10 minutes. This prevents sogginess and lets the ghee redistribute evenly. I learned this the hard way—skipping it leaves you with a sticky, uneven mess.
Make-ahead tips for 1 kg ghee rice
Prep Ahead Spice Base
Save time by toasting your spices in ghee up to 3 days ahead—store the aromatic mixture in an airtight container in the fridge. I like to keep it in a glass jar with a tight lid to preserve the flavors. When ready to cook, simply bring the ghee-spice blend to room temperature before adding your rice and onions. This shortcut maintains all the depth of flavor without sacrificing quality. 🧈
Pressure Cooker Adaptation
For a quick version, use a pressure cooker like the Instant Pot—just toast your spices in ghee first, then add rice and 2 cups water. Seal the lid and cook on high pressure for 8 minutes, followed by a 10-minute natural release. The ghee infusion remains intact, and you’ll have perfectly cooked rice in under 30 minutes. This method works especially well for busy weeknights.
Freezer-Friendly Leftovers
Portion cooled rice into quart-sized freezer bags, removing as much air as possible to prevent freezer burn. Label with the date—this rice stays delicious for up to 3 months. To reheat, thaw overnight in the fridge, then gently warm in a pot with a splash of water or ghee over low heat. The texture remains creamy, and the flavors are just as vibrant as the day you made it. ❄️
Garnish Prep Station
Set up a garnish station with fried onions, cilantro, and mint pre-chopped and stored in small bowls. Keep the fried onions in a separate airtight container to maintain their crispiness. When ready to serve, simply sprinkle the herbs and onions over the rice for a fresh, vibrant finish. This step adds brightness and balances the richness of the ghee. 🌿
Double the Batch
This recipe scales beautifully—double the ingredients for a crowd, but use a larger, heavy-bottomed pot to prevent boiling over. I often make 2 kg batches for gatherings, as the leftovers reheat wonderfully. Store any extras in the fridge for up to 4 days, or freeze for later. The extra effort pays off when you’re serving a group and can focus on other dishes. 💫
Ghee Substitutes
If you’re out of ghee, butter or neutral oil (like avocado or vegetable oil) can work in a pinch, though the flavor will be less rich. For a closer substitute, use clarified butter—just avoid the milk solids to prevent burning. The texture won’t be as luxurious, but it’s a decent backup for when you’re short on time. Always return to ghee for the best results, though! 🔥
Nutrition facts
Frequently asked questions
Can I use this ghee rice recipe for special occasions?
This recipe is designed for celebrations—its saffron-infused richness and aromatic spices make it perfect for weddings, feasts, or holiday gatherings. For an extra touch, serve it in a clay pot or brass tray to enhance presentation. Pair with grilled meats, yogurt-based raitas, or pickled vegetables for a complete spread.
How do I adjust the recipe for fewer servings?
For 2 servings, halve all ingredients: use 500g basmati rice, 0.75 cup ghee, and 1 cup water. Keep the spice ratio the same—just reduce quantities proportionally. The toasting time remains unchanged, but cooking time may reduce to 10-12 minutes instead of 15.
Why does my rice turn out mushy?
Mushy rice usually happens from one of three issues: too much water, lifting the lid while cooking, or under-toasted rice. Always use 2 cups water per 1 kg rice (just covering the grains), avoid peeking during cooking, and toast the rice for 2-3 minutes until translucent at the edges. For extra insurance, use a heavy-bottomed pot to prevent scorching.
Can I add vegetables to this ghee rice?
Yes! Stir in 1 cup mixed veggies (like peas, carrots, or bell peppers) with the rice during the 15-minute cooking time. For firmer veggies (like potatoes), add them 5 minutes earlier and reduce water by 0.5 cup. The ghee will beautifully coat the vegetables, enhancing their flavors. Just avoid adding leafy greens—they'll wilt in the high-fat environment.
What's the best way to store leftover ghee rice?
Store in an airtight container for 3-4 days in the fridge. For longer storage, freeze in quart-sized bags for up to 3 months. To reheat, add 1-2 tablespoons water or ghee and warm on low heat until steaming. Never microwave—it ruins the texture. The rice reheats best when gently steamed to restore its creamy consistency.