
Main Courses
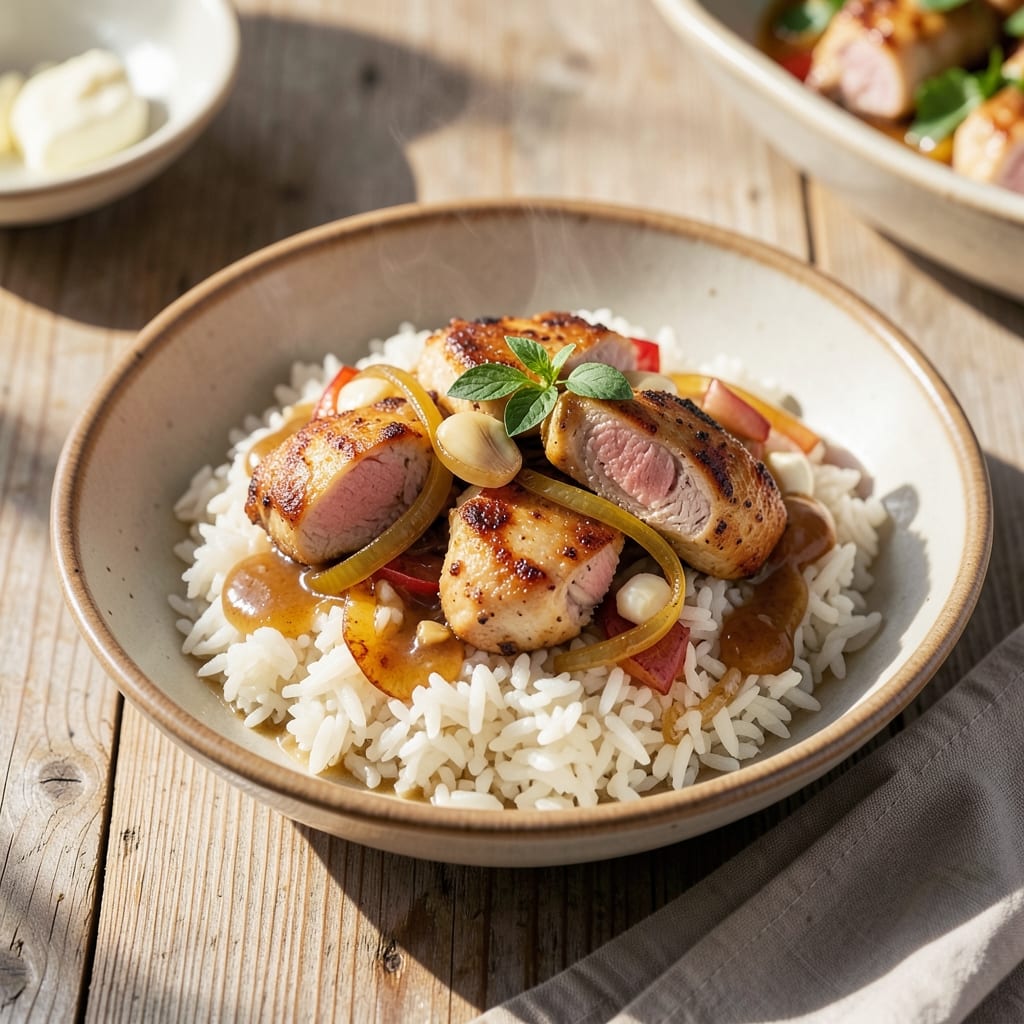
Mastering a 1-cup rice recipe transforms simple grains into a versatile, protein-packed foundation for any meal—perfect for busy weeknights. The secret lies in the one-pot method, which cuts cleanup while ensuring fluffy, evenly cooked rice every time. Whether you're using white, brown, or basmati, this technique guarantees consistent results without the guesswork. Start with a 1:2 rice-to-water ratio (or broth for extra flavor), and never skip rinsing the grains first to remove excess starch. For added depth, stir in butter, garlic, or herbs during the final minutes of cooking. The result? Light, separate grains that absorb flavors beautifully while maintaining their natural texture. This method works for sides, bowls, or even as a base for stir-fries—all in 20 minutes or less. The simplicity makes it ideal for beginners, while the flexibility lets you customize flavors to suit any dish. Ready to elevate your rice game? Let’s get started with the foolproof steps.
What sets this approach apart is the one-pot efficiency, which eliminates the need for separate pots or strainers. The rice cooks directly in the same pot where you’ll later add proteins or vegetables, making it a time-saver and space-saver. For extra richness, swap water for broth or coconut milk, or finish with a pat of butter and fresh herbs for a restaurant-worthy touch. The beauty of this recipe is its adaptability—use it as a side for grilled chicken, a base for fried rice, or a standalone meal with sautéed veggies and a fried egg. The 20-minute timeline ensures dinner is on the table without sacrificing flavor or texture. Whether you're feeding one or a crowd, this method delivers consistent, delicious results.
For best results, always rinse the rice before cooking to prevent gummy texture, and avoid lifting the lid while the rice steams—this keeps the grains intact. If you prefer firmer rice, reduce the water slightly; for softer grains, add a splash more. The one-pot technique also works for brown rice, though cooking times may vary. Serve your perfectly cooked rice alongside proteins, roasted vegetables, or as a base for a hearty bowl. This recipe isn’t just about rice—it’s about building a flexible, flavorful foundation for any meal. Ready to try it? The instructions make it simple.
Ingredients for 1 cup of rice
The foundation for a protein-packed one-pot meal starts with these 12 essential ingredients.
| Ingredient | Amount | Notes |
|---|---|---|
| Long-Grain White Rice 🍚 | 1 cup | Uncooked, medium or jasmine variety preferred |
| Chicken Breast 🍗 | ¾ lb | Boneless, skinless, cut into bite-sized pieces |
| Garlic Cloves 🧄 | 4 cloves | Minced for aromatic depth |
| Yellow Onion 🧅 | ½ whole | Diced, medium yellow preferred |
| Unsalted Butter 🧈 | 2 tbsp | European-style for higher smoke point |
| Chicken Broth 💧 | 2 cups | Low-sodium, homemade preferred |
| Fresh Thyme Leaves 🌿 | ¼ cup | Chopped, or 1 tsp dried thyme |
| Bay Leaves 🌿 | 2 whole | For subtle earthy complexity |
| Diamond Crystal Kosher Salt 🧂 | 1 ½ tsp | Adjust to taste after cooking |
| Freshly Ground Black Pepper 🌶️ | ½ tsp | Cracked peppercorns preferred |
| Lemon Juice 🍋 | 1 tbsp | Freshly squeezed for brightness |
| Fresh Parsley 🌿 | ⅛ cup | Chopped, for vibrant garnish |
The rice selection is critical for texture. Long-grain white rice yields perfectly separate grains, while basmati adds a delicate floral note. For extra flavor depth, jasmine rice from Asian markets delivers aromatic complexity. The chicken breast should be cut uniformly—bite-sized pieces ensure even cooking. If using pre-cut chicken, trim any large chunks to maintain consistency. For the broth, homemade chicken broth provides superior flavor, but low-sodium store-bought options work in a pinch. Always check labels for hidden sodium content.
No fresh thyme or parsley? Dried herbs at one-third the amount suffice, though fresh imparts superior brightness. Substituting chicken with shrimp or tofu maintains the protein-packed profile—just adjust cooking times accordingly. For a vegetarian version, swap chicken for chickpeas or lentils and use vegetable broth. The bay leaves can be removed before serving, but leaving them in during cooking infuses subtle earthy notes. If you prefer firmer rice, reduce the broth by 0.25 cup—the one-pot method allows precise adjustments. For extra richness, finish with a pat of European-style butter during the final minutes.
Store uncooked rice in an airtight container in a cool, dark place for up to 6 months. Fresh herbs should be wrapped in damp paper towels and refrigerated for 5-7 days. The cooked one-pot meal reheats beautifully—simply add 1-2 tbsp water or broth and cover for 2-3 minutes. For meal prep, portion into glass containers with tight lids to maintain freshness for 3-4 days. Freeze portions for up to 3 months by spreading in a single layer before transferring to freezer bags.
Why You'll Love This Recipe
- One-Pot Magic: I swear by this trick—just toss everything in one pot, stir once, and walk away. The rice and chicken cook together, so no juggling timers or burning the garlic. (Between us, I’ve ruined enough rice to know this is a lifesaver.)
- Buttery Garlic Bomb: That butter and garlic combo? It’s where this dish gets its soul. The onions caramelize just enough to coat every grain, and the chicken stays juicy—no dry, sad bites here. Honestly, I’ll take this over takeout any day.
- Lunchbox Hero: Pack this for work or school—it reheats like a dream and tastes even better the next day. My kids actually eat their leftovers (yes, really). Plus, it’s the kind of meal that makes you look like a cooking pro, even if you’re just following a simple list.
- Budget Flex: Chicken breast is affordable, rice fills you up, and you’re using basic pantry staples. I’ve made this for $3 a serving, and it still feels like a treat. Not the prettiest, but the taste makes up for it—every time.
Step-by-step instructions for one-pot protein-packed rice
A complete meal in a single pot—flavorful, efficient, and perfect for weeknight dinners.
Sear the Chicken and Sauté Aromatics
Heat a large, heavy-bottomed pot over medium-high heat. Add the 2 tbsp unsalted butter and allow it to melt completely, swirling to coat the bottom evenly. Once foaming subsides, add the 0.75 lb chicken breast cut into bite-sized pieces, spreading them out in a single layer. Let them sear undisturbed for 3-4 minutes until the edges turn golden brown and the chicken develops a light crust.
Push the chicken to one side of the pot, then add the 0.5 whole yellow onion and 4 cloves garlic cloves. Sauté for 2-3 minutes until the onions soften and become translucent, and the garlic releases its fragrant aroma. Stir occasionally to prevent burning—this is where the foundation of your dish's flavor develops. The chicken will continue cooking as you build the base, ensuring it stays juicy throughout the process.
Toast the Rice and Add Seasonings
Add the 1 cup long-grain white rice to the pot, spreading it evenly over the chicken and aromatics. Stir gently for 1-2 minutes to coat each grain with the rendered butter and chicken juices. This step, called "toasting," enhances the rice's nutty flavor and prevents it from becoming mushy.
Next, sprinkle the rice with the 1.5 tsp diamond crystal kosher salt, 0.5 tsp freshly ground black pepper, 0.25 cup fresh thyme leaves, and 2 whole bay leaves. Stir once more to distribute the seasonings evenly. The thyme and bay leaves will infuse the entire dish with their earthy depth, while the salt and pepper balance the flavors. Let the mixture cook for another 1 minute to allow the spices to bloom and release their aromas.
Deglaze and Simmer with Broth
Pour in the 2 cups chicken broth, stirring gently to combine. The liquid should just cover the rice—this ensures even cooking without making the dish watery. Bring the mixture to a gentle boil, then immediately reduce the heat to low. Cover the pot with a tight-fitting lid and simmer for 15 minutes without lifting it. This undisturbed cooking period allows the rice to absorb the liquid evenly and develop a tender, fluffy texture.
After 15 minutes, check the rice for doneness. It should be tender but still slightly firm to the bite—like al dente pasta. If the liquid has completely evaporated, add 2-3 tablespoons of water and continue cooking for another 2-3 minutes. The rice is ready when the grains are separate and the liquid is fully absorbed. Avoid lifting the lid during this time to maintain consistent heat and prevent the rice from drying out.
Finish with Lemon and Garnish
Once the rice is tender, remove the pot from the heat. Stir in the 1 tbsp lemon juice and let it sit for 1 minute to brighten the flavors and cut through the richness of the butter and chicken. The lemon juice also adds a subtle tang that balances the dish's savory notes. Discard the 2 whole bay leaves—they've served their purpose and can be removed now.
Garnish the dish with the 0.125 cup fresh parsley, chopped finely for a pop of color and freshness. The parsley not only enhances the presentation but also adds a mild, slightly peppery note that complements the thyme and garlic. Serve immediately, family-style from the pot, ensuring each serving includes an even distribution of chicken, rice, and aromatics. The dish should be aromatic, with the scent of thyme and garlic lingering in the air.
Pro Tips For Making 1 Cup Of Rice
- Toast the Onion First: Cut the onion into even ¼-inch slices and cook them in the butter over medium-high heat until the edges turn golden—about 5-6 minutes. I used to skip this step, thinking it was just flavor, but now I know it’s the thing that makes the whole dish taste deeper and less raw. ---
- Salt the Rice Water: Add a full teaspoon of salt to the water when cooking the rice—yes, even if you’re using unsalted butter later. I learned this the hard way when my rice tasted bland no matter how much seasoning I added to the chicken. ---
- Don’t Overcrowd the Pan: Cut the chicken breast into thin, even strips and cook them in batches if needed. A crowded pan steams the meat instead of searing, and you’ll end up with tough, gray chicken instead of juicy, golden pieces. ---
- Use Cold Butter: Let the unsalted butter sit out for 10 minutes before using it to sauté the garlic and onions. Cold butter melts slower, giving you better control over the heat and preventing the garlic from burning before the onions get tender.
Troubleshooting great 1 cup of rice
Undercooked Rice Fix
If your rice feels firm or crunchy after cooking, it needs more moisture. Remove the lid and add 2-3 tablespoons of hot water or broth, then cover and simmer for 2-3 more minutes. Avoid lifting the lid frequently—this disrupts steam and can dry out the rice further. For best results, use a tight-fitting lid to trap steam and ensure even cooking. 💧
Mushy or Gummy Rice
Overcooked rice becomes sticky and mushy due to excess starch. To salvage it, spread the rice on a baking sheet and let it cool slightly. Then, gently fluff with a fork and mix in 1 tablespoon of butter or olive oil to separate the grains. If serving as a side, stir in 1 tablespoon of lemon juice or vinegar to cut through the stickiness. For future batches, reduce the broth by ¼ cup or increase simmering time slightly. ✨
Burnt Aromatics
If your onions or garlic turn brown too quickly, lower the heat to medium-low and stir more frequently. The key is patience—sauté aromatics until softened (2-3 minutes) but not browned. For extra flavor without burning, add ½ teaspoon of sugar to the pot with the onions; it caramelizes gently and adds sweetness. Always use a heavy-bottomed pot to distribute heat evenly. 🔥
Uneven Cooking
Uneven rice often results from inconsistent heat or stirring too much. Use a medium-sized pot (not too wide) to concentrate heat. Once the broth is added, avoid stirring—just let it simmer undisturbed for the full 15 minutes. If your stove has hot spots, rotate the pot halfway through cooking. For electric stoves, use the back burner for more stable heat. 🌡️
Dry or Crusty Bottom
A crusty bottom forms when the rice touches the pot directly. To prevent this, ensure your pot has enough liquid to cover the rice by ¼ inch. If it happens, scrape off the burnt layer and stir the remaining rice with a splash of hot water or broth to restore moisture. For future batches, add a pinch of oil to the pot before cooking to create a non-stick barrier. 💡
Chicken Overcooked
If your chicken turns out tough, it likely cooked too long in the broth. Remove the chicken early (after 10 minutes of simmering) and finish cooking it separately in a pan or oven. For juicy results, sear the chicken first, then add it back to the pot only for the last 5 minutes of rice cooking. Use a meat thermometer to check doneness—chicken should reach 165°F internally. 🍗
Nutrition facts
Frequently asked questions
Can I use this recipe with other types of rice?
While the recipe uses long-grain white rice, you can adapt it for jasmine, brown, or basmati. For white or jasmine, follow the same 1:2 rice-to-broth ratio. Brown rice needs 1.5 cups broth and 25-30 minutes of simmering time. Always rinse the rice first to remove excess starch, regardless of type.
What if I don't have chicken broth?
No problem! Use water for a neutral flavor or swap for vegetable broth for a vegetarian version. For extra richness, add 1 tablespoon butter or olive oil when toasting the rice. If using water, season with an extra ½ teaspoon salt to enhance flavor.
How do I make this recipe with less rice?
Simply reduce the rice proportionally. For a ½ cup serving, use ½ cup rice and 1 cup broth, keeping the same cooking time. Maintain the 1:2 ratio to ensure even cooking. Adjust seasonings slightly if reducing the overall volume—½ teaspoon salt and ¼ teaspoon pepper work well.
Can I cook this rice in an Instant Pot?
Yes! Follow the same steps until adding broth. Use 1.5 cups broth (instead of 2) and cook on high pressure for 4 minutes. Let it naturally release for 10 minutes before opening. Stir in lemon juice and parsley at the end. The pressure cooker cuts time to just 15 minutes total!
Why is my rice still crunchy after cooking?
Crunchy rice usually means it didn't absorb enough liquid. Remove the lid, add 2-3 tablespoons hot water or broth, cover, and simmer for 2-3 more minutes. Avoid lifting the lid during cooking to maintain steam. For future batches, check your pot size—smaller pots need slightly less liquid.